May 17, 2024
Mastering Layout Design for Flutter Web: A Step-by-Step Guide
Get a comprehensive understanding of Flutter Web layout design and manage shared UI elements using the go_router package in this detailed guide.
Author

Subject Matter Expert


Book a call
Table of Contents
While building user interfaces in Flutter Web, we often create them by combining independent widgets. But some UI elements, like the navigation bar, bottom navigation bar, side drawer, etc. repeat across different screens.
To handle this, Flutter uses layouts to organise the interface and hold these shared elements. In this article, we will explore managing layouts and nested layouts in Flutter Web using the go_router package.
GoRouter is a declarative routing package that simplifies navigation between different screens within your app. It leverages the built-in Router API to define routes using URL-like patterns. This allows you to programmatically navigate to specific screens by providing a URL-like string, making your code more readable and maintainable.
Getting Started
Assuming you already have Flutter installed, let us dive into creating your application! We will begin by incorporating the go_router package into your pubspec.yaml file. Throughout this guide, we will be using version ^14.1.1.
Route Configuration
Once you have included the go_router package in your pubspec.yaml dependencies, you can proceed with setting up the GoRouter configuration within your Flutter application.
Route Utils
Let us create enum class inside the app_routes.dart file that contains all the screens that our application has.
For navigation in our Flutter application, we will define a mechanism to manage routing information. This involves creating an AppRouter class to define all our routes.
GoRouter excels at handling both standard and nested navigation in your Flutter application. While standard navigation switches between entirely different screens, nested navigation allows you to dynamically choose widgets within a parent screen. Crucially, during nested navigation, any persistent UI elements, like a bottom navigation bar, remain unchanged, providing a seamless user experience. In GoRouter, a Shell Route is a special type of route designed to manage applications with a persistent UI layout, typically seen in mobile and web apps. This shell (layout) usually contains elements like a navigation bar, footer, or sidebar that remain constant across different screens within the app.
Why Use Shell Routes?
Shell routes leverage these layout benefits by creating a dedicated layout for the persistent UI elements. This layout:
- Preserves state: Since the shell route acts as a container, its layout (navigation bar, footer, etc.) remains in memory and doesn't need to be recreated on navigation. This improves performance and avoids unnecessary UI refreshes.
- Stays interactive: The shell layout's interactive elements continue to function throughout navigation within the section managed by the shell route.
- Allows nesting: Shell routes can be nested within other shell routes, enabling you to create complex navigation hierarchies with consistent layouts throughout the app.
In essence, shell routes provide a structured and efficient way to manage navigation in applications with a persistent UI shell. They leverage the concept of layouts to maintain state, interactivity, and performance during navigation.
- Custom NestedNavigationWrapper: We have created a custom widget named
NestedNavigationWrapperusingStatefulShellRoute.indexedStack. This widget takes aStatefulNavigationShellargument as input. - StatefulShellRoute Breakdown:
- It accepts a list of
StatefulShellBranchitems, where each branch represents an independent stateful section within the overall navigation tree. - Both
GoRouterandStatefulShellBranchrequire anavigatorKeyargument. These keys are typically defined within theAppRouterclass for centralised management.
- It accepts a list of
- StatefulShellBranch Flexibility: Each
StatefulShellBranchcan define its own route hierarchy using the familiarGoRouteAPI. This allows for granular control over nested routes within each branch. - StatefulShellRoute.indexedStack: Utilising
StatefulShellRoute.indexedStackprovides a builder function. This builder function grants access to thenavigationShellobject, which is crucial for constructing the shell layout (the visual representation of your nested routes).
You can refer to the AppRouter class for detailed implementation for StatefulShellRoute.indexedStack.
Now, let us integrate our profile and settings screens, along with their corresponding nested screens, into the NestedNavigationWrapper widget.
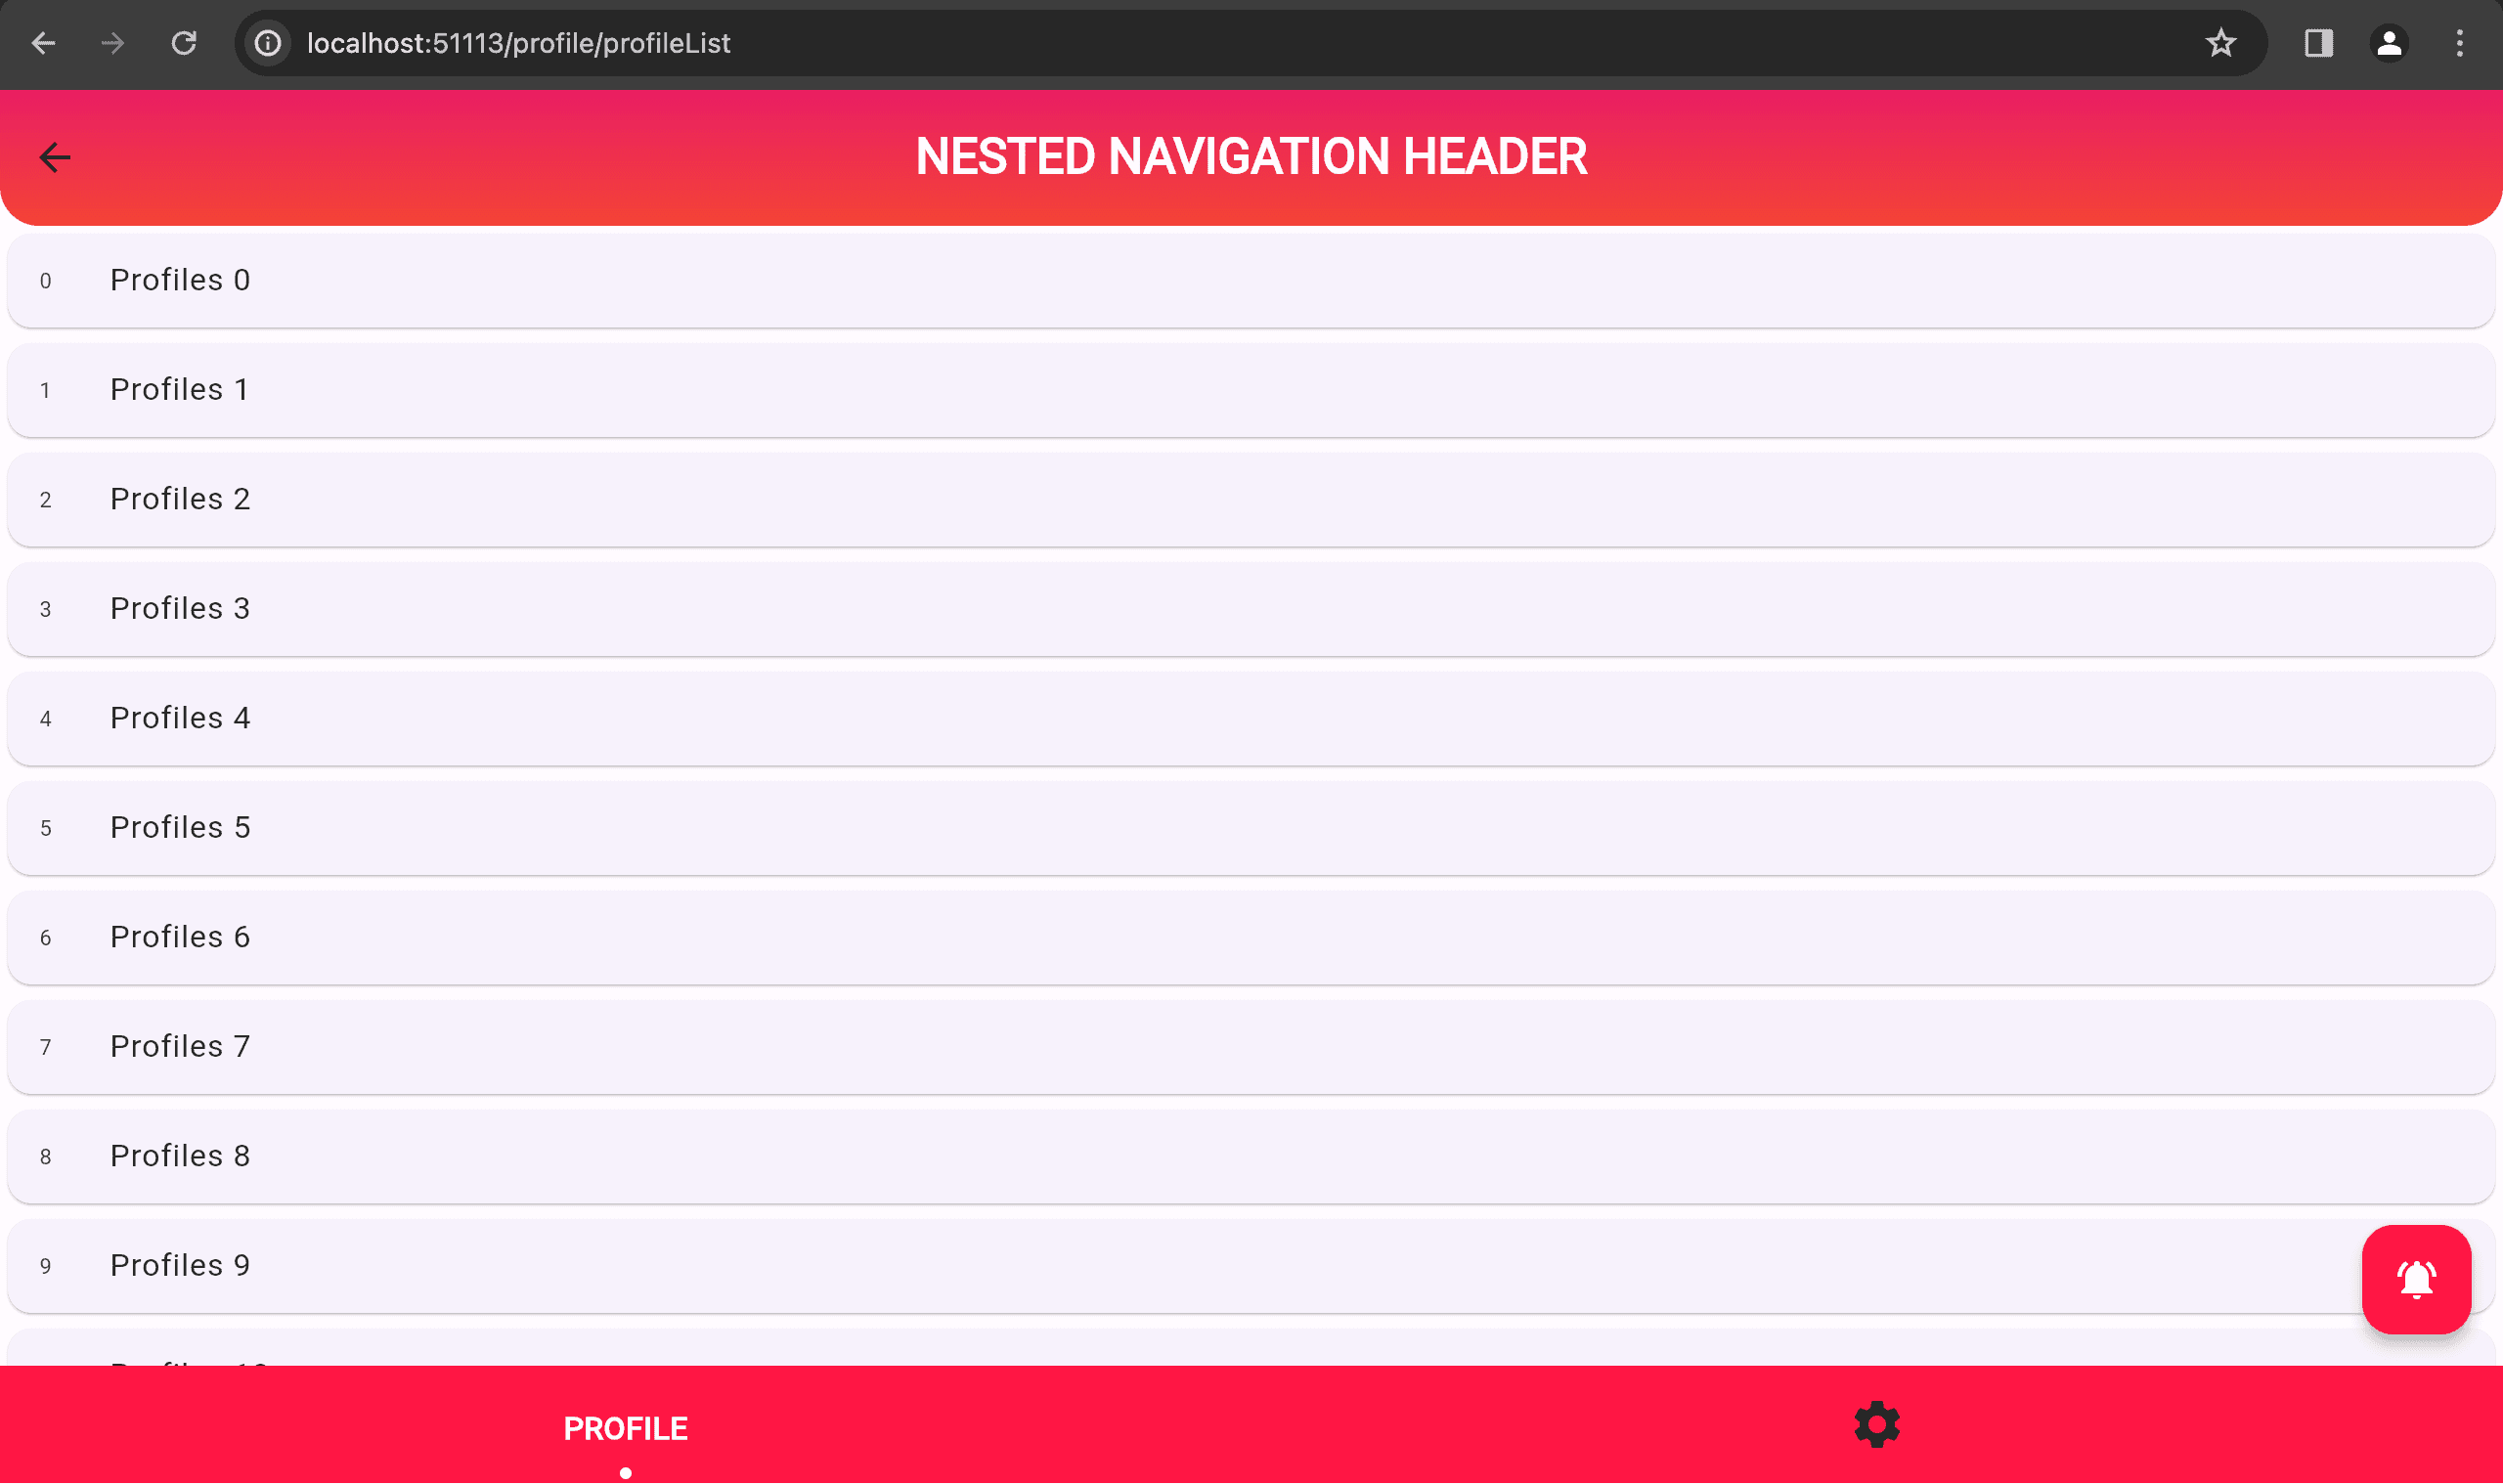
- Profile Screens

Within the profile screen, to navigate to its nested profile list screen, we can utilise GoRouter's context.goNamed(AppRoutes.profileList.name) method.
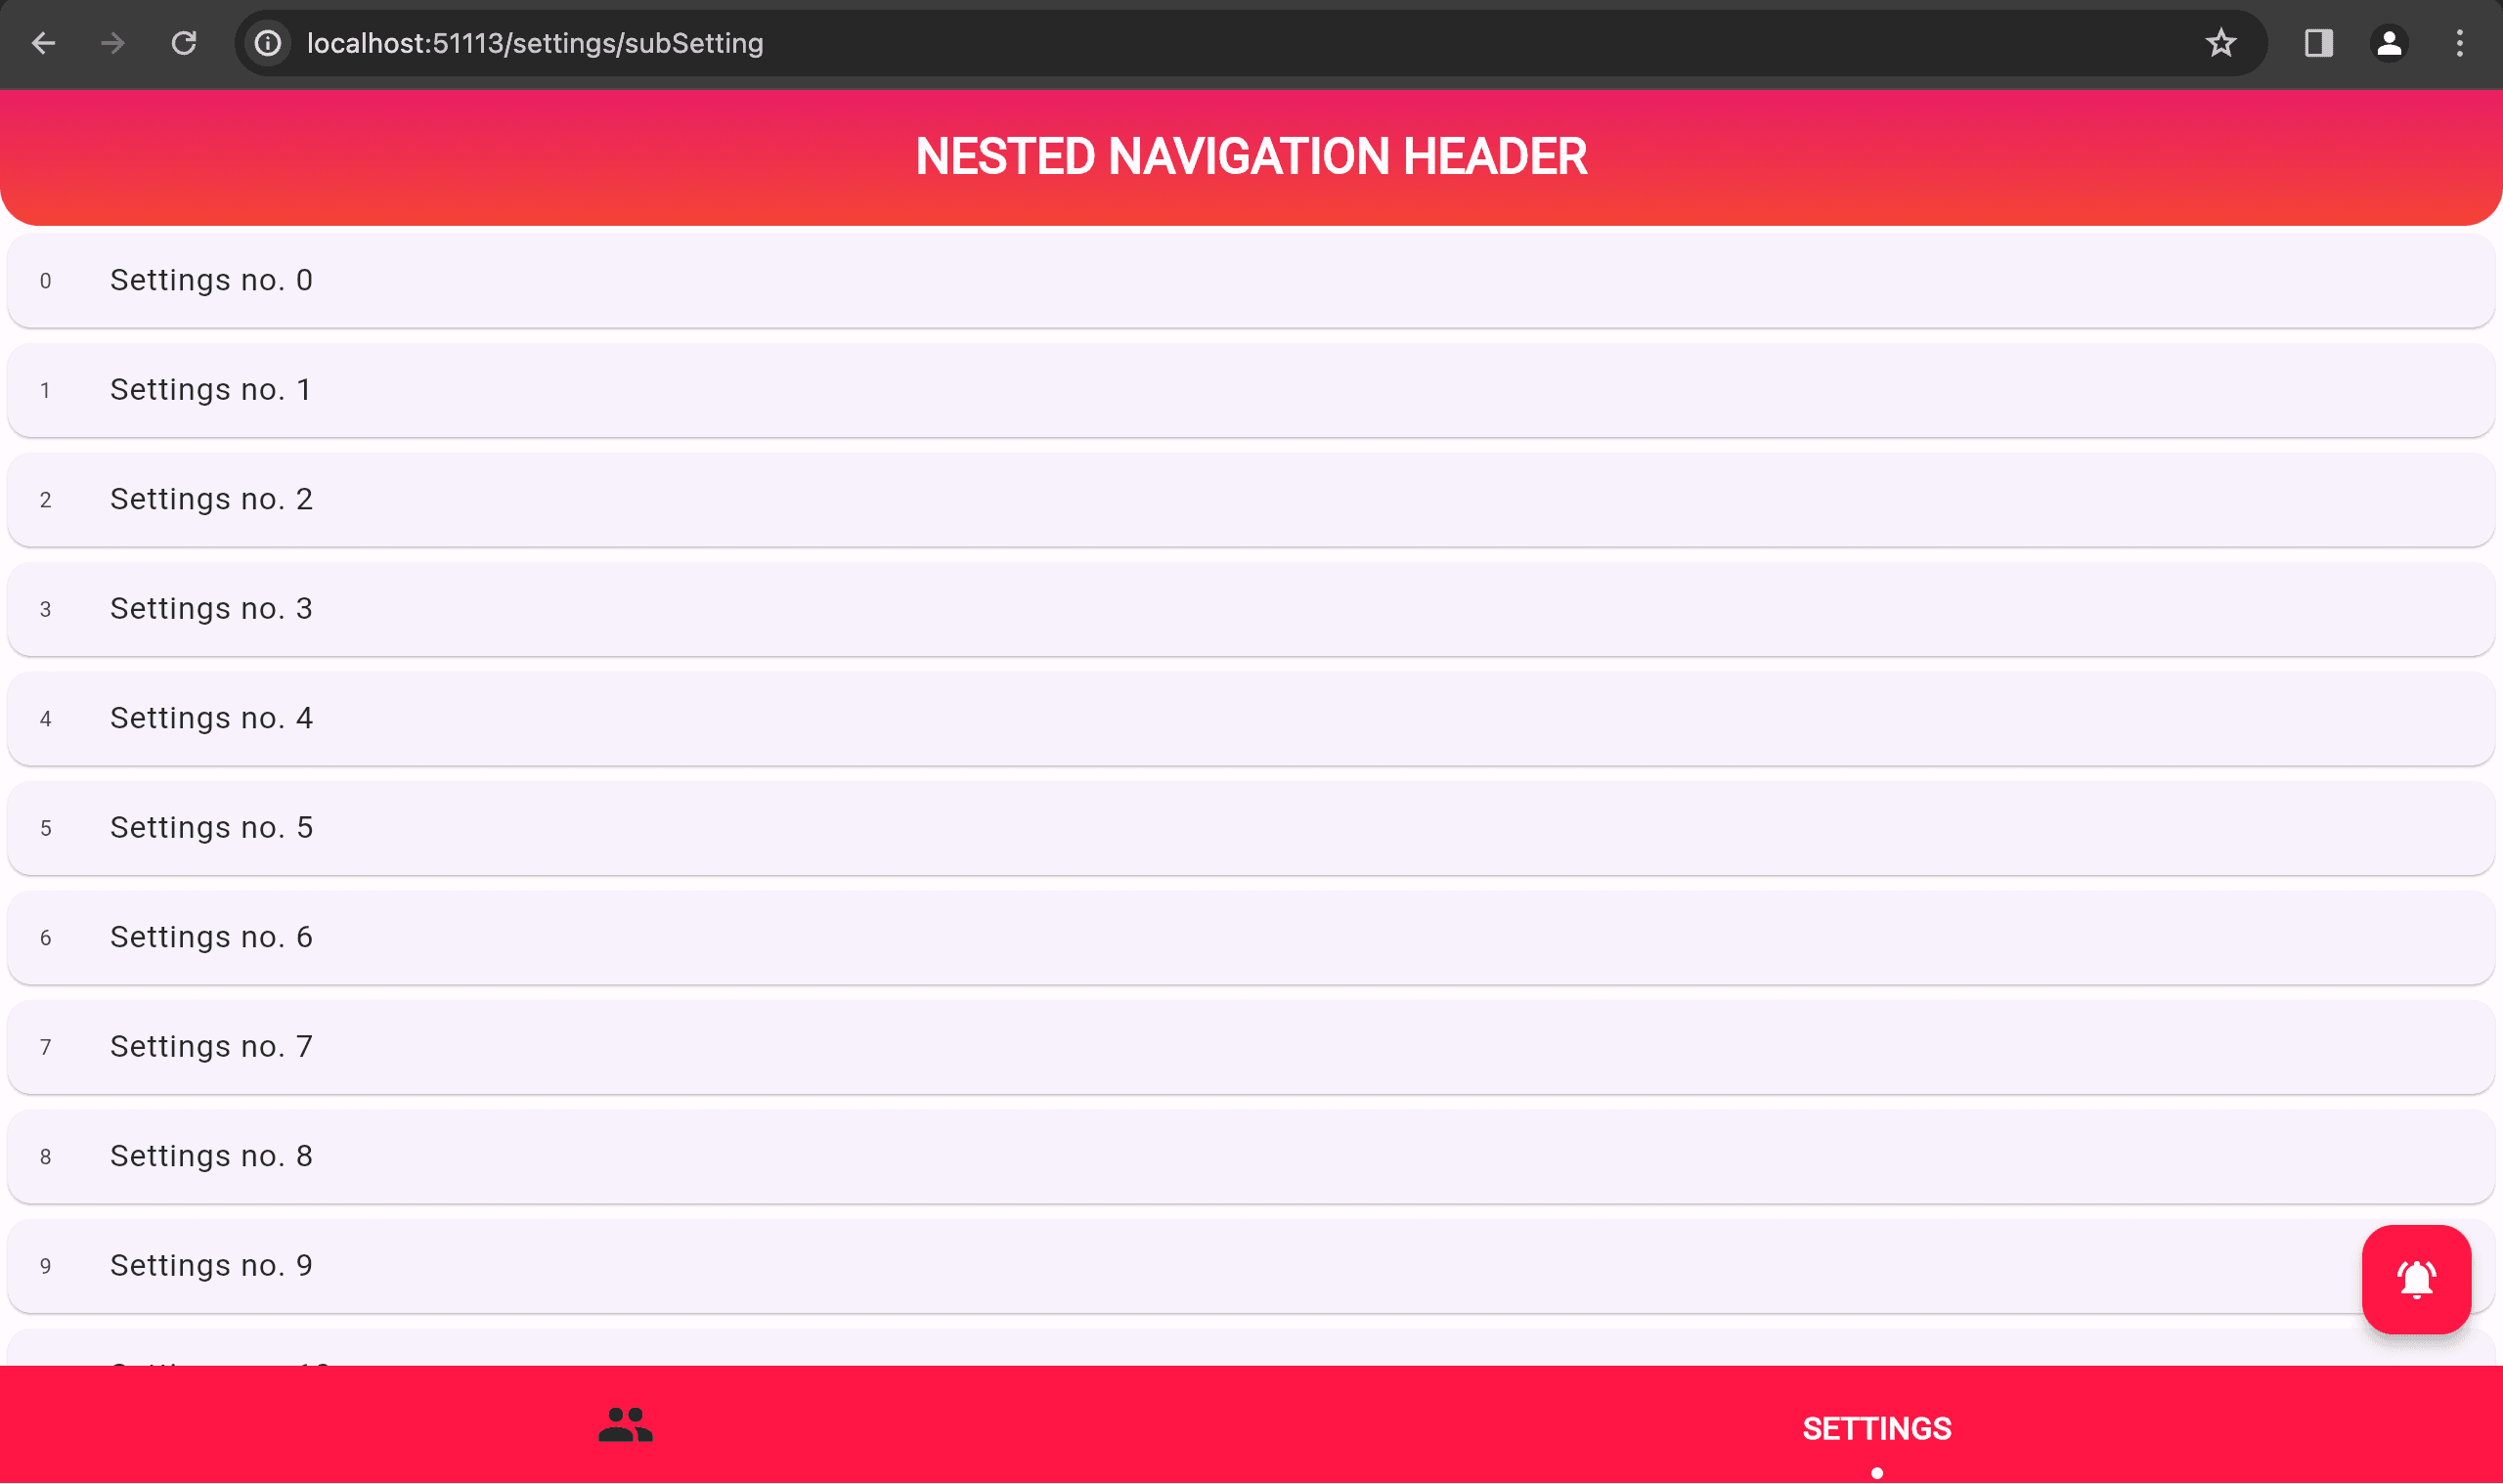
- Settings Screens
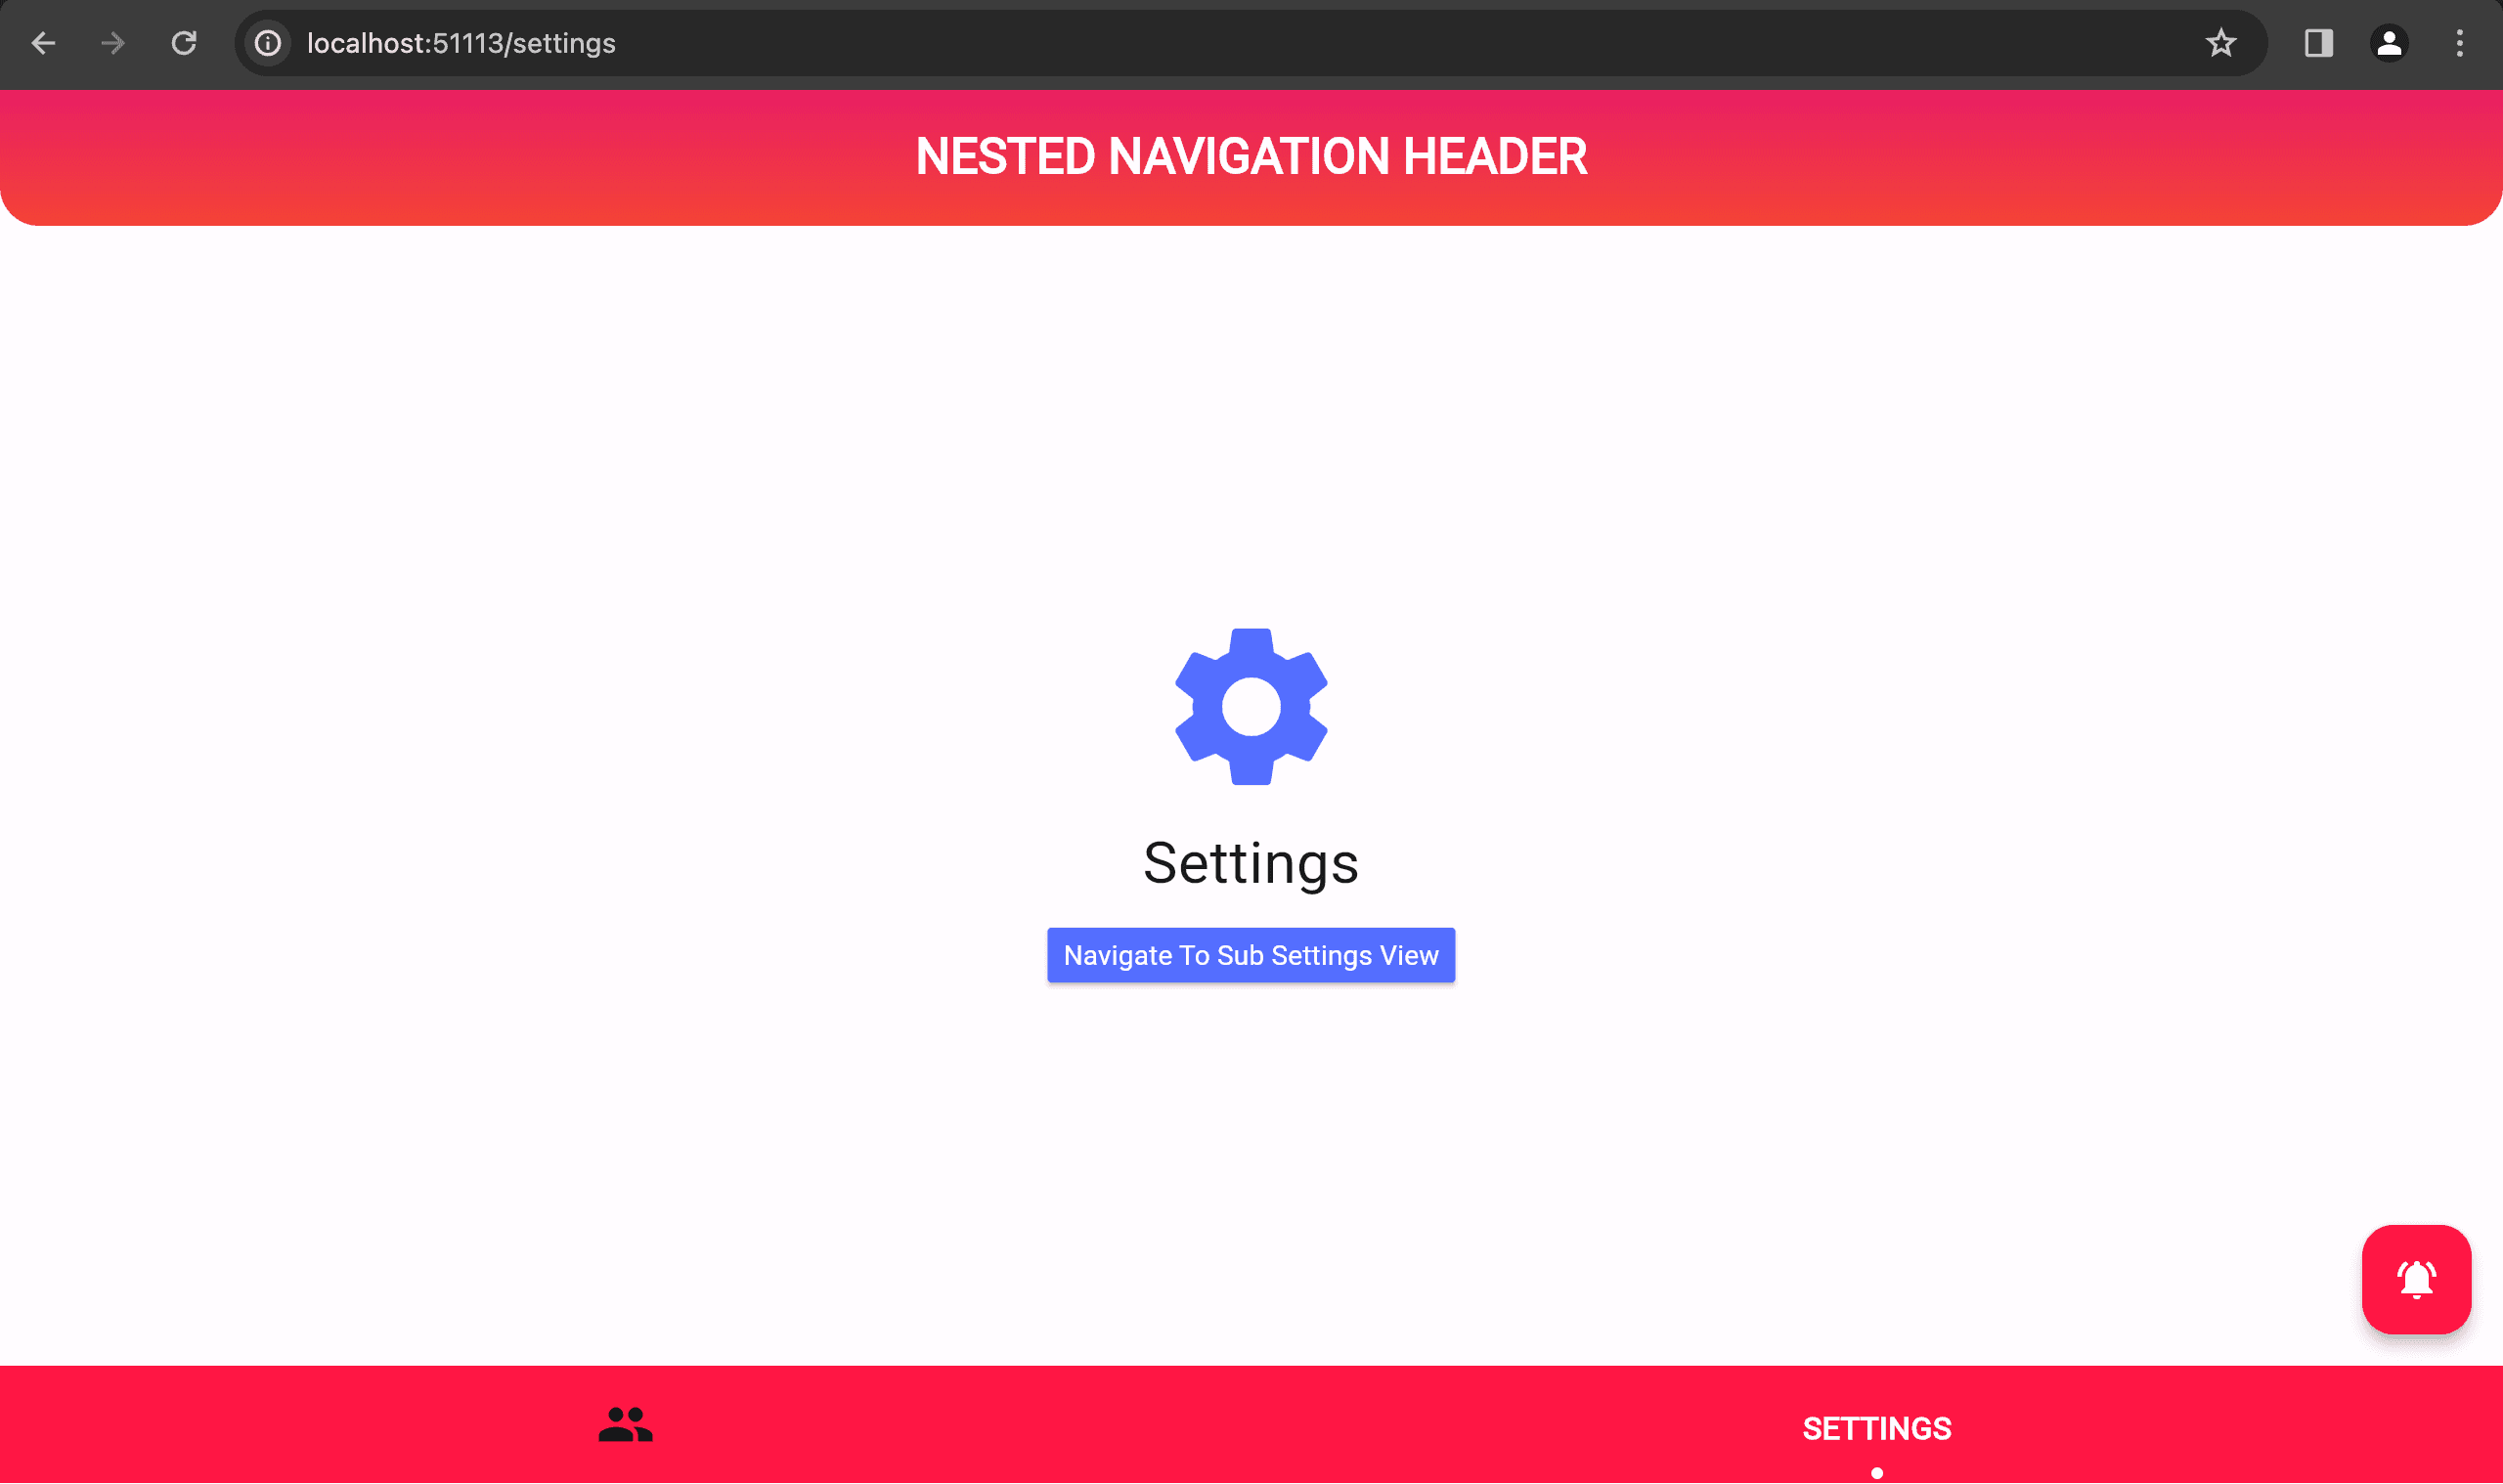
Similarly within the settings screen, to navigate to its nested sub settings screen, we can utilise GoRouter's context.pushNamed(AppRoutes.subSetting.name) method.
Check out the demo I created to see nested layouts in action! A nested layout is a UI component that is shared across multiple routes in your application. During navigation, these layouts maintain their state, remain interactive, and avoid unnecessary re-rendering.
Consider the layout we created with a persistent header and bottom navigation bar. This layout acts as a container, allowing you to seamlessly switch between tabs. The profile tab, for instance, can navigate to nested child routes like 'profileList' with a subprofile id. For example, you could see a profile list details page as http://localhost:56219/profile/profileList/subprofile/5. Similarly, the settings tab has its own nested routes like http://localhost:56219/settings/subSetting.
Now, let us consider the following example: tapping the notifications icon in your app. This action triggers a smooth transition to a dedicated notifications screen. This screen has its own distinct layout, optimized for displaying your notifications. Importantly, when you navigate back from the notifications screen, the previous layout (the one you left) remains unchanged, including any state it may have held. This seamless state preservation ensures that you can pick up right where you left off, without losing any context or information.
Conclusion
This guide explored how GoRouter empowers you to structure your Flutter application's UI with shared elements across various routes in your web application.
We have delved into the concept of nested navigation using GoRouter, allowing you to dynamically swap content within a parent screen while maintaining a persistent UI shell (like a bottom navigation bar). This approach ensures a seamless user experience during navigation.
If you found this guide valuable, please share it with your fellow Flutter developers! We encourage you to leave comments or questions below to continue the conversation and contribute to the Flutter development community.
Subscribe to Our Newsletter
Subscribe to RSS
Press & Media Hub RSS FeedRelated Articles.
More from the engineering frontline.
Dive deep into our research and insights on design, development, and the impact of various trends to businesses.

Jul 10, 2026
How We Built the Missing Bridge from Code to Figma

Jun 27, 2026
Building a Resilient Hybrid-Cloud Network with WireGuard HA, Route-Based Failover, and Deep Observability

Jun 19, 2026
We Built a 114-Second AWS-to-Azure Failover. Here’s What We Learned

Jun 12, 2026
Cloud-Native and Cloud-Agnostic Are Not Ideologies; They Are Business-Stage Decisions

Jun 8, 2026
Geeklego: The Open-Source Design System Built to Work With AI

May 18, 2026