Feb 16, 2024
Sending Notifications Using OneSignal SDK
In this detailed guide we learn how to leverage OneSignal effectively within your Flutter applications.
Author

Book a call
Table of Contents
Push notifications play a pivotal role in maintaining user engagement and connectivity with applications, serving as a direct channel to keep users informed and involved, even when the app is not actively being utilized.
Incorporating OneSignal into your Flutter development toolkit simplifies the process of sending such notifications and unlocks a world of possibilities for creating immersive and interactive user experiences.
Through OneSignal's versatile capabilities, developers can craft personalized messages, deliver timely updates, and drive user actions, fostering a dynamic and interactive app experience for their audience.
Key Features of OneSignal
- Cross-Platform Support: OneSignal seamlessly supports multiple platforms, including Android and iOS. This means you can leverage a single solution for both operating systems.
- Ease of Integration: With its dev-friendly Flutter plugin, OneSignal simplifies the process of integrating push notifications into your Flutter application. The plugin is designed to be developer-friendly, ensuring a smooth and hassle-free integration process.
- Advanced Targeting and Segmentation: OneSignal allows you to target specific user segments with personalized messages while also providing the flexibility to tailor your messaging strategy.
- Rich Notification Content: Beyond simple text notifications, OneSignal supports rich media content, enabling you to include images, buttons, and interactive elements in your push notifications. This capability allows for a more engaging and visually appealing user experience.
Steps Required for OneSignal Configuration for Flutter
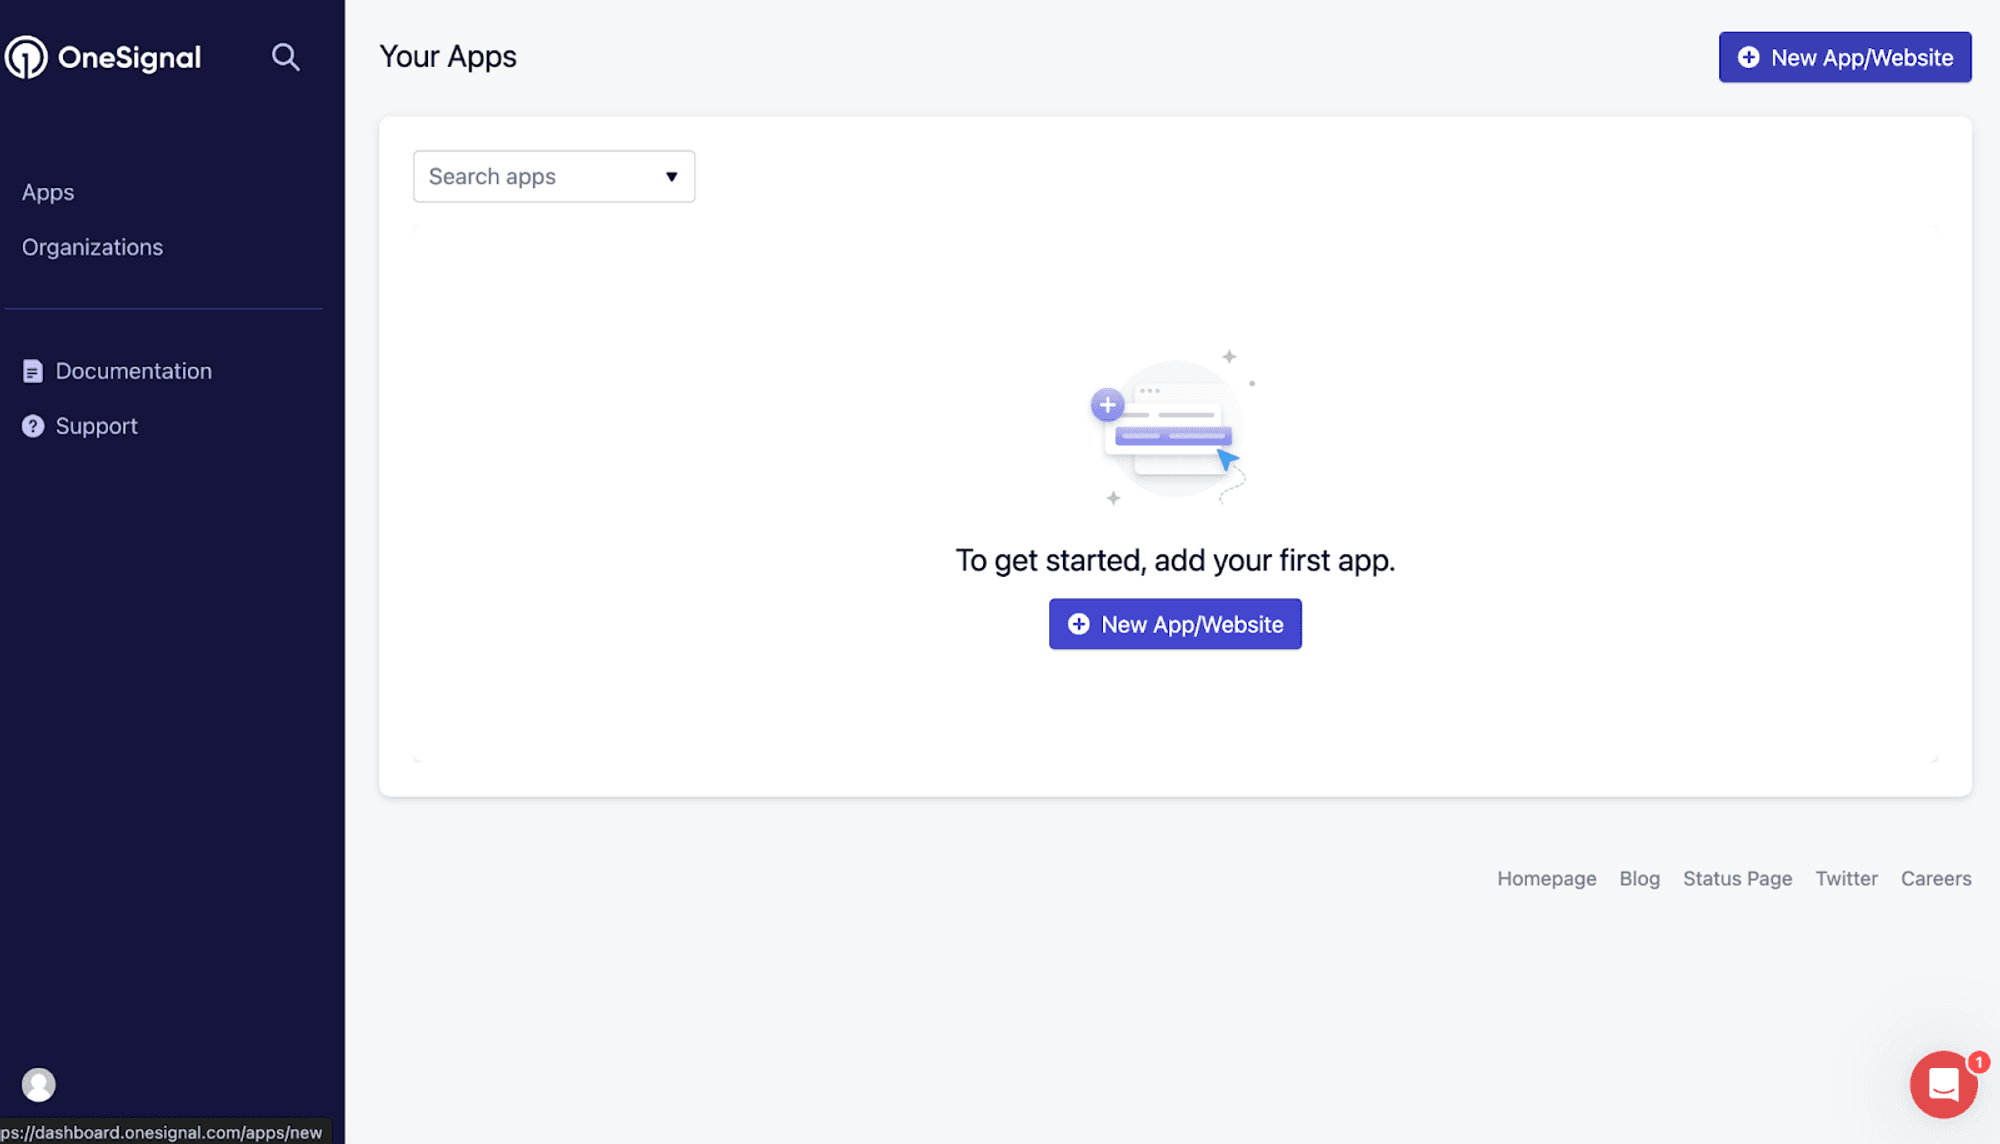
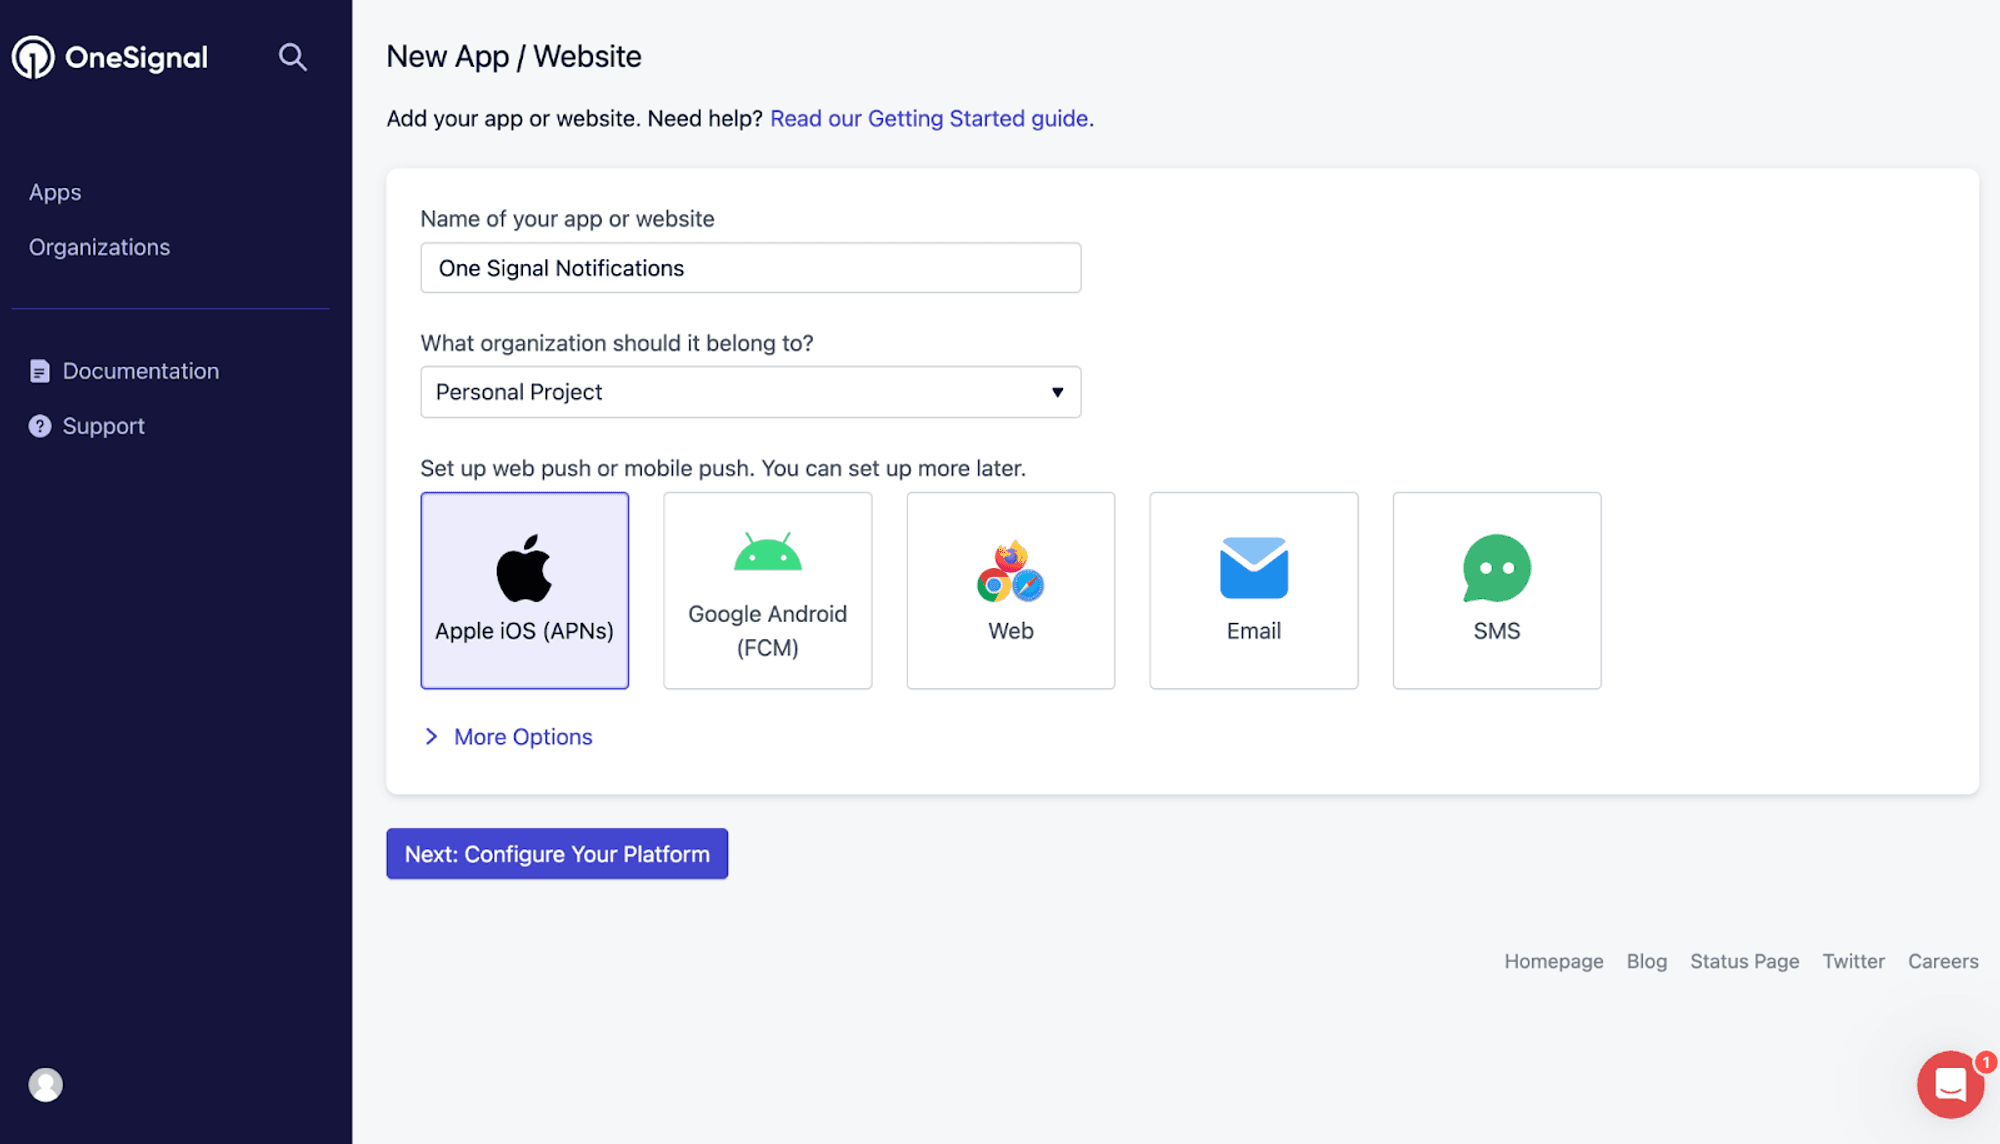
1. Create OneSignal Account and App
If you don't have a OneSignal account, sign up on the OneSignal website and create a new app for your Flutter project.
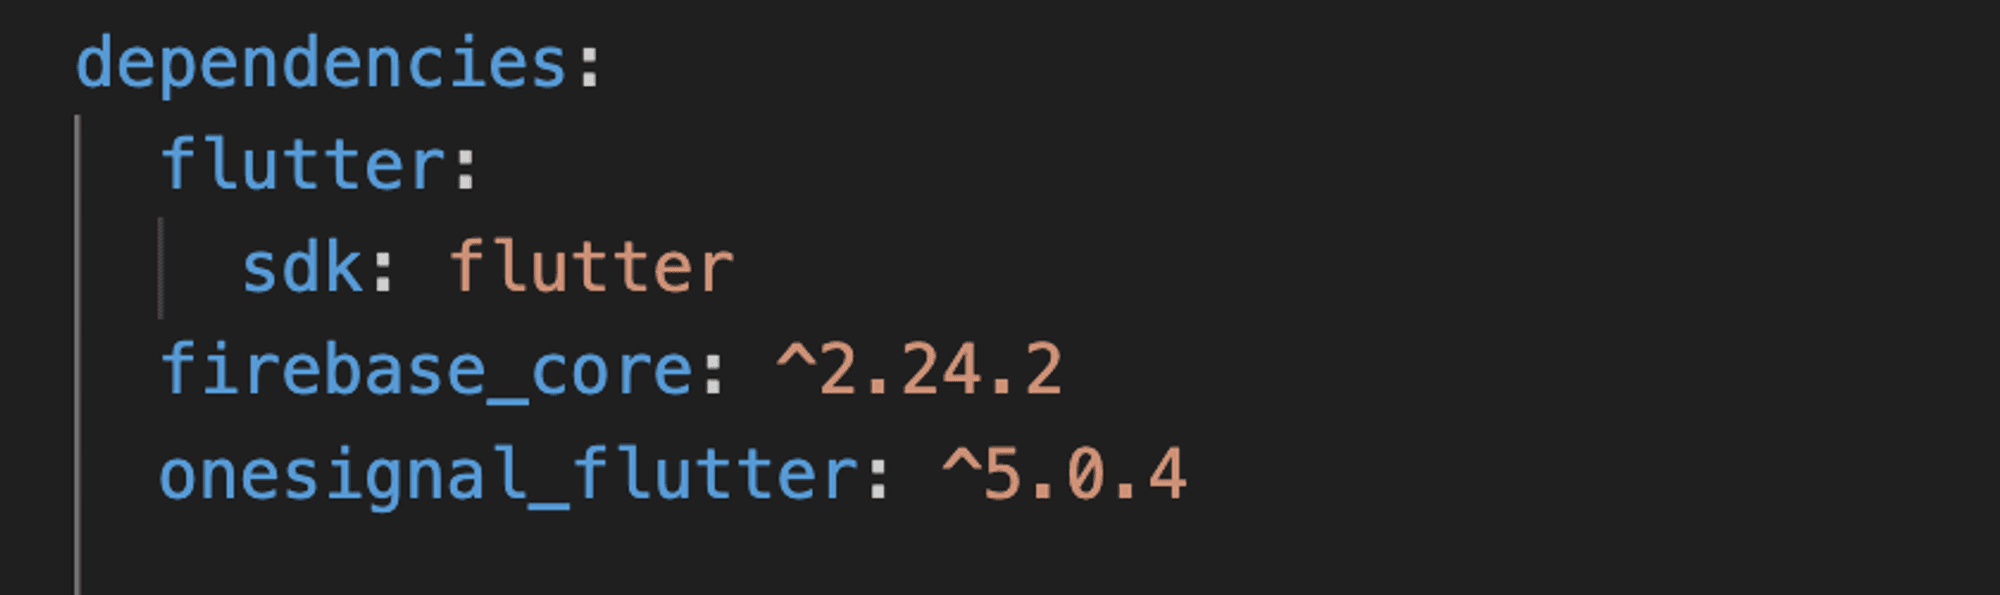
2. Install Required Plugins
Add firebase_core and one_signal_flutter plugin to your pubspec.yaml file.
3. Configure your OneSignal App's Android Platform Settings
Configure Firebase Project for Android
- Create and set up a Firebase project.
- Enable Firebase Cloud Messaging API (V1).
- Generate a Private Key JSON file:
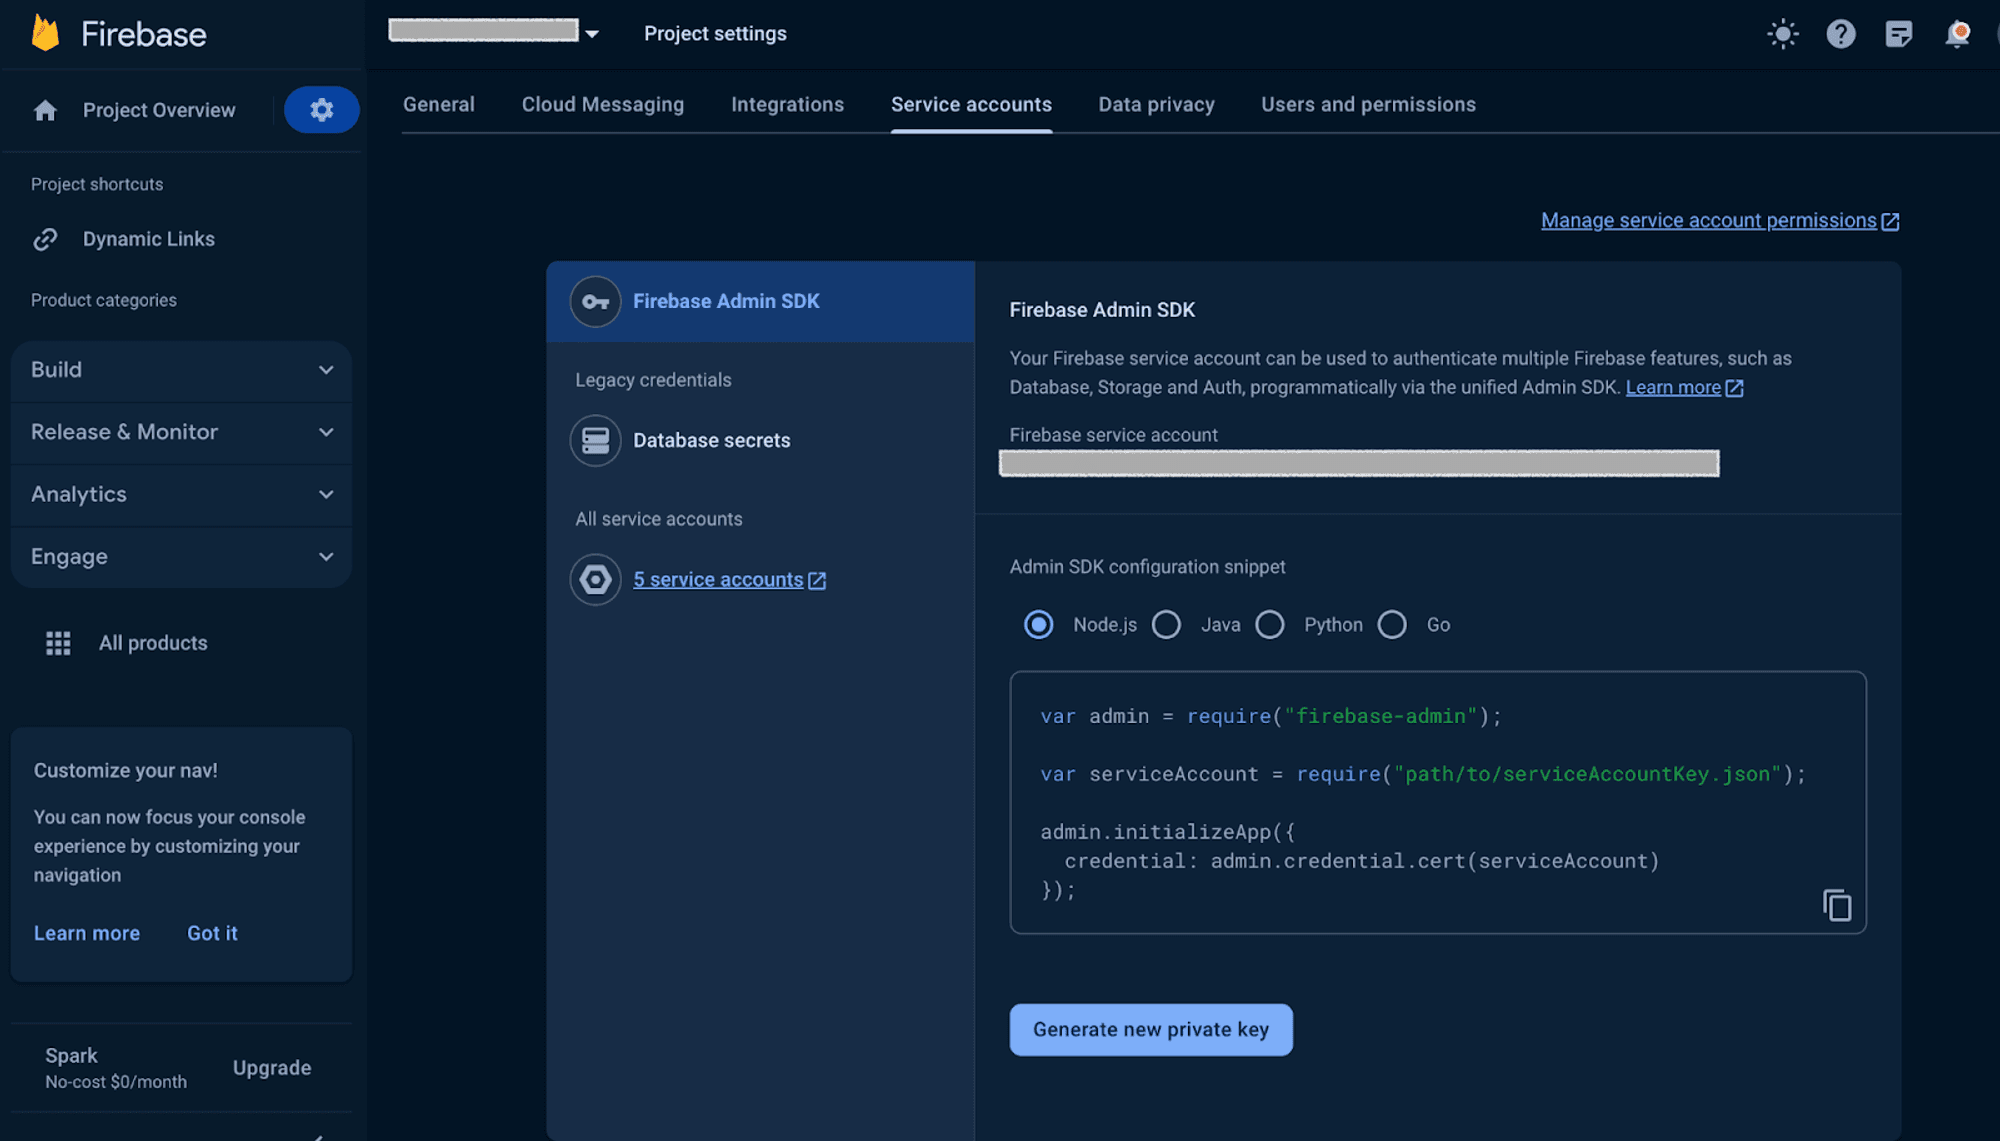
- In the Firebase Console, go to Project settings.
- Navigate to the Service accounts tab.
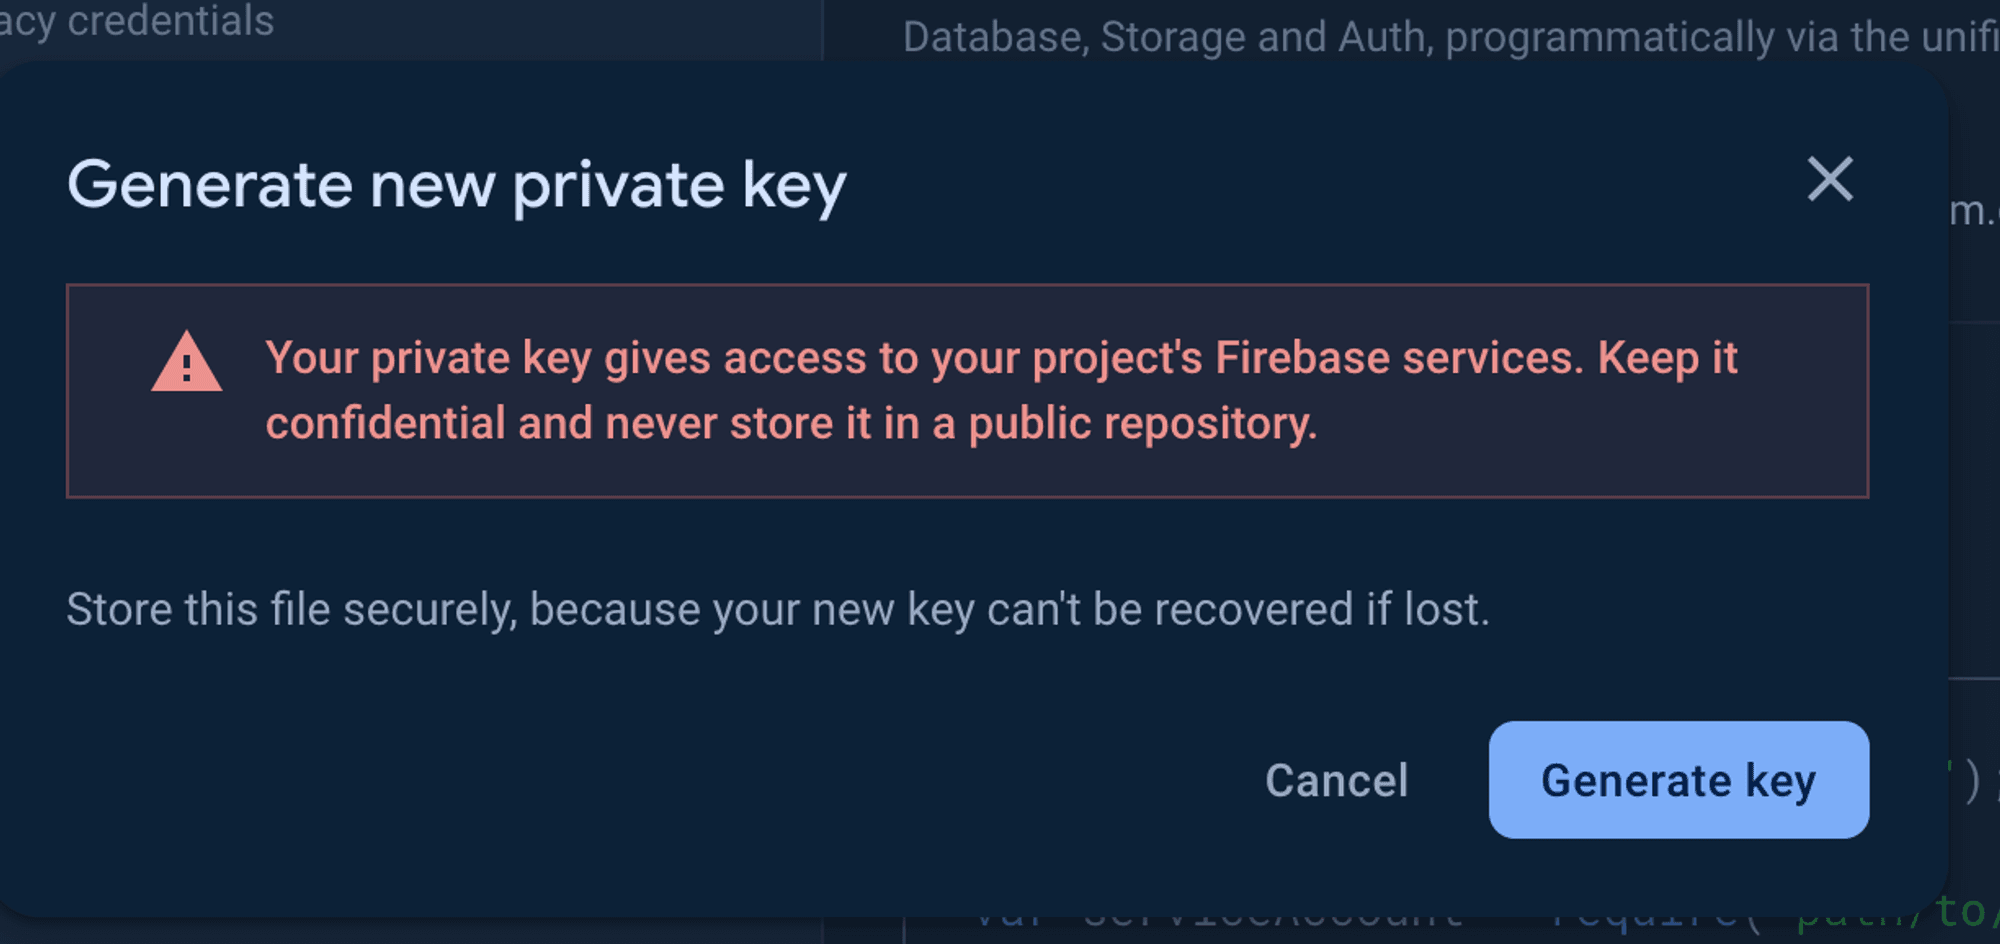
- Click "Generate new private key" at the bottom of the page.
- Save the JSON file securely; it will be needed shortly.
Configure OneSignal for Android
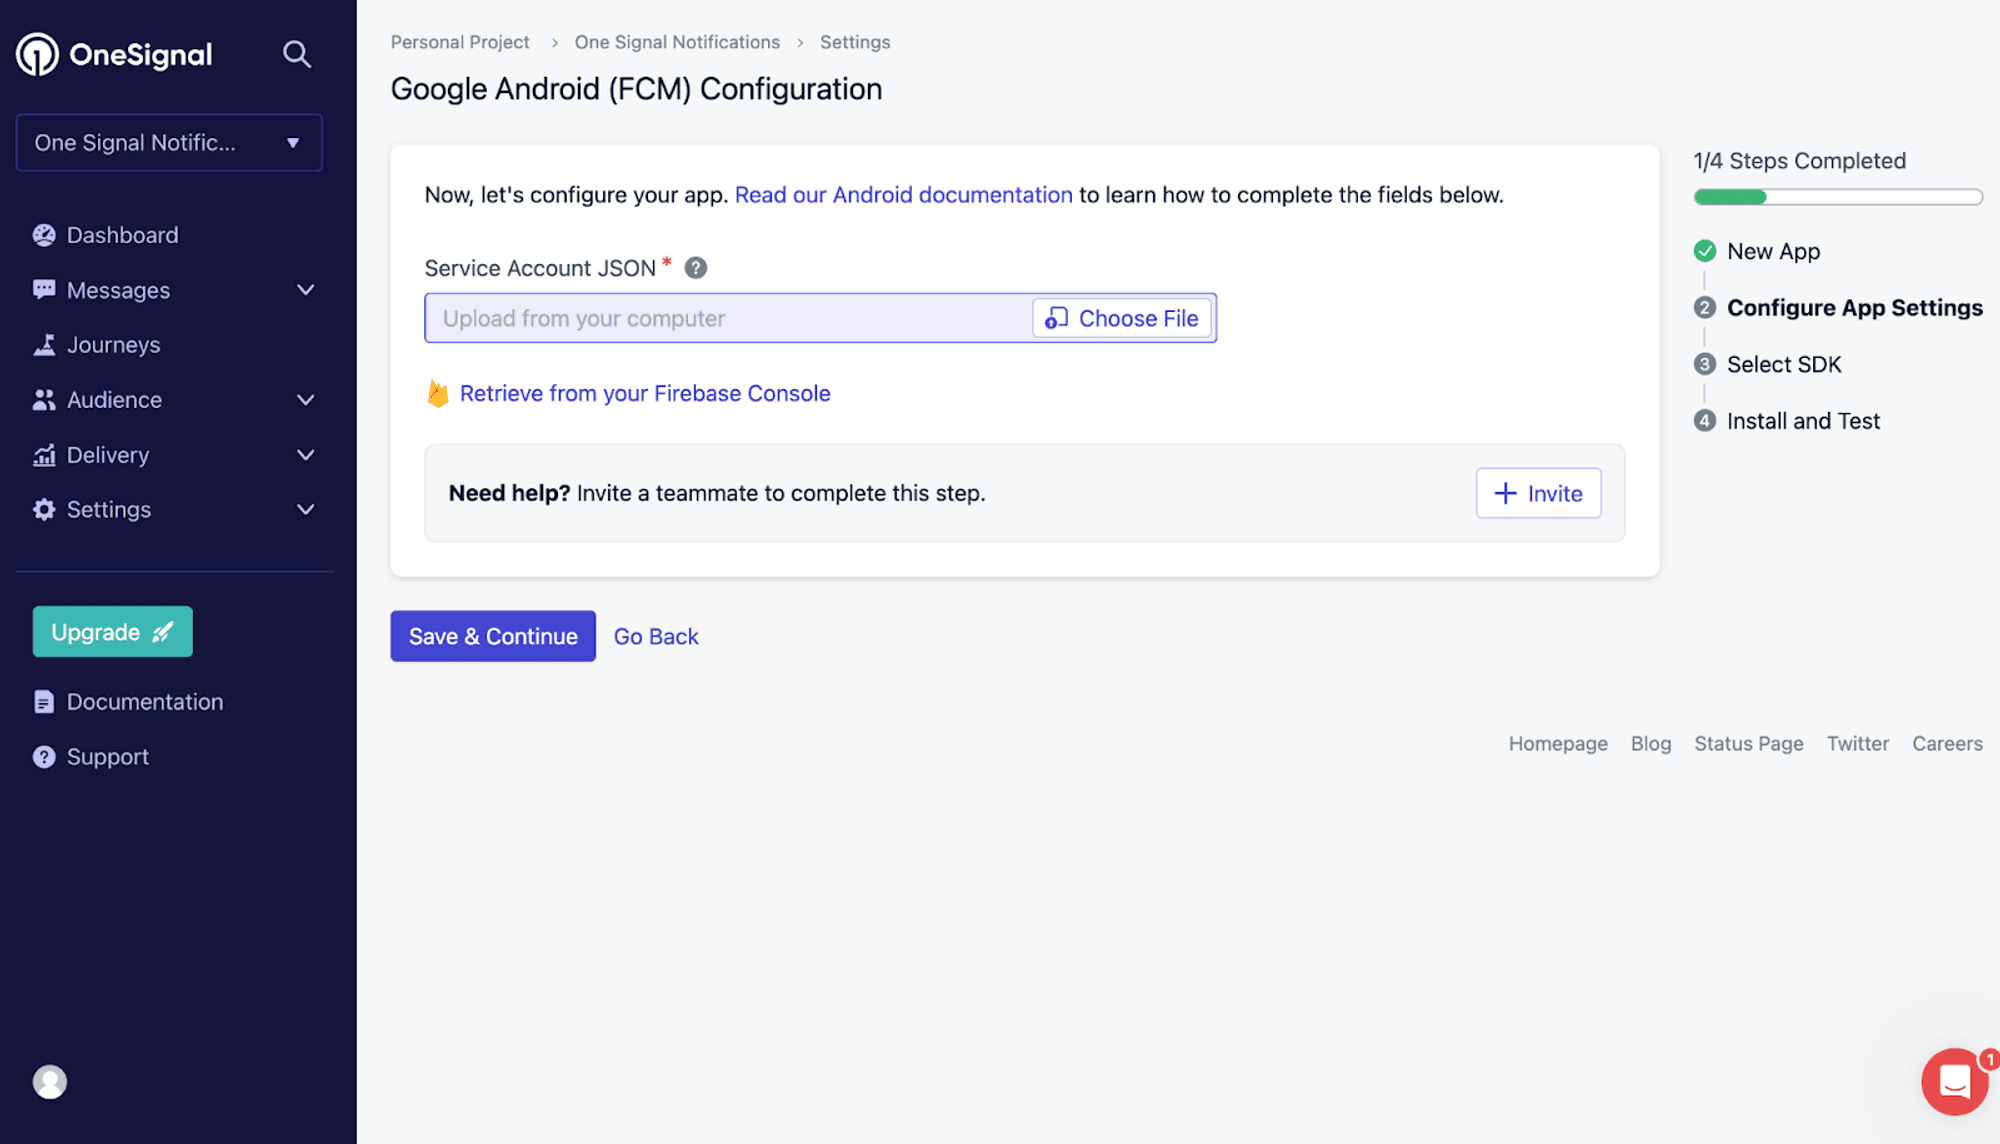
- In OneSignal, go to Settings > Platforms > Google Android.
- Activate the Android platform.
- Click on "Service Account JSON" and choose the JSON file you downloaded from your Firebase service account.
- Click "Save and Continue."
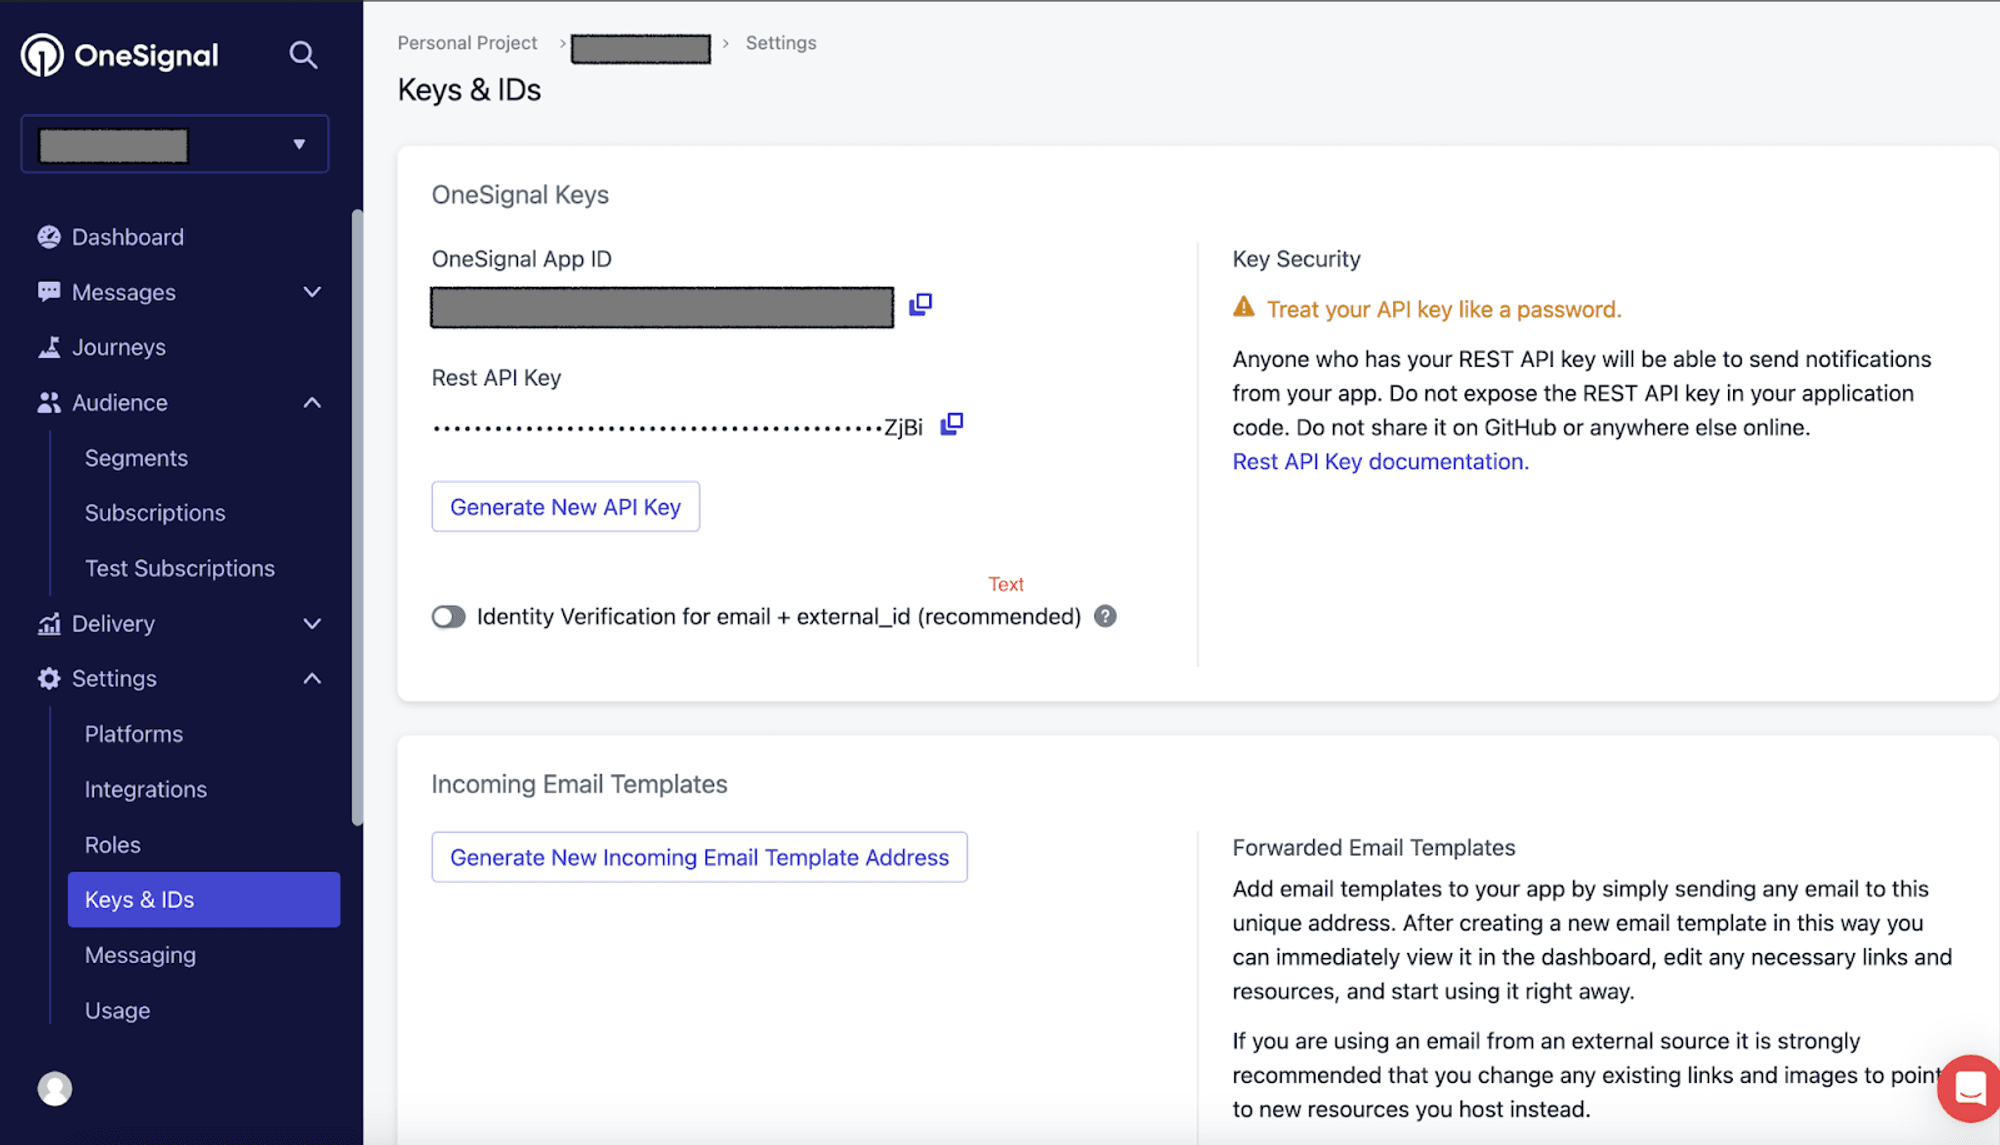
Retrieve OneSignal App ID and Rest API Key
- After configuring Android, your OneSignal App ID and Rest API Key are ready to use.
4. Configure your OneSignal App's Ios Platform Settings
- Activate iOS Platform in OneSignal Dashboard
- Navigate to the OneSignal dashboard's “Settings” section and click on "Platforms."
- Click the "Activate" button for iOS platforms to initiate the setup process.
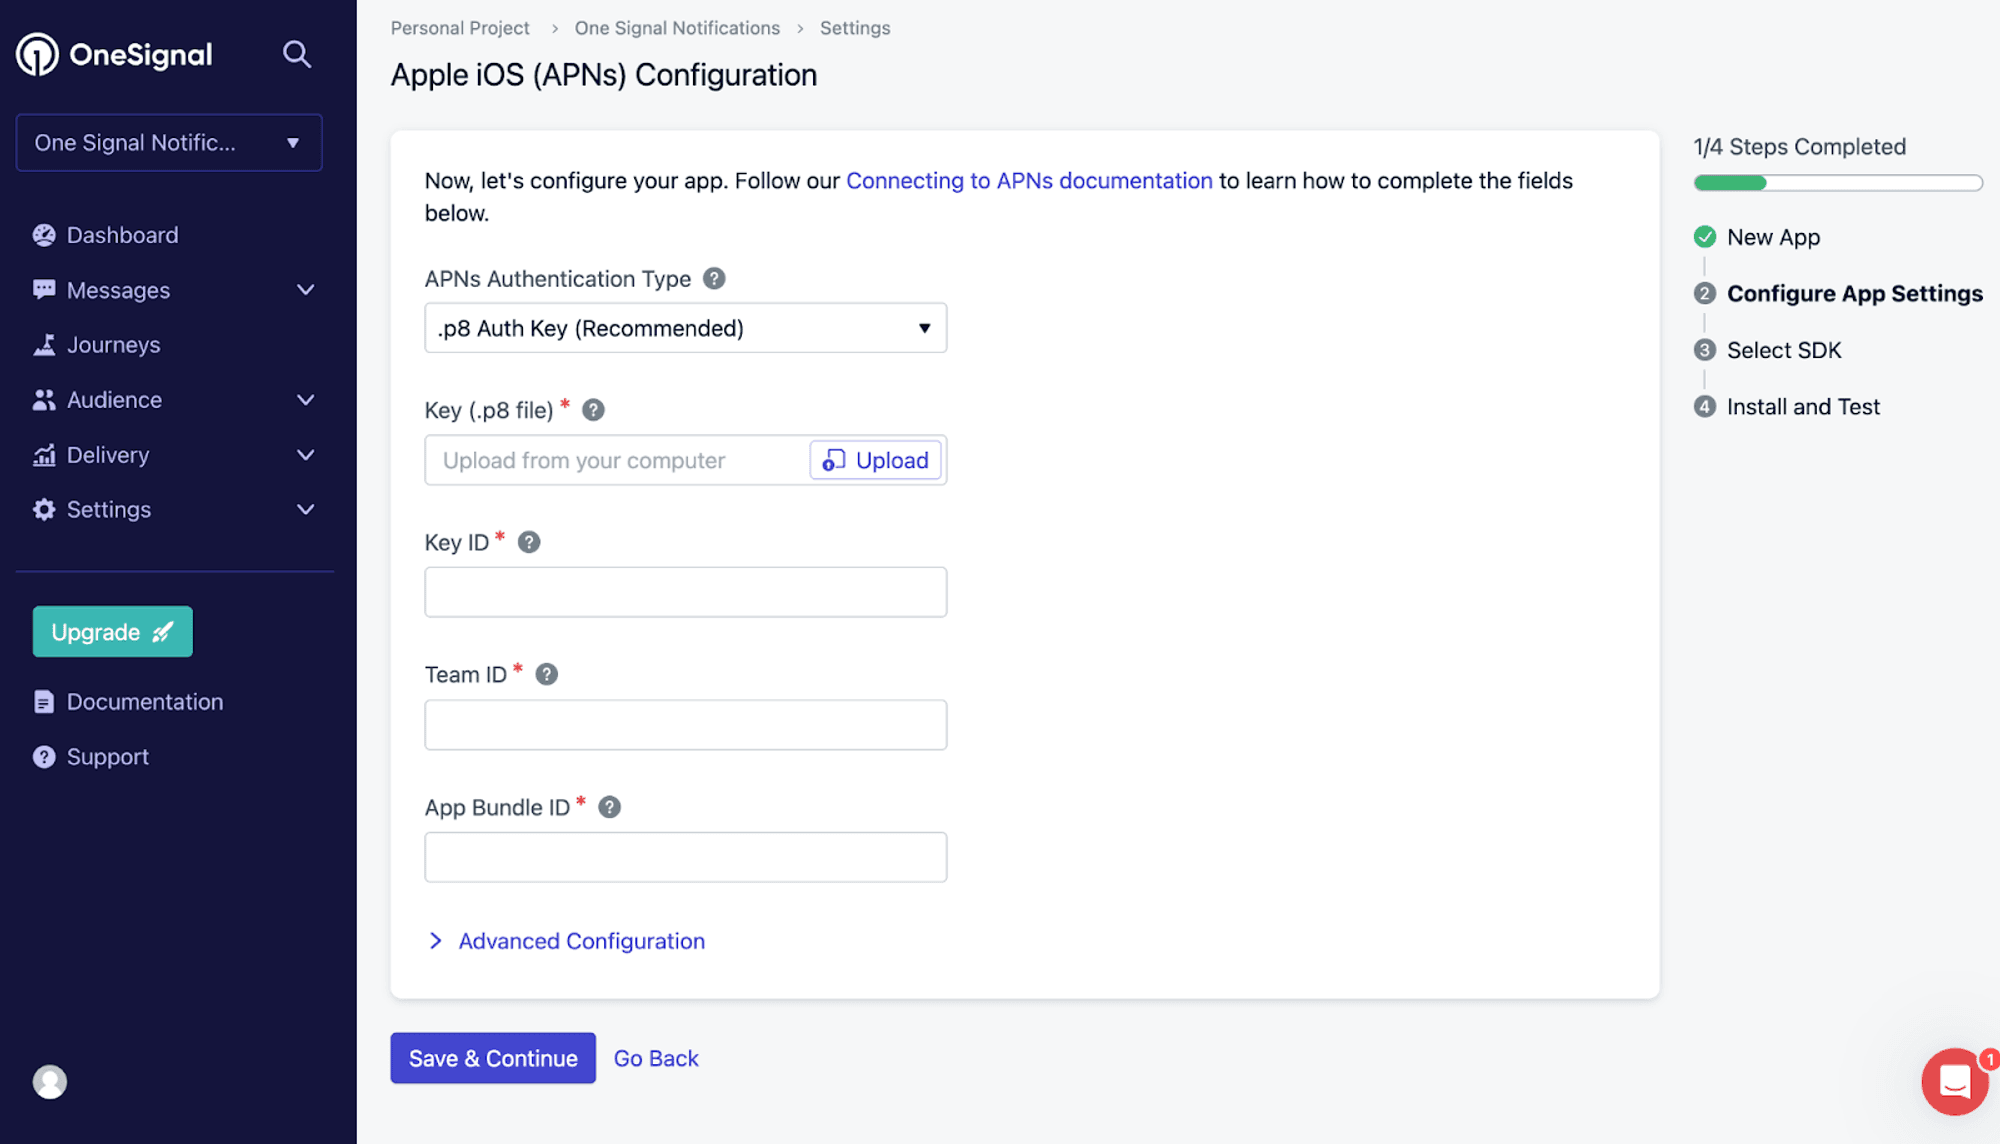
- Get Key ID & Key (.p8 file) from Apple Developer Console Apple Developer account
- In the Apple Developer console, go to the "Account" section.
- Access "Certificates" and select "Keys" to create an Apple Push Notification Service (APNs) key.
- Click the plus icon to add a new key, register a name, and click “Continue.”
- After generating the key, access its details and copy the unique Key ID.
- Download the authentication key by clicking the download button.
- Upload the downloaded key to the designated “Upload” section in OneSignal.
- Obtain App's Bundle ID
- In your Apple Developer console, go to the "Apps" section.
- Select the specific app for which you want to enable push notifications.
- Navigate to "App Information" and copy the app’s bundle ID, typically structured like:
com.example.your_app_name
- Retrieve Team ID
- Find your Team ID within your Apple Developer account’s account details page.
- Copy the Team ID and paste it into the designated “Team ID” section in OneSignal.
- Save Changes
- Confirm and save the changes made in the OneSignal dashboard.
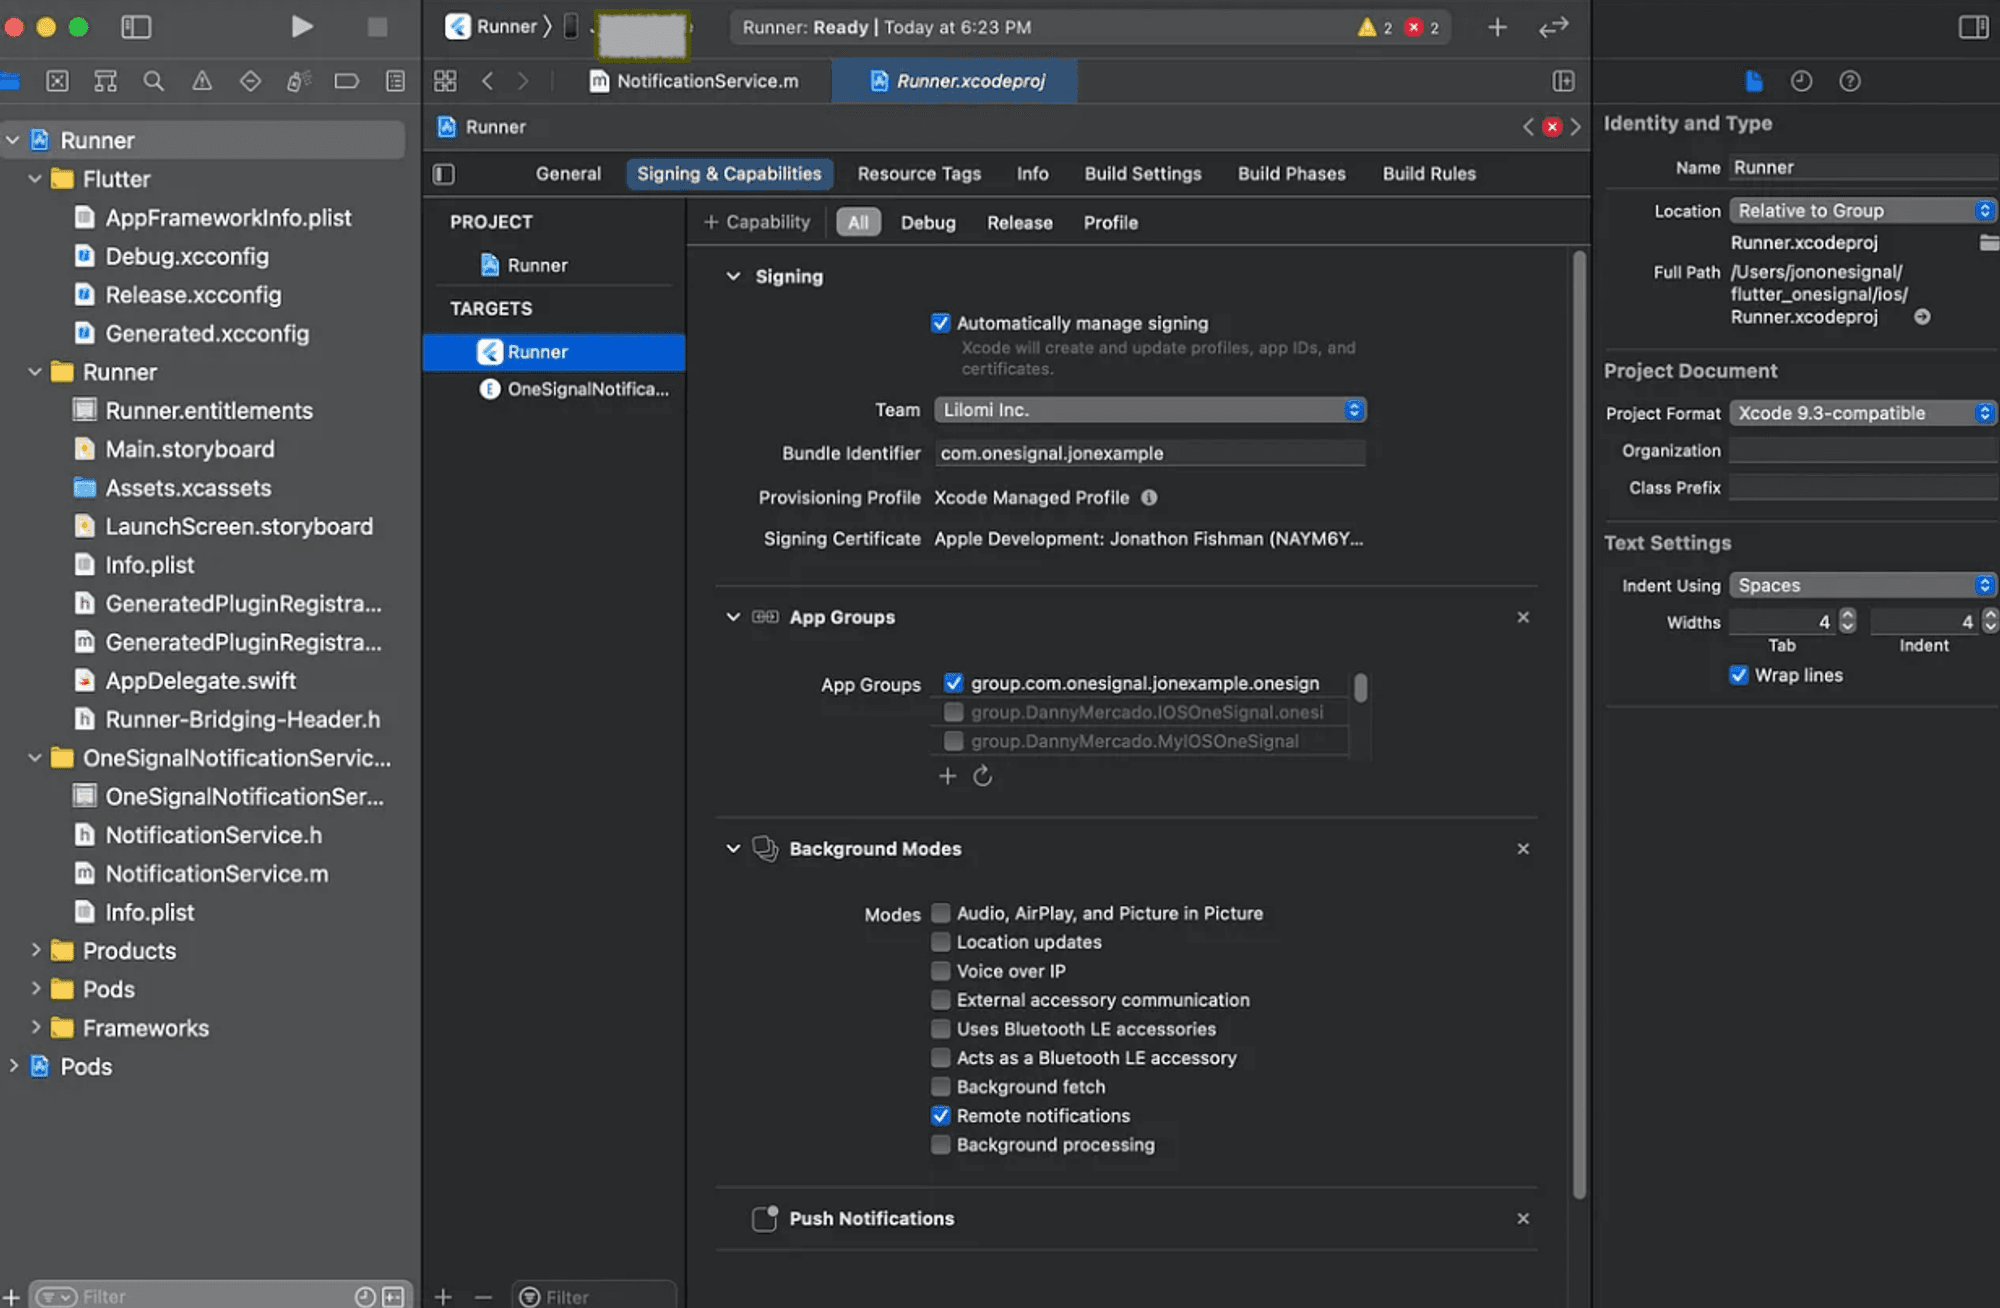
iOS Service Extension
- Open your Xcode project.
- Follow the instructions in the OneSignal iOS SDK Setup Guide to add an iOS Service Extension.
- A Service Extension is required for handling advanced features such as media attachments and interactive buttons in your push notifications.
- Enable iOS Push Capability
- In the main app target, select Signing & Capabilities > All > + Capability, enable Push Notifications.
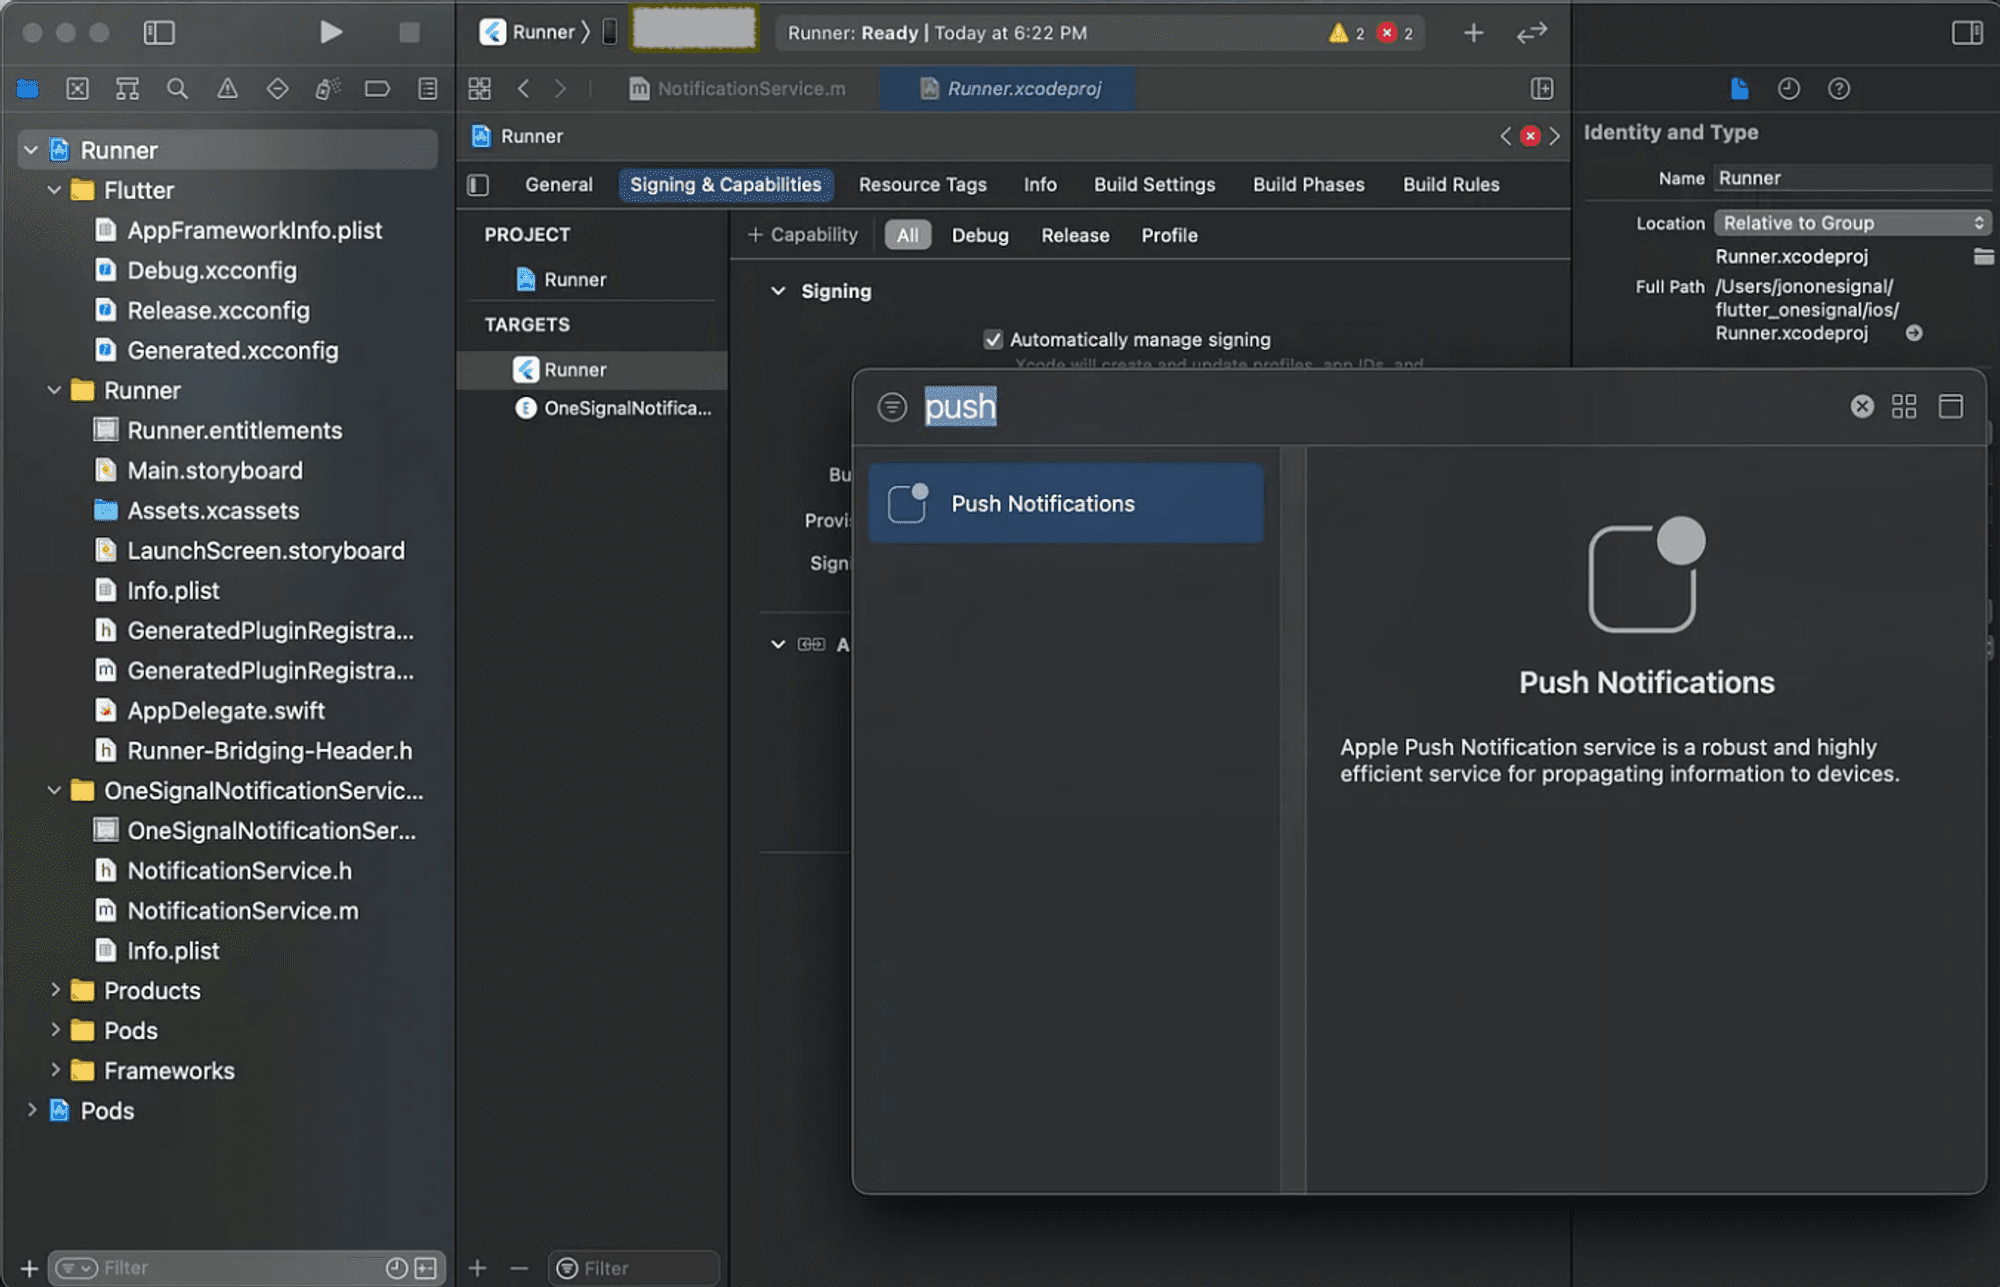
- Next, enable Background Modes and check Remote Notifications.
We're done setting up!
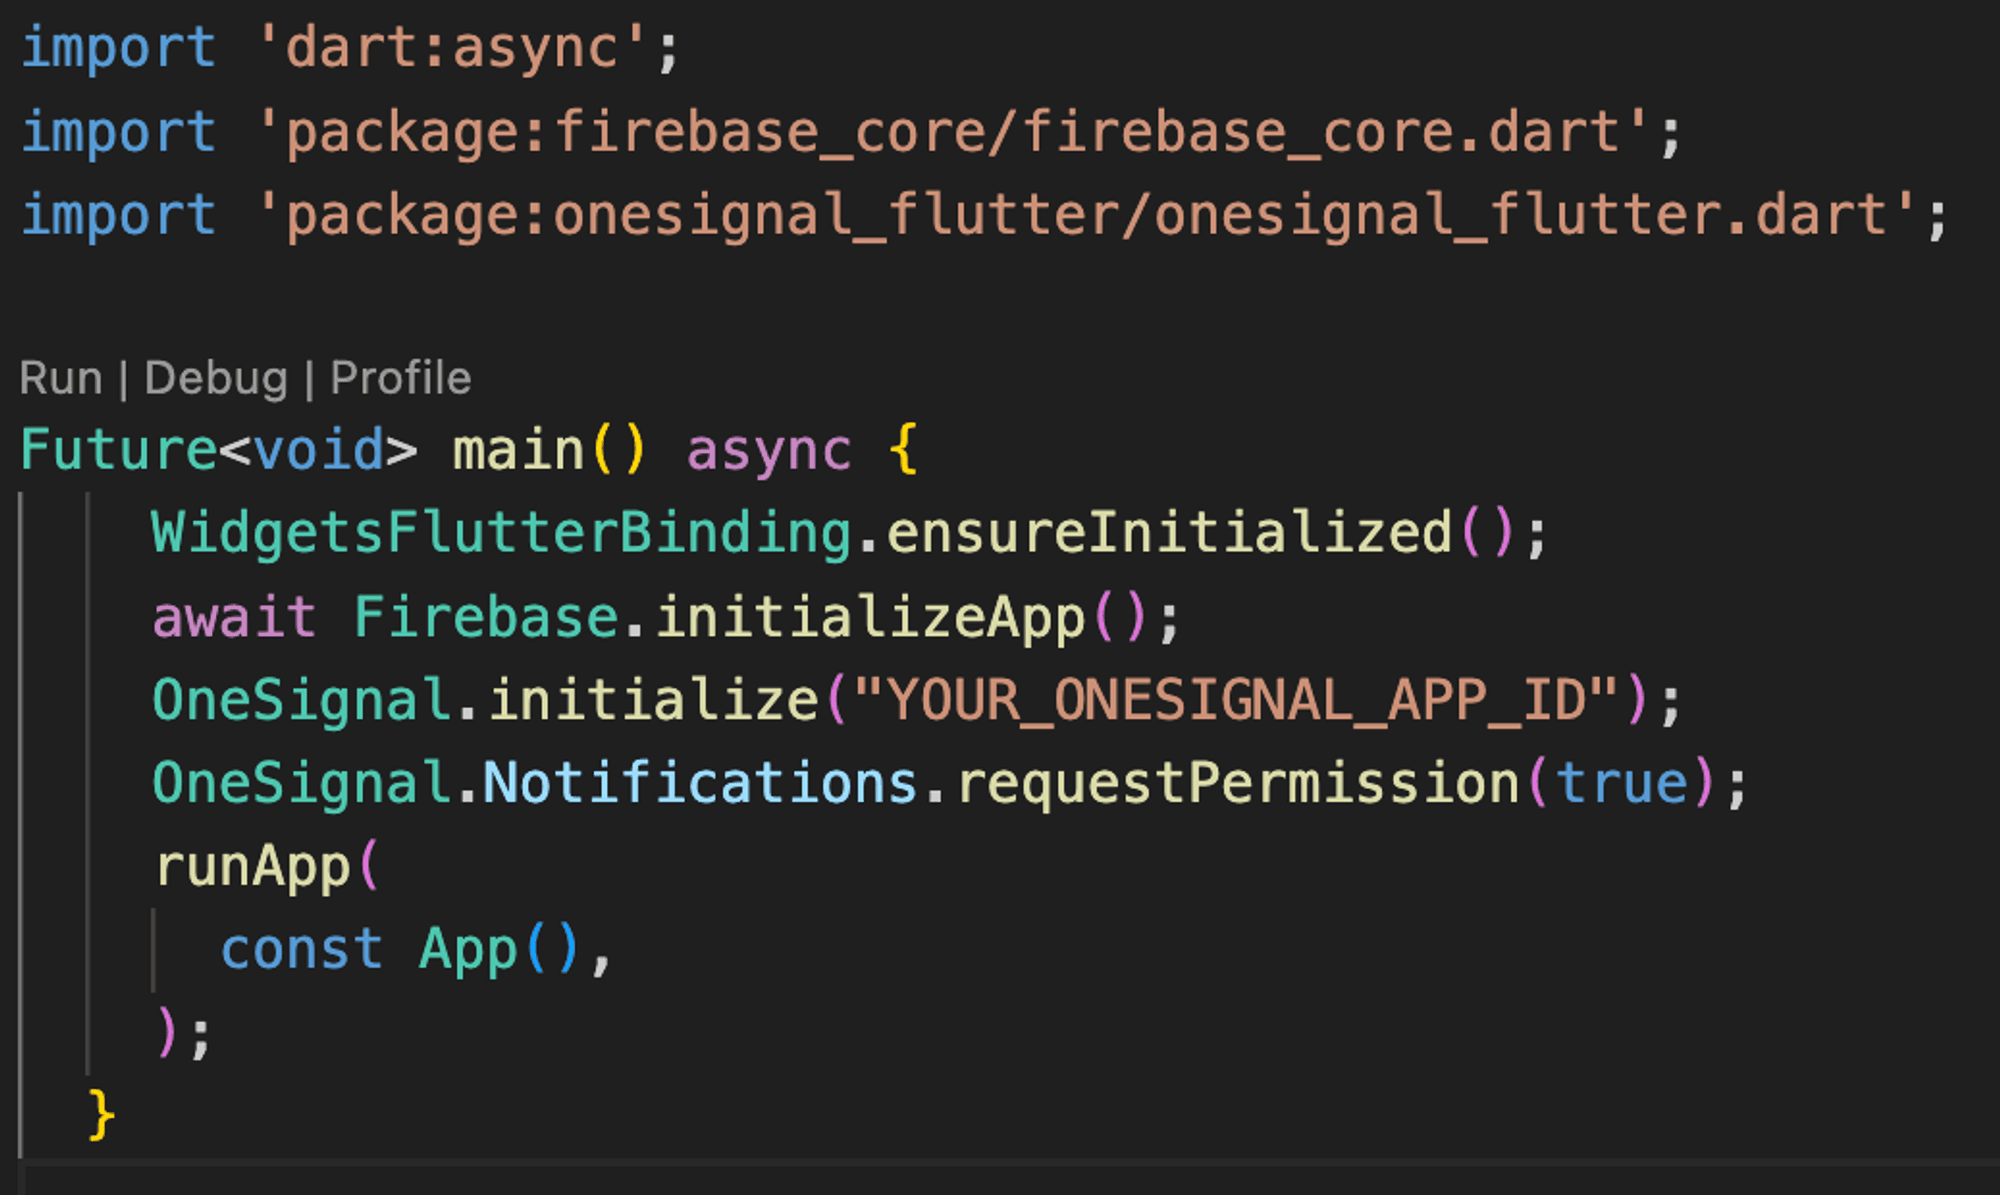
5 . Listen to push notifications
To listen to push notifications we need to initialize the OneSignal plugin in the main.dart file of your project :
- Initializes the OneSignal SDK. This should be called during application startup. The ONESIGNAL_APP_ID can be found in Keys & IDs.
- When the OneSignal SDK is initialized in your mobile app, it creates a Subscription ID for that device. The user must opt-in (aka subscribe) to receive push notifications for your app.
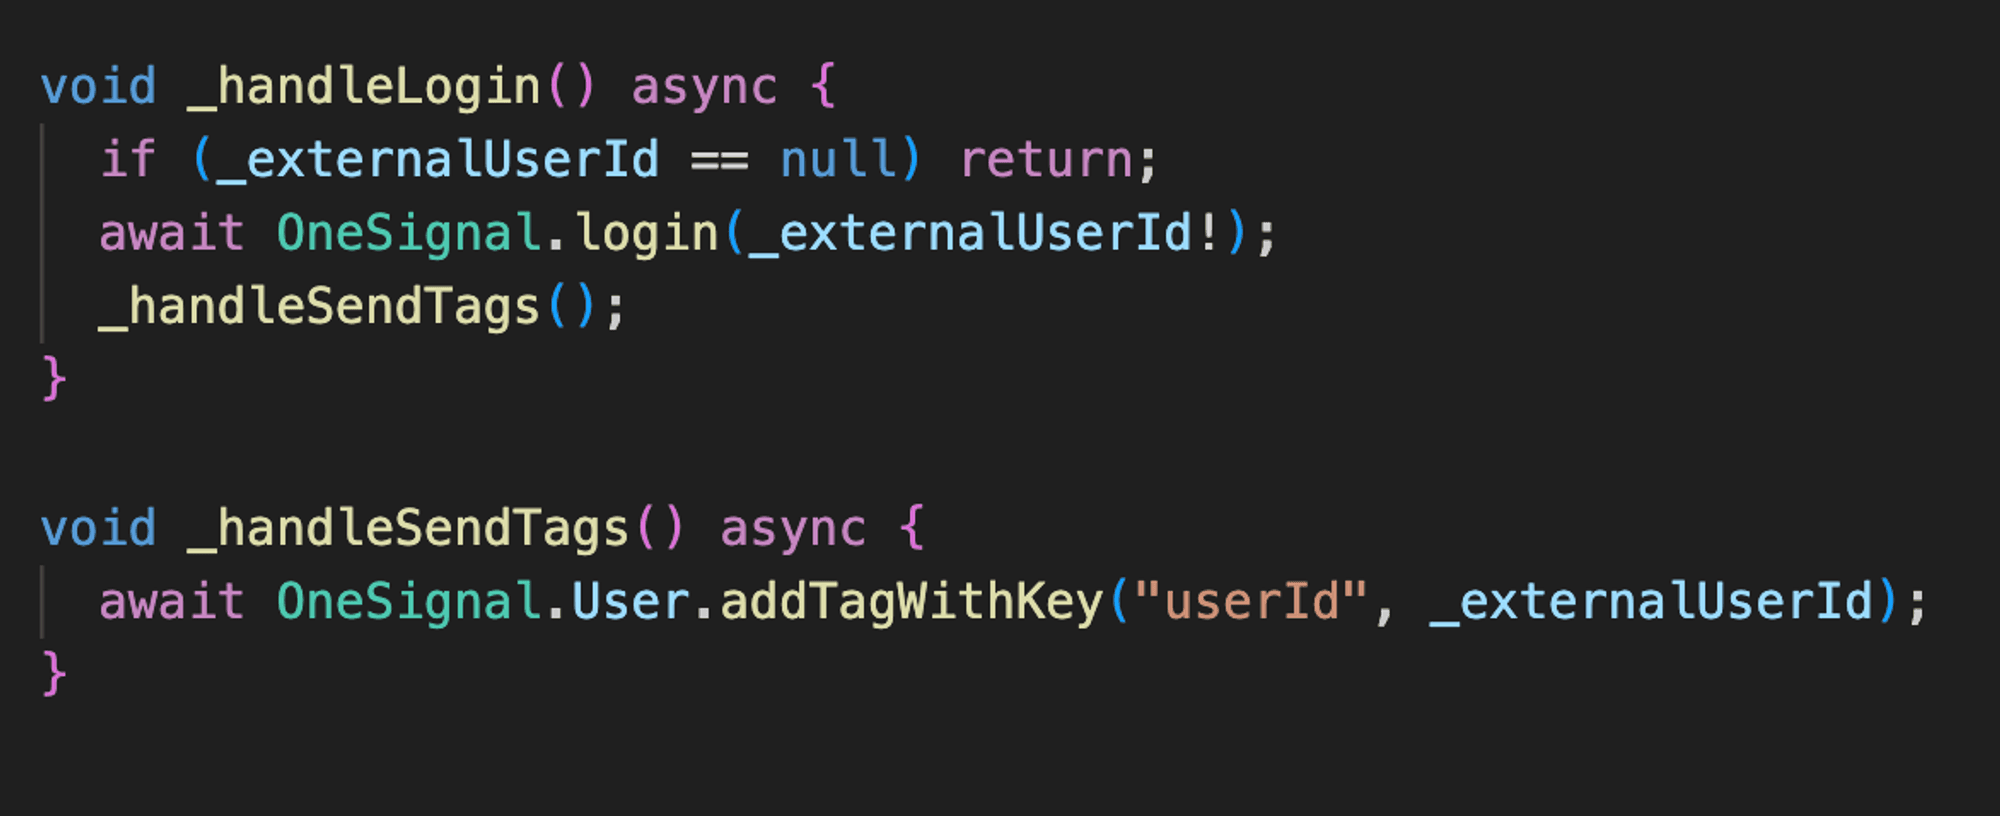
Logging in a User with OneSignal
In OneSignal, logging in a user is a crucial step to authenticate the user and associate their device with their account. By doing so, the user becomes eligible to receive personalized push notifications, and you gain the ability to send targeted messages to specific users based on various filters, such as tags.
Why Login Matters
- Personalized Notifications
- Logging in allows you to associate an external user ID with the OneSignal device. This association enables the delivery of personalized push notifications tailored to individual users.
- User Segmentation with Tags
- OneSignal provides a powerful filtering mechanism through tags. Tags are key-value pairs that can be associated with users. In the context of login, the user's unique ID is often used as a tag.
- Using the unique user ID as a tag enables precise user segmentation, allowing you to send notifications to specific users or groups.
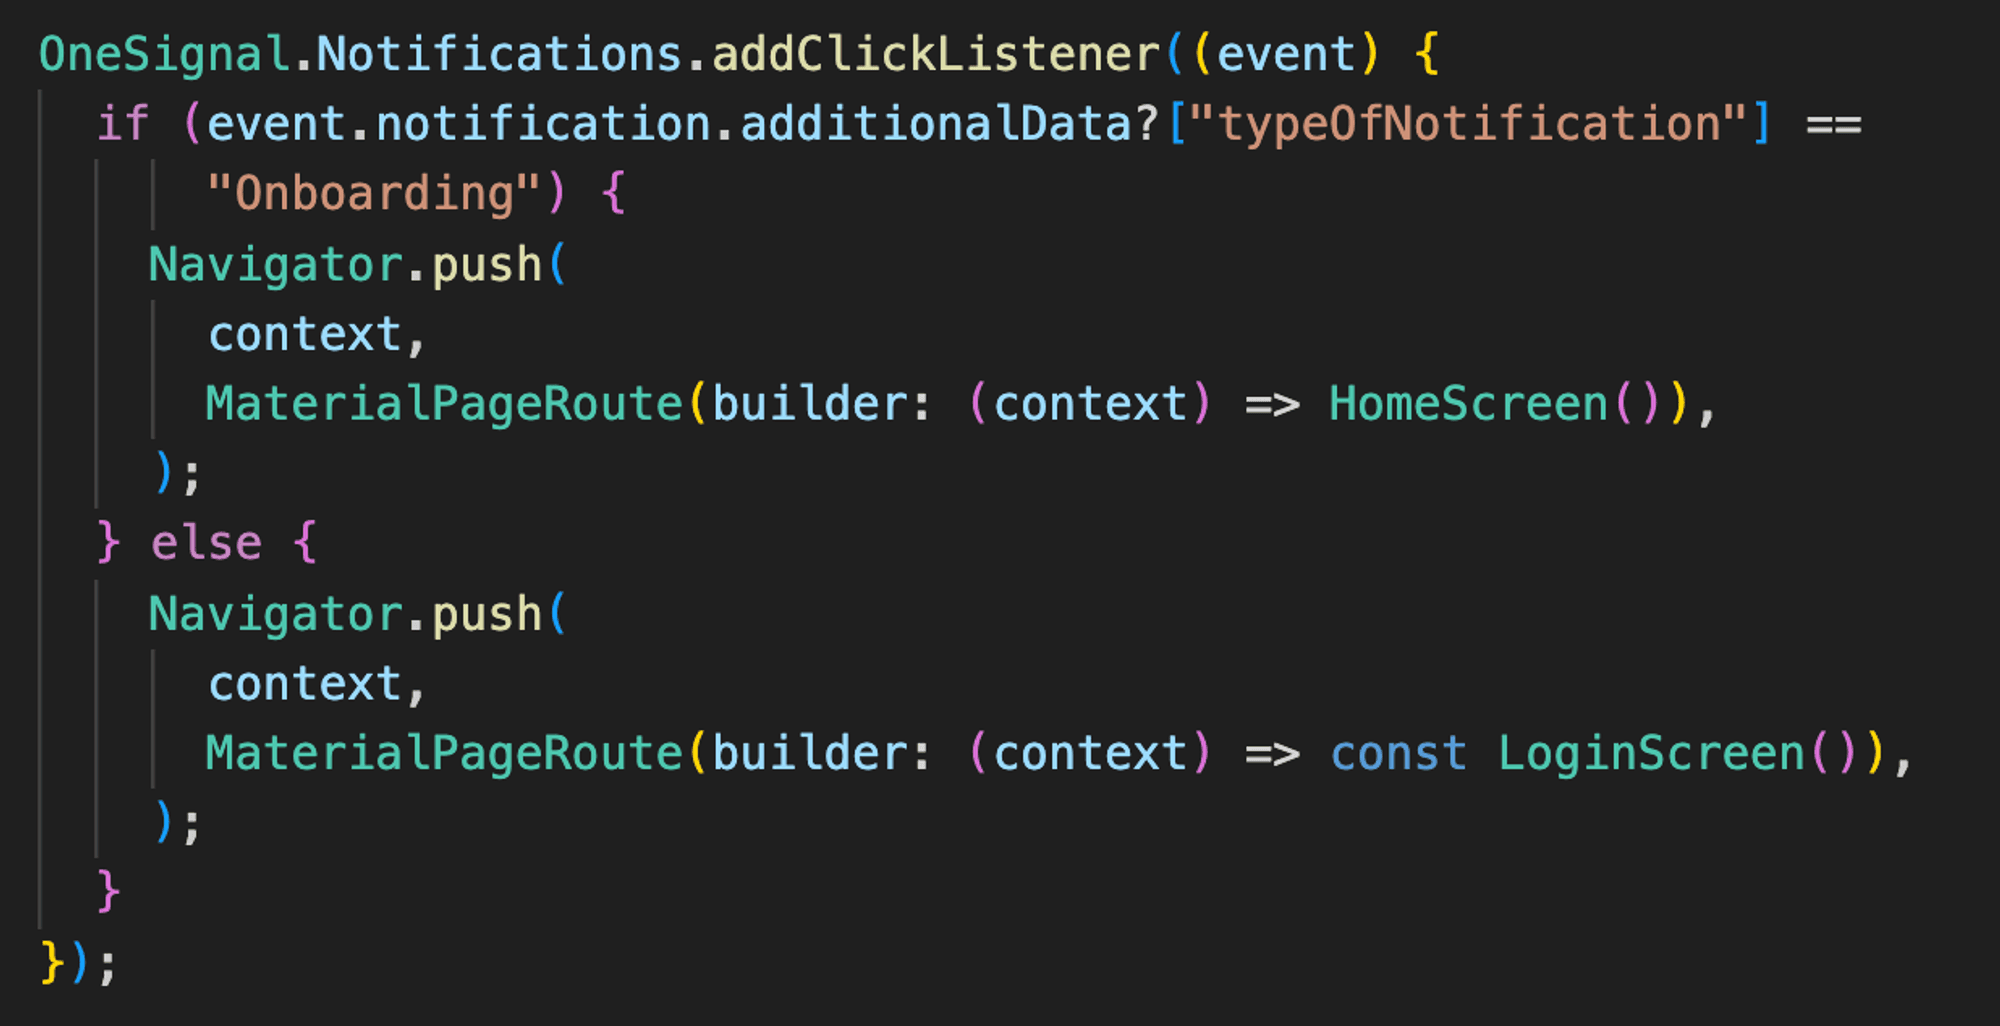
Handling Notification Clicks in OneSignal
In OneSignal, setting a notification click listener enables you to define custom actions when a user opens a push notification. This is a powerful feature that allows you to navigate users to specific screens or perform actions based on the additional data provided with the notification. Let's explore how to implement this in a Flutter app.
Customizing Notification Display in OneSignal for Flutter
OneSignal provides a versatile method, addForegroundWillDisplayListener, which allows you to listen to notifications when your app is running in the foreground. This is particularly useful for performing custom logic before displaying a notification, giving you the flexibility to decide whether to show the notification or handle specific cases differently.

Sending Push Notifications with OneSignal API in Flutter
To send push notifications to devices using OneSignal in Flutter, you can leverage the OneSignal API. The code example below demonstrates how to construct a request and send a notification.
Prerequisites
Before you begin, ensure you have the following:
- Your OneSignal App ID (appId).
- Your OneSignal API Key (apiKey).
- The OneSignal endpoint for notifications (apiUrl).
- The desired segments or filters for targeting users.
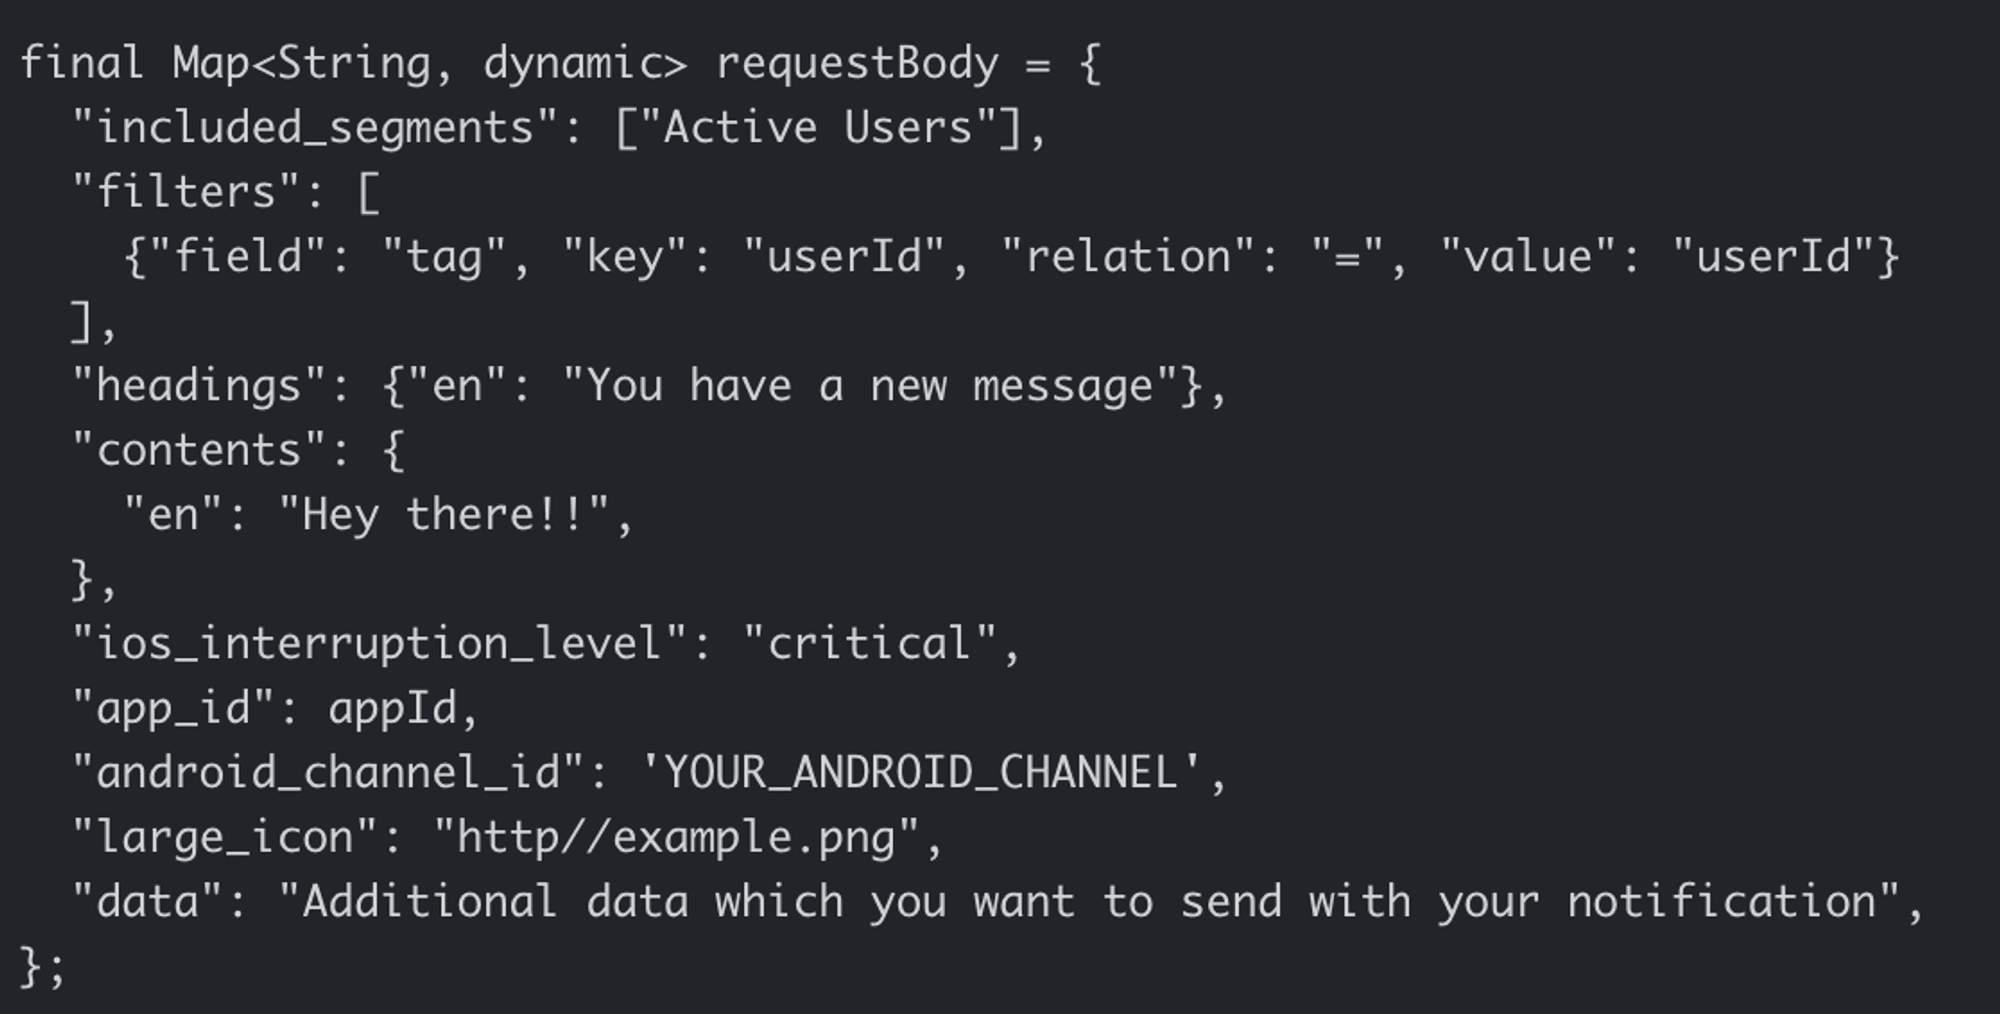
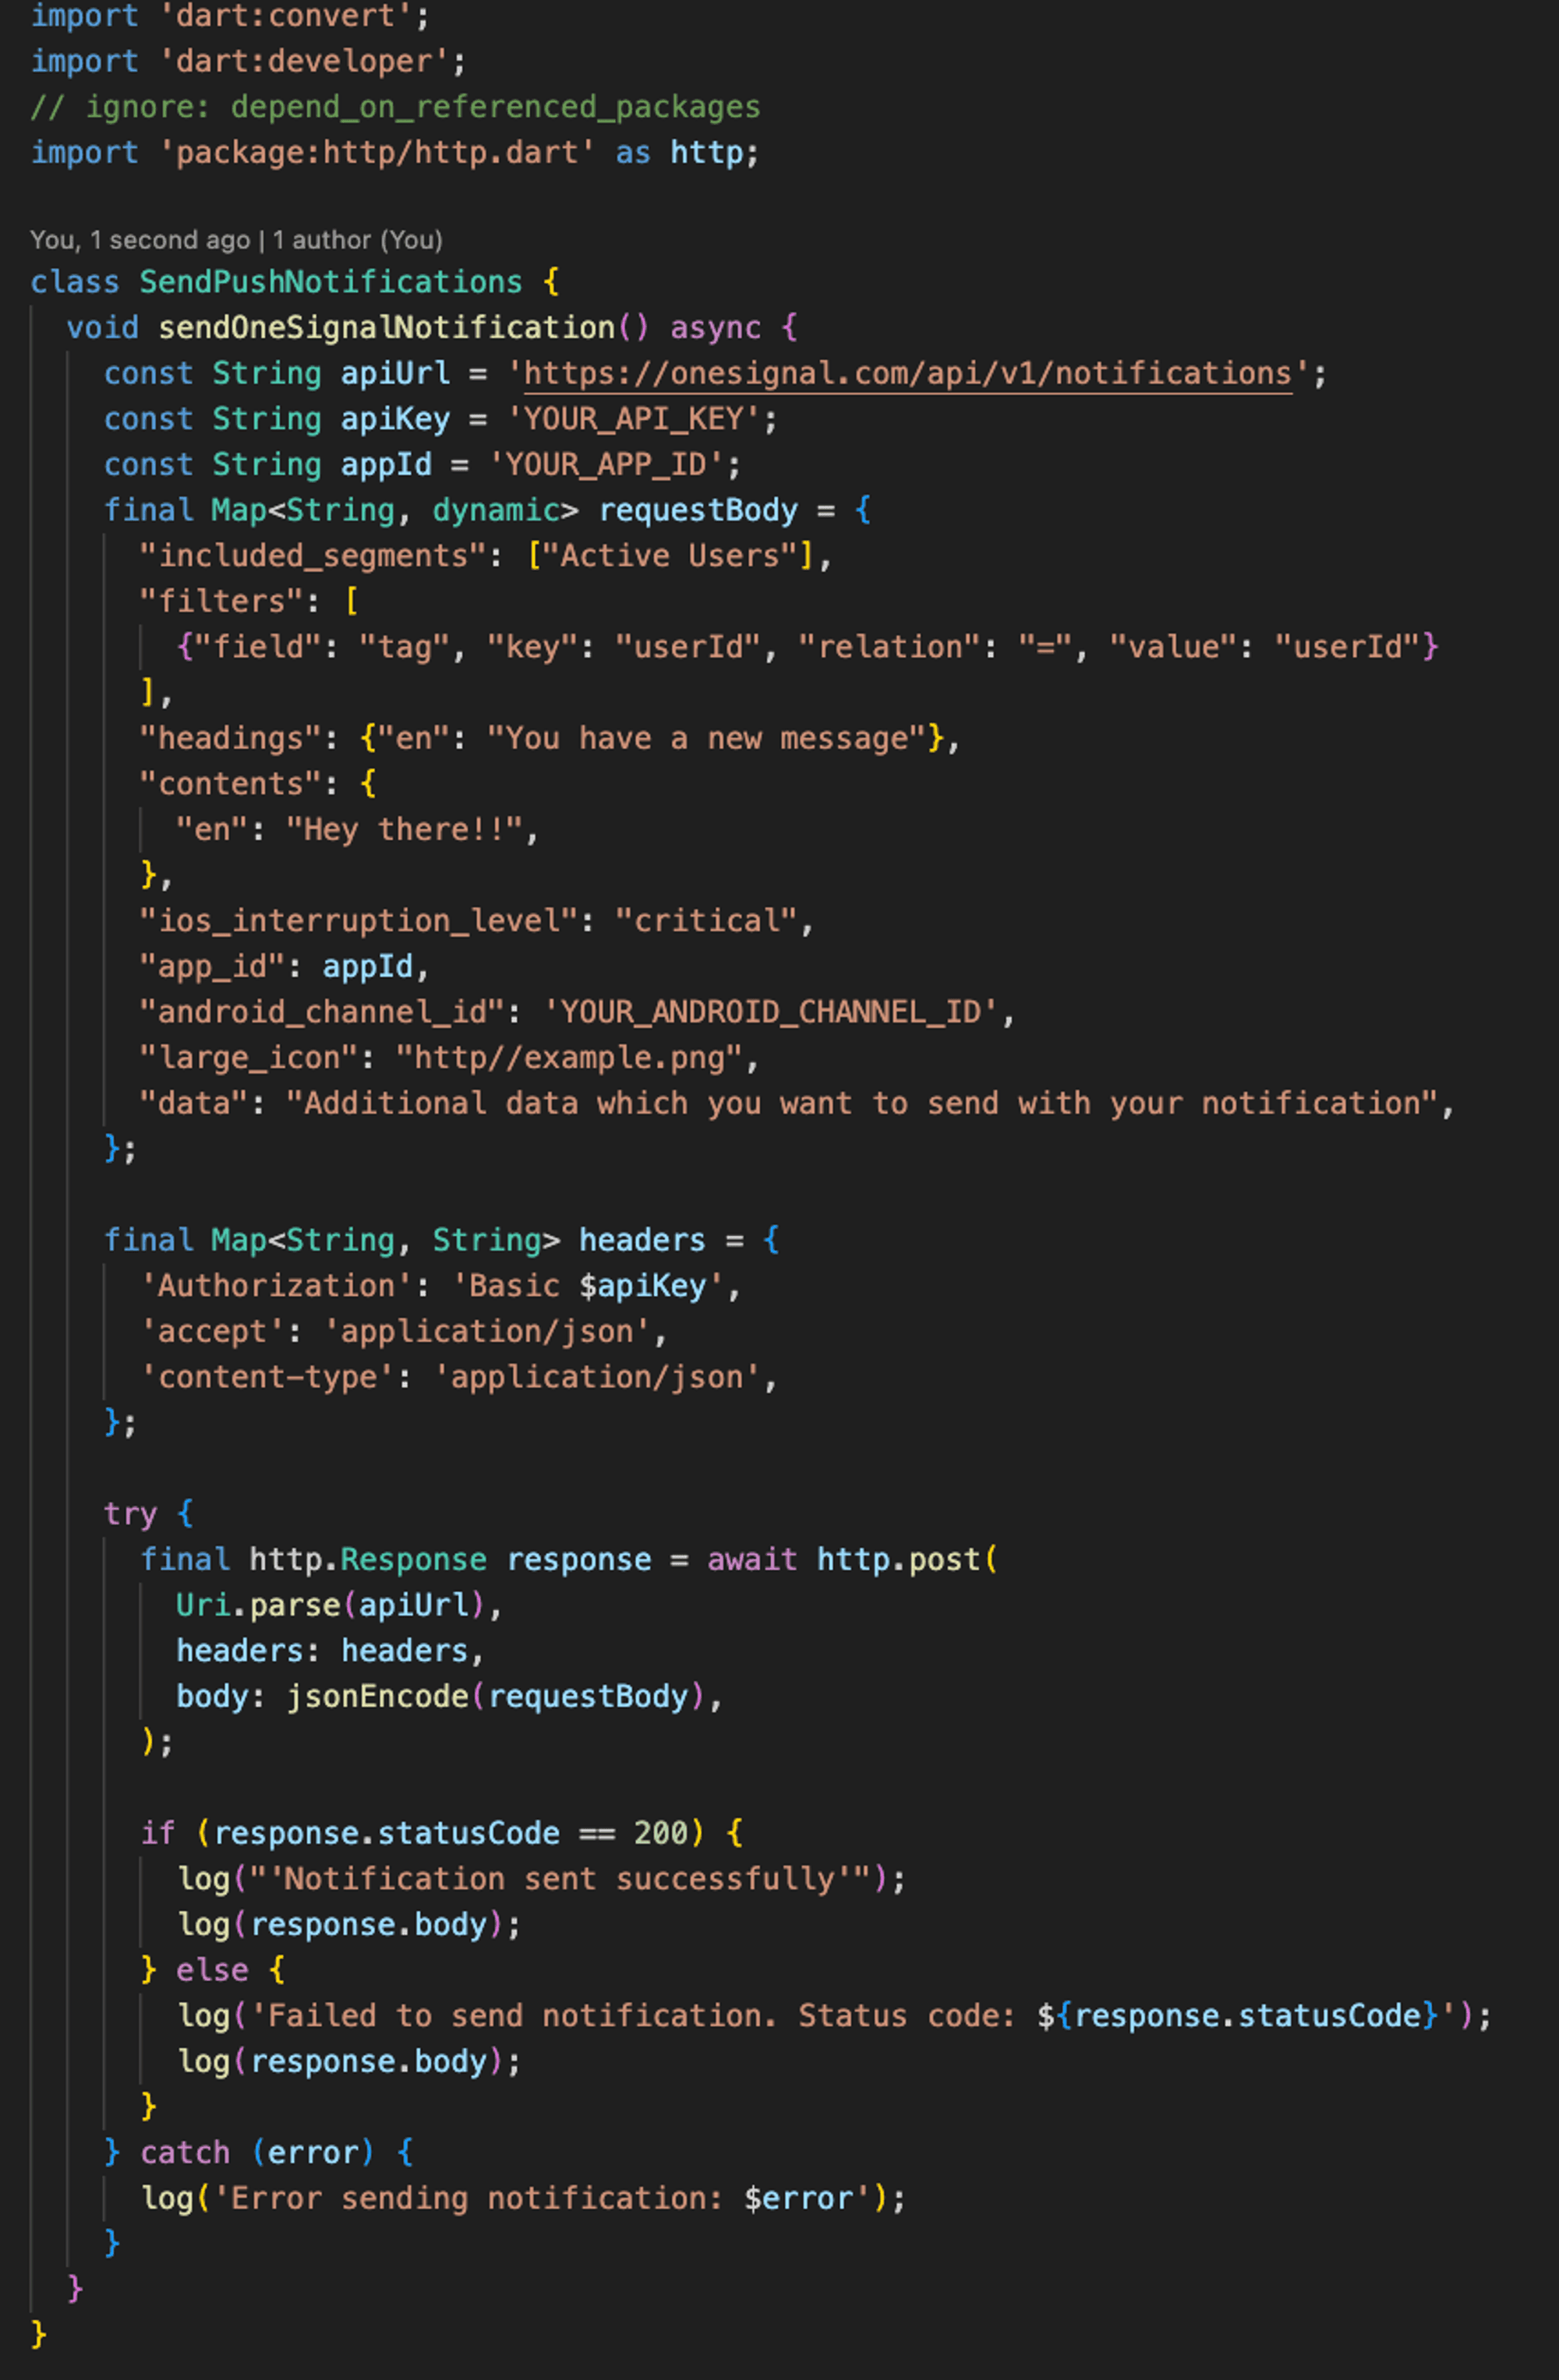
Constructing the Request Body
- Define a requestBody Map that contains the necessary information for the notification.
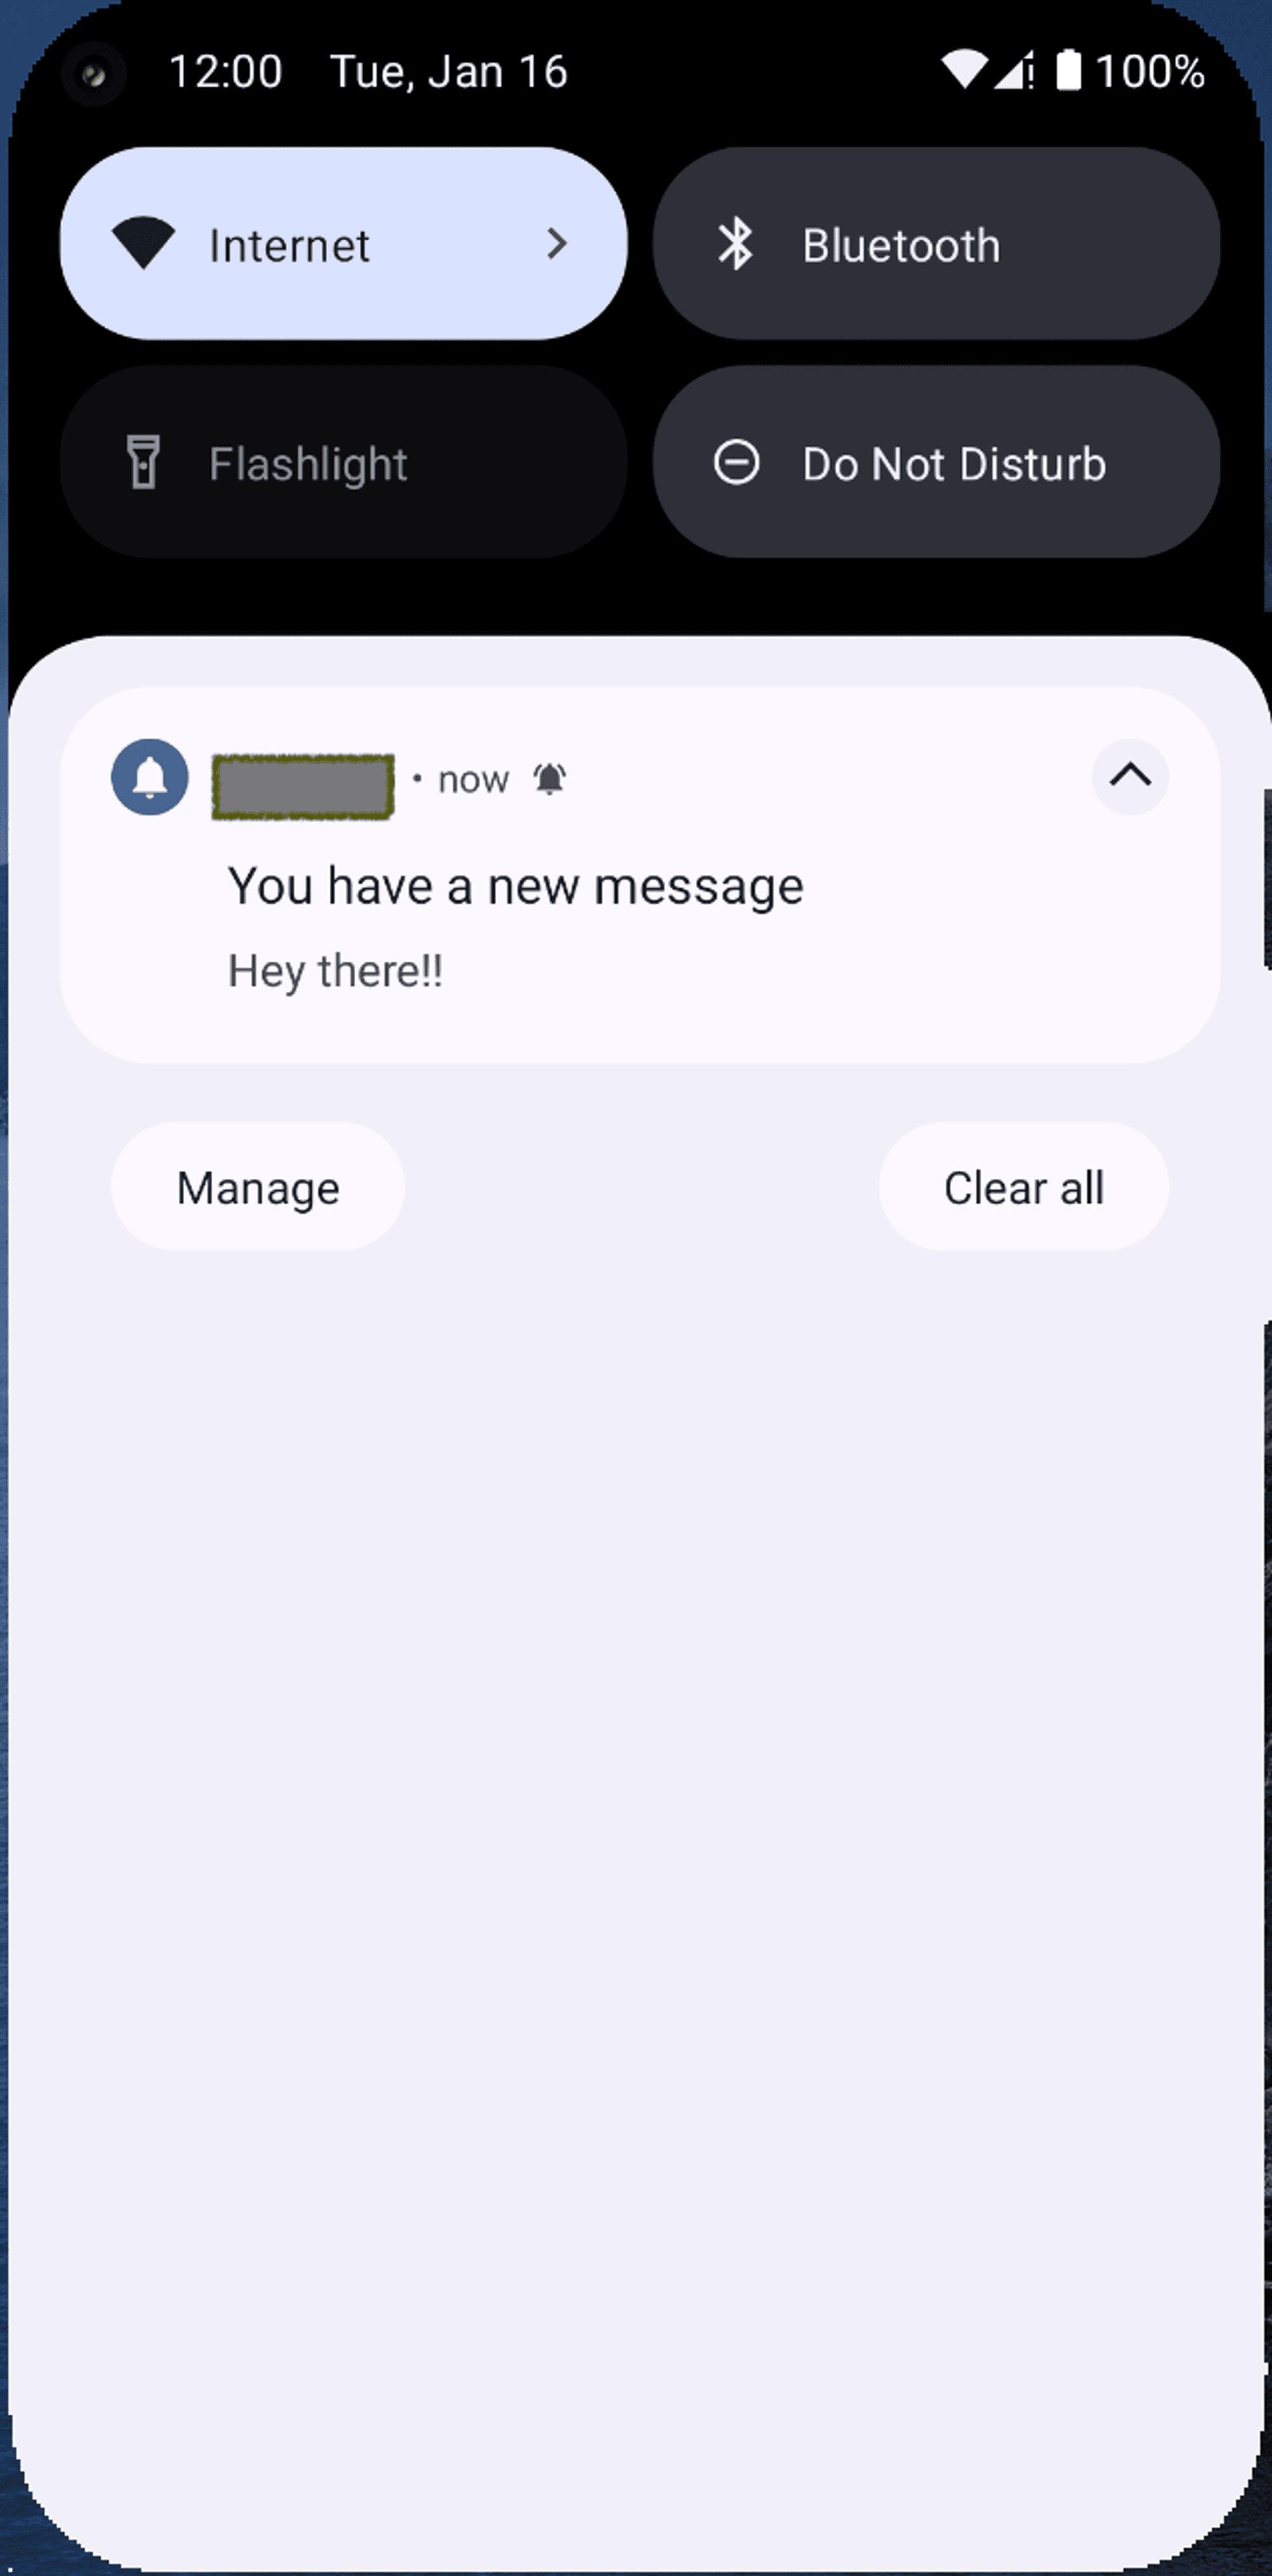
- In this example, we include the target segments, filters based on tags, notification content, and additional data.
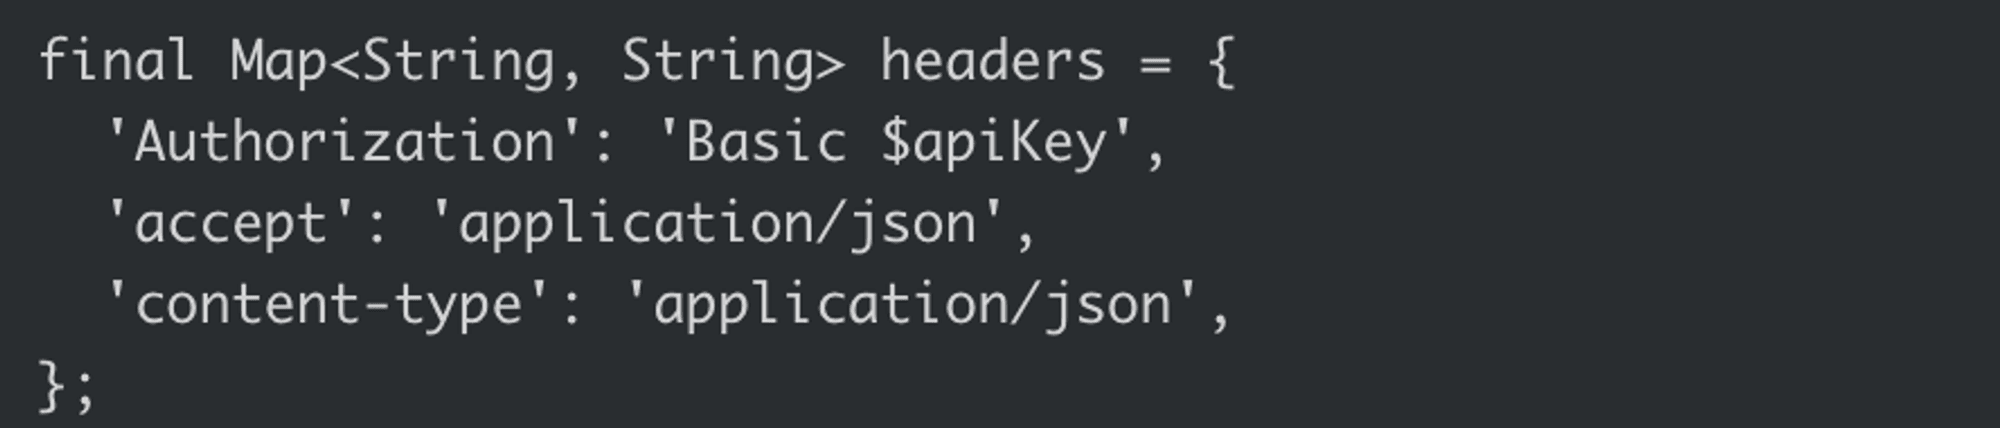
Setting Up Headers
- Create a headers Map that includes the necessary authorization and content-type headers.
Sending the Request
- Use the http.post method to send a POST request to the OneSignal API endpoint with the constructed requestBody.
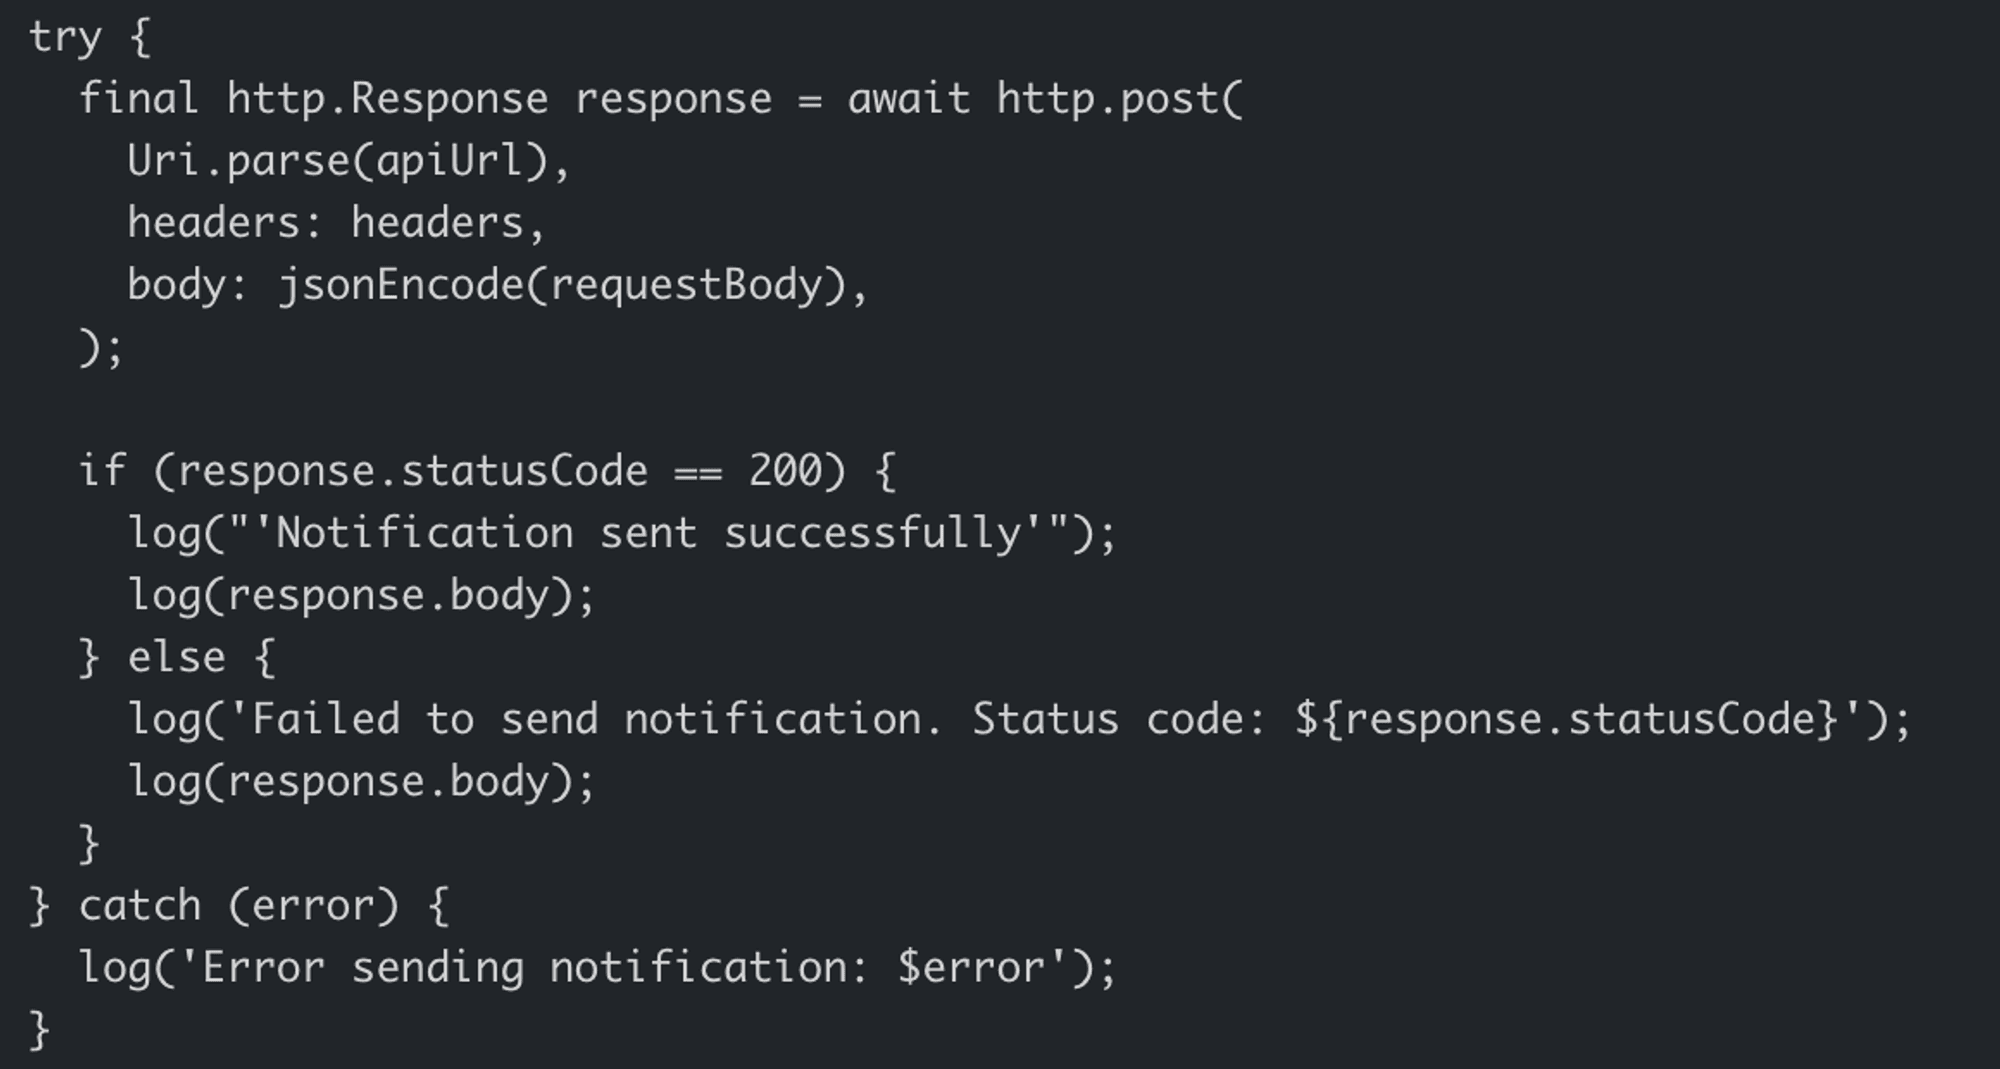
By using the OneSignal API, you can dynamically send push notifications to targeted segments or individual users in your Flutter app. Customize the requestBody and headers according to your app's requirements.
Here is the complete code
Conclusion
In conclusion, this guide aims to equip developers with the knowledge and tools necessary to leverage OneSignal effectively within their Flutter applications. By following the best practices outlined herein, developers can develop an exceptional notification system that not only keeps users informed but also enhances user satisfaction and retention.
Subscribe to Our Newsletter
Subscribe to RSS
Press & Media Hub RSS FeedRelated Articles.
More from the engineering frontline.
Dive deep into our research and insights on design, development, and the impact of various trends to businesses.

Jul 10, 2026
How We Built the Missing Bridge from Code to Figma

Jul 2, 2026
What Founders Must Evaluate Before Launching an AI-Built App

Jun 27, 2026
Building a Resilient Hybrid-Cloud Network with WireGuard HA, Route-Based Failover, and Deep Observability

Jun 19, 2026
We Built a 114-Second AWS-to-Azure Failover. Here’s What We Learned

Jun 17, 2026
Google I/O 2026 Mobile Playbook: AI Studio, Android CLI, and Antigravity for App Development

Jun 12, 2026