


Editor’s Note: The article was originally written by Aanchal Goyal in November 2022. It was reviewed and updated by Harrini in July 2026 to improve clarity and align the tutorial with current content standards. The implementation continues to demonstrate Razorpay integration with Laravel 8.
Key Takeaways
- Integrating Razorpay with Laravel involves setting up API keys, installing the SDK, and connecting payment workflows.
- Payment verification and capture help ensure every transaction is completed securely being recorded.
- Storing payment details in a database makes it easier to track transactions, refunds, and payment history.
- A production-ready payment integration requires secure backend logic, proper error handling, and reliable payment workflows.
Introduction
Razorpay can be integrated with Laravel 8 by installing the Razorpay SDK, configuring your API keys, creating payment routes, verifying and capturing transactions, and storing payment details in your database. As businesses adopt AI to speed up their software development processes, payment integrations still require careful implementation for secure transactions and frictionless payment processing.
This tutorial walks through each step of the integration process, from setting up a Laravel project and connecting a database to building a checkout page and handling payment responses in a secure way using Razorpay.
Steps to Integrate RazorPay with Laravel
Let’s get started. Follow the steps below, and you are good to go!
Step 1 - Install the Laravel 8 Application
Go to the directory where you want to install your project in the terminal and run the following command to install a new Laravel project.
composer create-project laravel/laravel RazorpayIntegrationLaravelStep 2 - Connect Database to an Application
In this step, open your project folder in vs. code and open .env and add your database name, user, and password like this.
DB_CONNECTION=mysql
DB_HOST=127.0.0.1
DB_PORT=3306
DB_DATABASE=laravel_razorpay
DB_USERNAME=root
DB_PASSWORD=
Step 3 - Add RazorPay Credentials
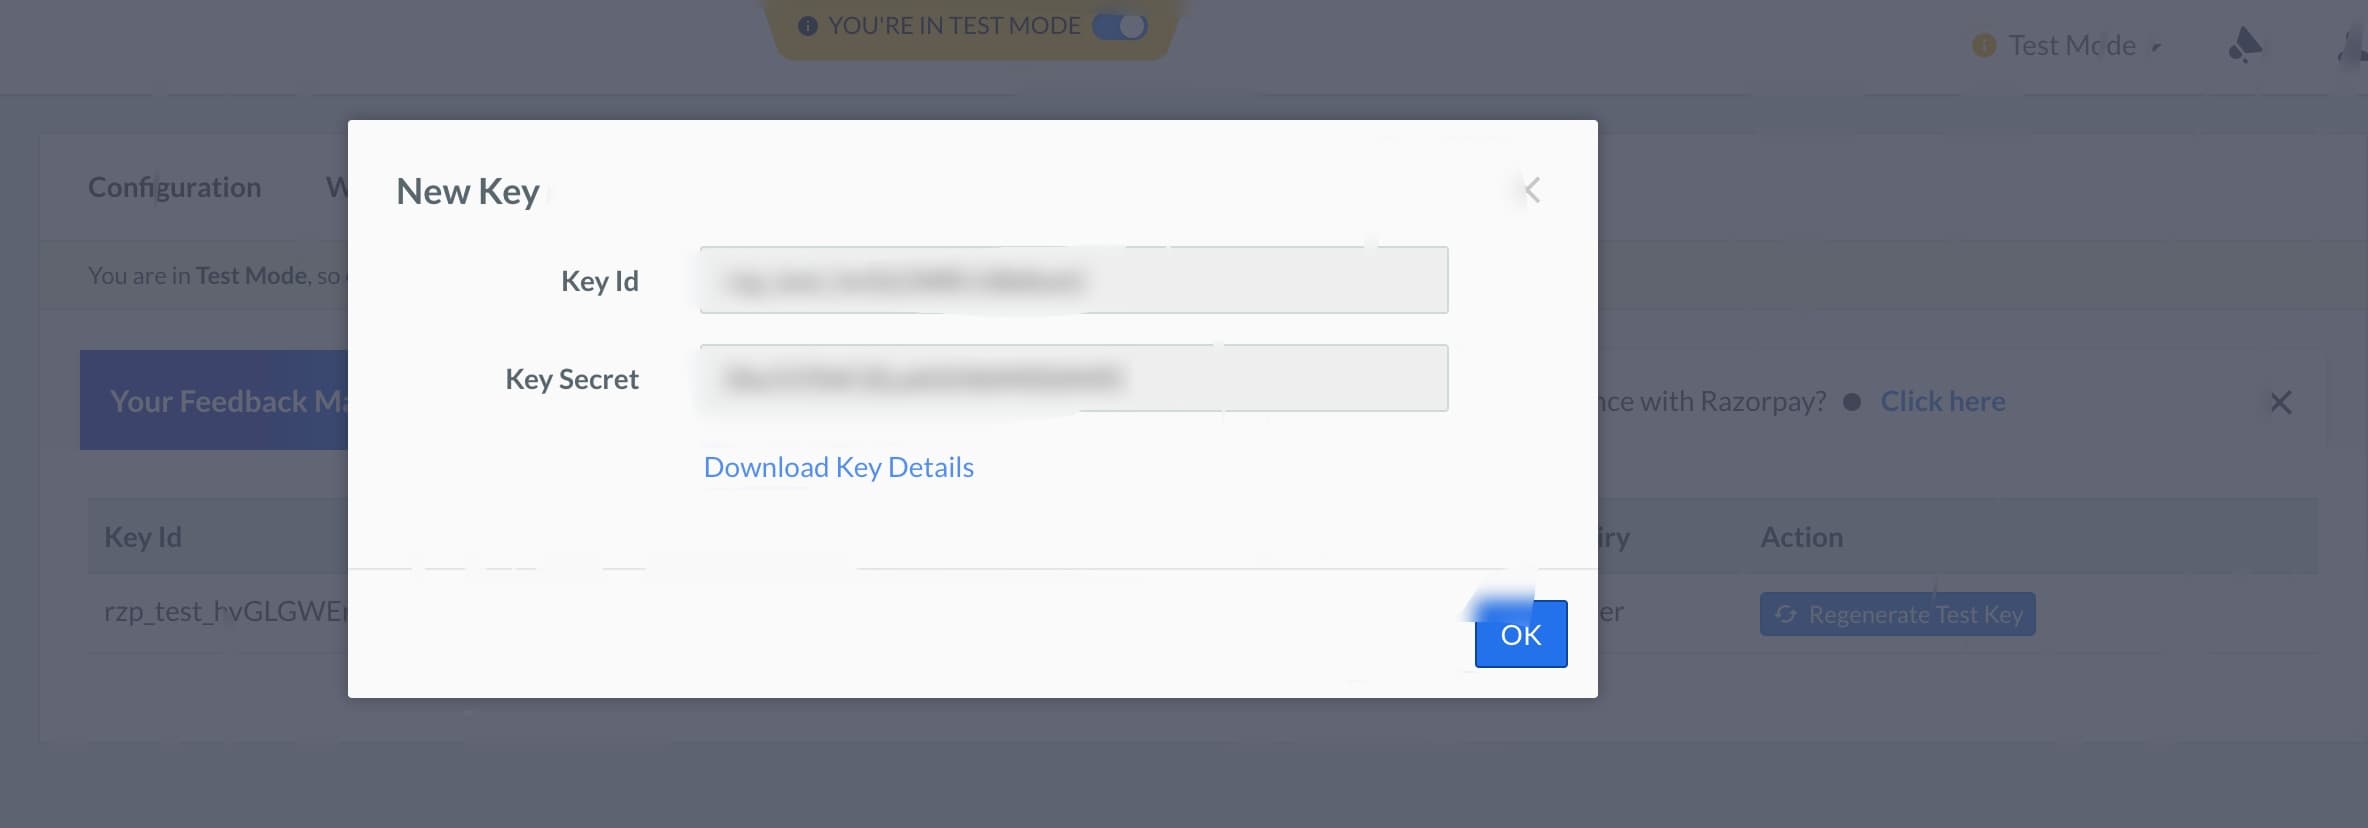
If you already have a Razorpay account, log in to the Razorpay dashboard or create a new Razorpay account. Then go to settings from the left sidebar, and you will see the API KEYS tab.
Open that tab and generate a new key. Copy those keys, and paste them into your .env
RAZORPAY_KEY=rzp_test_XXXXXXX
RAZORPAY_SECRET=XXXXXXXXXXXXXX
Step 4 - Install the Composer Package of RazorPay
Now, could you install the composer package of Razorpay? To install that, get the root directory of your project in the terminal and run the below command.
composer requires razorpay/razorpayStep 5 - Create Route
Open web.php and create a new route.
Route::get('product',[RazorpayController::class,'index']);
Route::post('razorpay-payment',[RazorpayController::class,'store'])->name('razorpay.payment.store');
Step 6 - Create Migration and Model
Now, you need to create a migration for the new table payments to store the response of the razorpay API. Also, create a model payment for the same. Run the command provided below.
php artisan make:model Payment —migrationCopy this code in the migration file and run php artisan migrate
Schema::create('payments',function(Blueprint $table) {
    $table->increments('id');
    $table->string('r_payment_id');
    $table->string('method');
    $table->string('currency');
    $table->string('user_email');
    $table->string('amount');
    $table->longText('json_response');
    $table->timestamps();
  });
<?php
namespace App\Models;
use Illuminate\Database\Eloquent\Factories\HasFactory;
use Illuminate\Database\Eloquent\Model;
class Payment extends Model {
use HasFactory;
protected $table = 'payments';
protected $guarded = ['id'];
}
Step 7 - Create Controller
Now, create a controller using this command and write the code below. In the controller, we will write the logic for the Razorpay API call and store the response in our database.
public function store(Request $request) {
    $input = $request->all();
    $api = new Api (env('RAZORPAY_KEY'), env('RAZORPAY_SECRET'));
    $payment = $api->payment->fetch($input['razorpay_payment_id']);
    if(count($input) && !empty($input['razorpay_payment_id'])) {
        try {
            $response = $api->payment->fetch($input['razorpay_payment_id'])->capture(array('amount' => $payment['amount']));
            $payment = Payment::create([
                'r_payment_id' => $response['id'],
                'method' => $response['method'],
                'currency' => $response['currency'],
                'user_email' => $response['email'],
                'amount' => $response['amount']/100,
                'json_response' => json_encode((array)$response)
            ]);
        } catch(Exceptio $e) {
            return $e->getMessage();
            Session::put('error',$e->getMessage());
            return redirect()->back();
        }
    }
    Session::put('success',('Payment Successful');
    return redirect()->back();
}
Step 8 - Create View File
Create a Laravel blade file and add the below code in that file and call that file with the help of the view function from the controller.
<div class="card card-default">
    <div class="card-header">
        Laravel - Razorpay Payment Gateway Integration
    </div>
    <div class="card-body text-center">
        <form action="{{ route('razorpay.payment.store') }}" method="POST" >
            @csrf
            <script src="https://checkout.razorpay.com/v1/checkout.js"
                    data-key="{{ env('RAZORPAY_KEY') }}"
                    data-amount="10000"
                    data-buttontext="Pay 100 INR"
                    data-name="GeekyAnts official"
                    data-description="Razorpay payment"
                    data-image="/images/logo-icon.png"
                    data-prefill.name="ABC"
                    data-prefill.email="abc@gmail.com"
                    data-theme.color="#ff7529">
            </script>
        </form>
    </div>
</div>
Now run this command below and open this URL http://127.0.0.1:8000/product
PHP artisan serve
Conclusion
This was a tutorial on integrating Razorpay into your Laravel 8 application. You can try it out and let us know how it went!







