Table of Contents
Boosting Performance with Next.js and React Server Components: A geekyants.com Case Study


Book a call
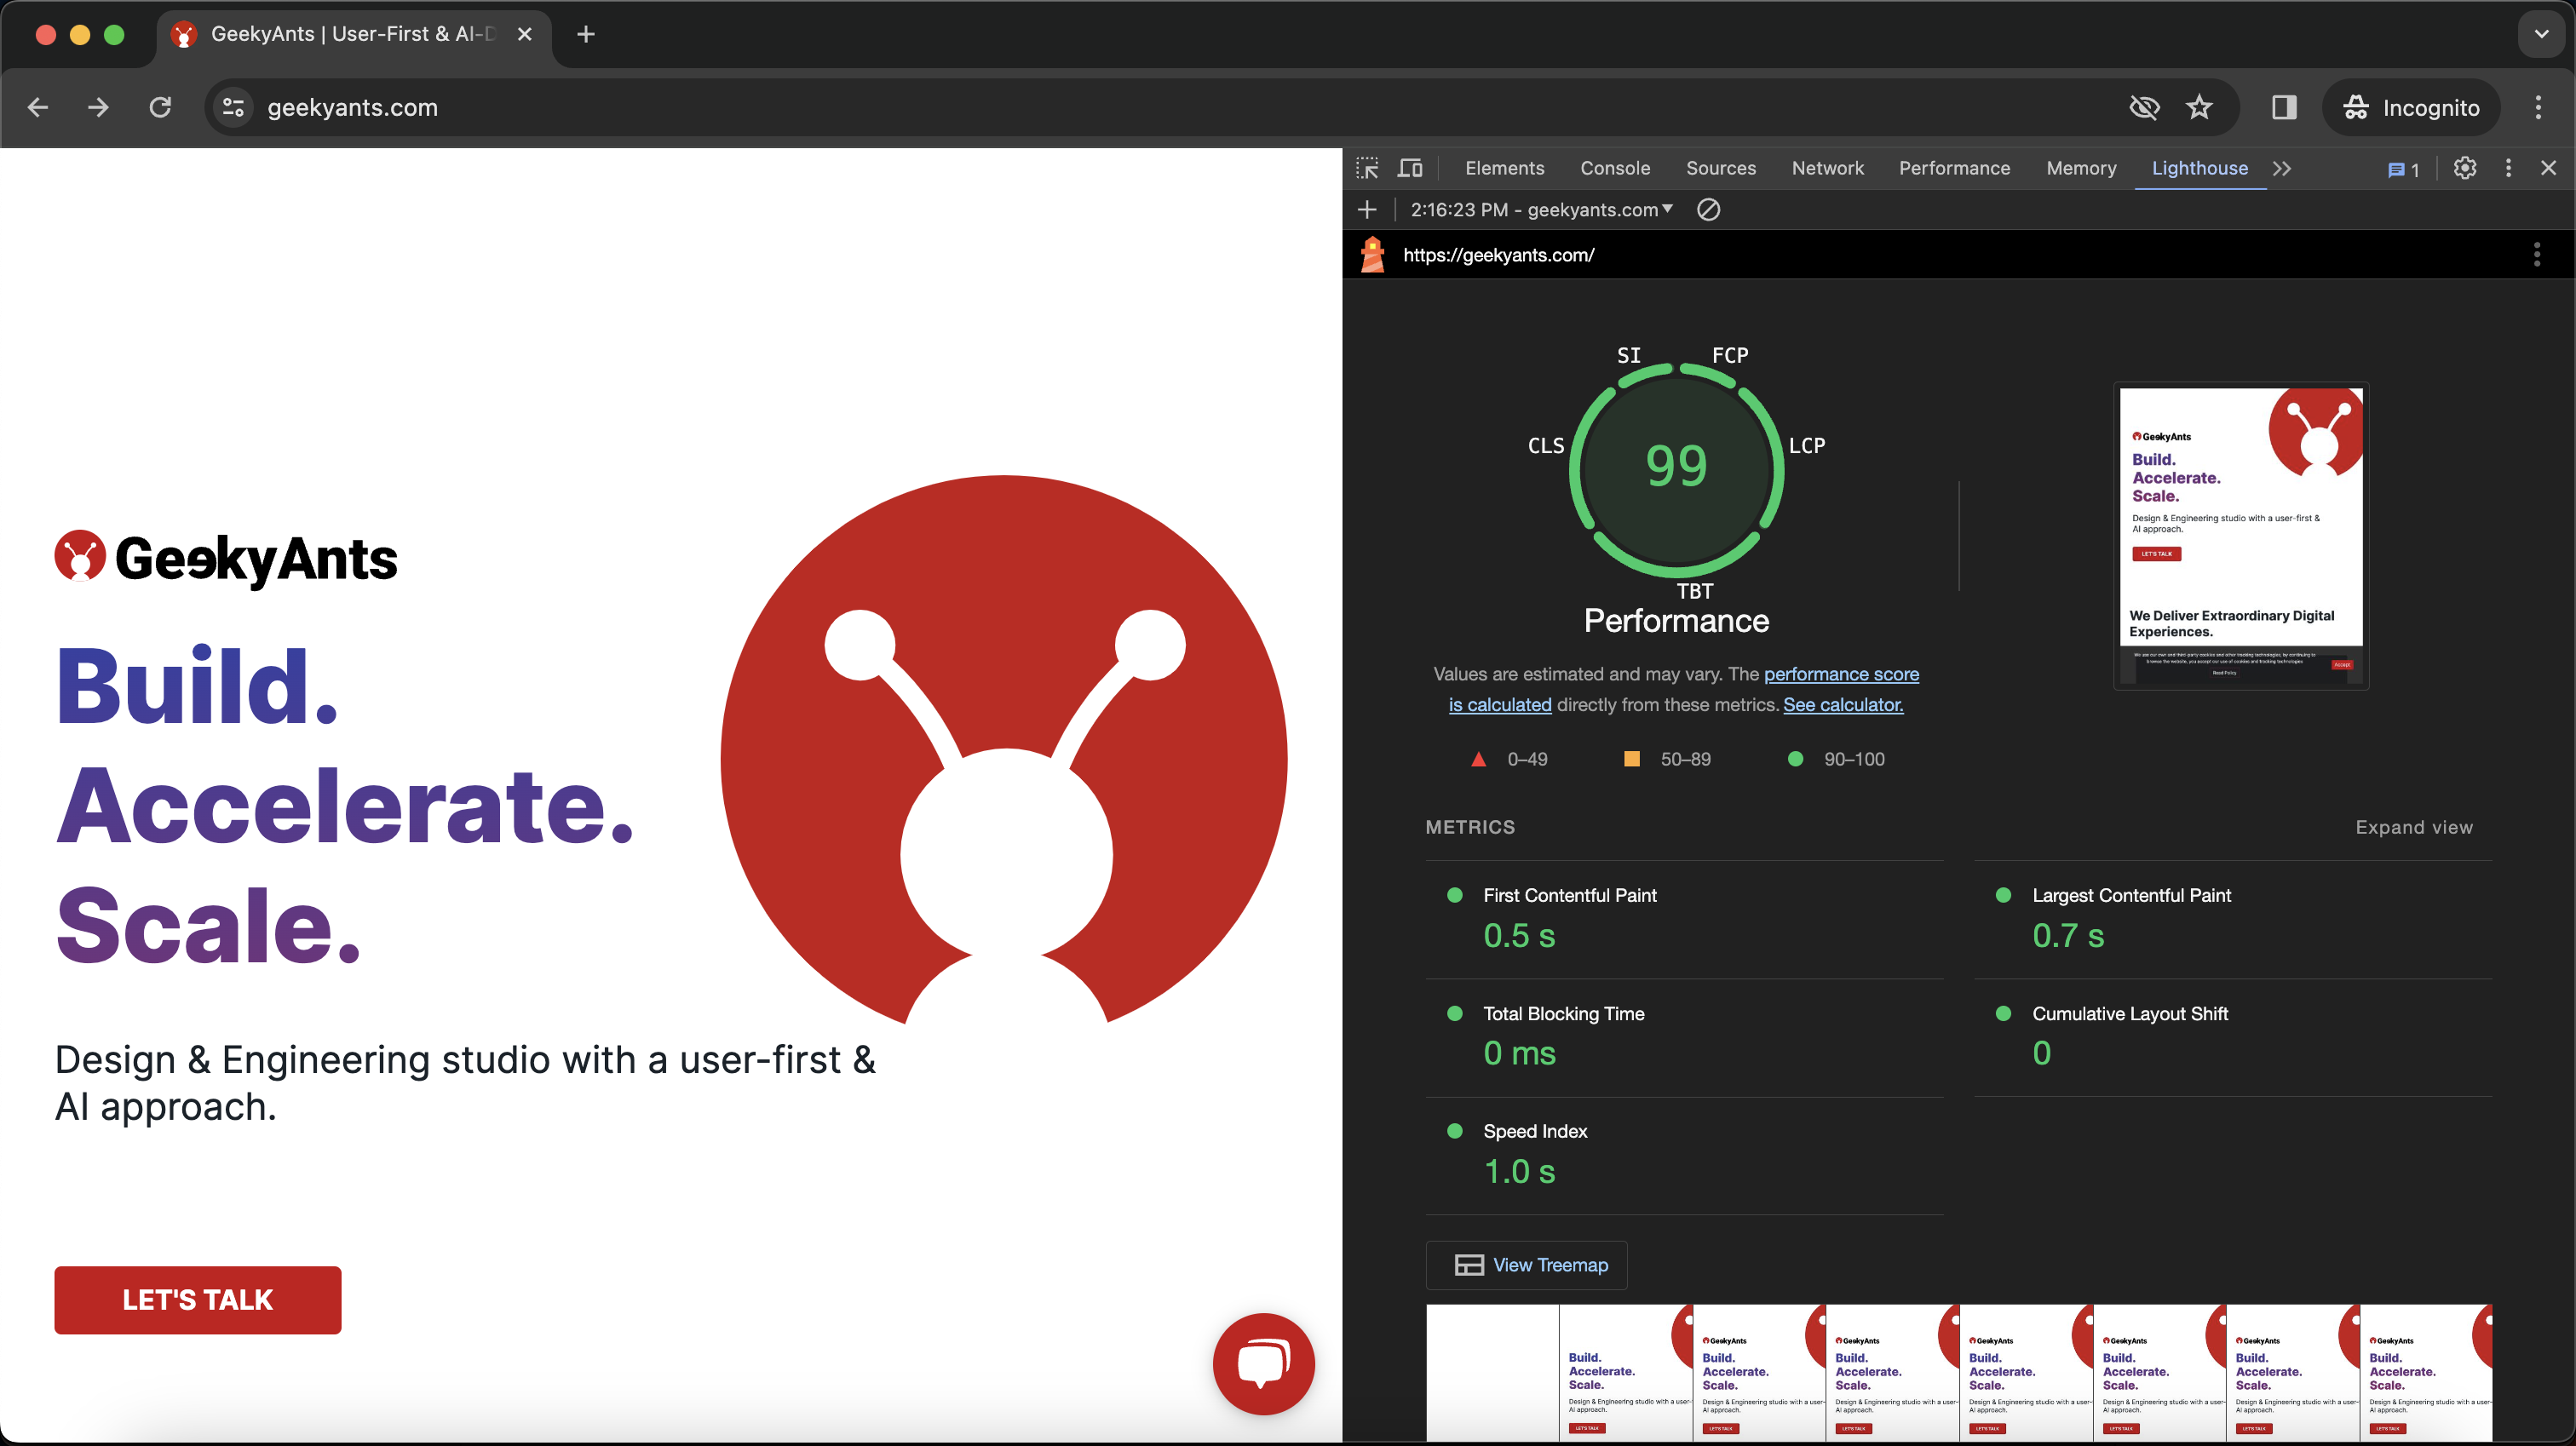
We recently upgraded our website geekyants.com to the latest version of Next.js using React Server Components (RSC). The goal was to improve our website's performance and user experience.
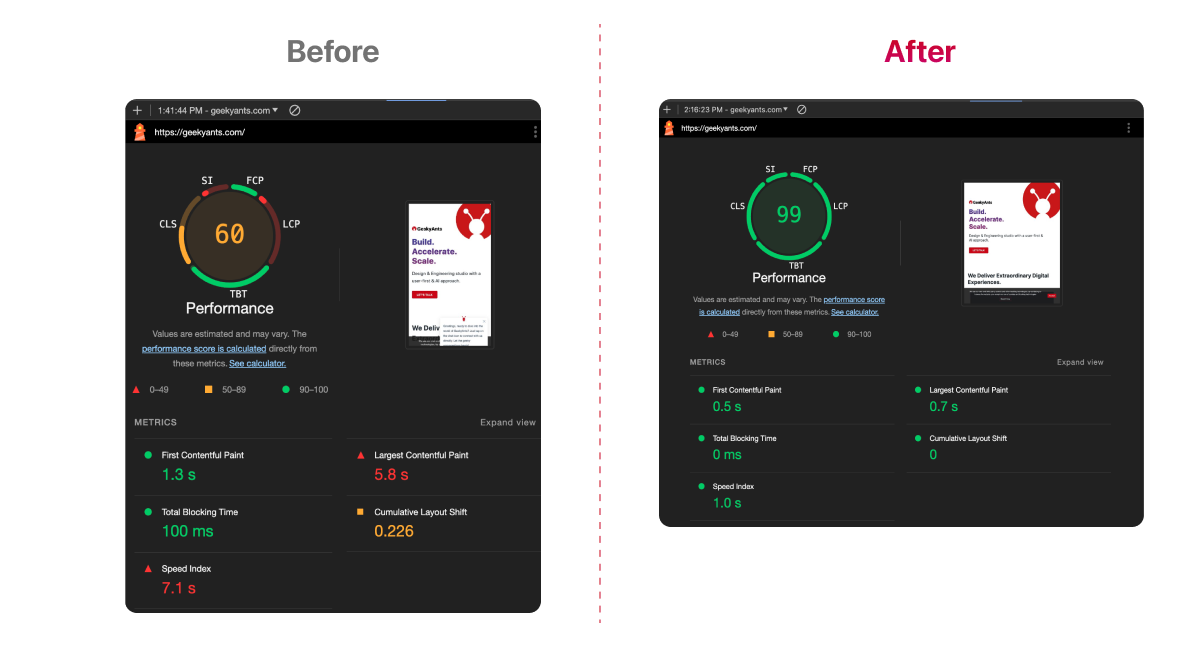
After deployment, we greatly boosted Lighthouse and PageSpeed scores, enhanced SEO health reports, and created a smoother user experience. The health scores reached 90+ and all parameters passed optimal standards.
This article summarizes what we learned and the process we followed to upgrade the website.
Why Upgrade & Challenges in Transitioning
We were dealing with low page speed and Lighthouse scores. It was affecting our SEO rankings. The scores averaged around 50, a suboptimal number. Moreover, since our landing page is full of information and media, optimizing it was hard.
Switching to React Server Components also meant changing how we handle API calls, moving from client-side to server-side. It would require us to reorganize our data-handling approach.
How We Upgraded: Improving Page Performance

We followed a process that involved upgrading to the latest Next.js version and the adoption of many new best practices standards. The details are below.
1. Adopting React Server Components
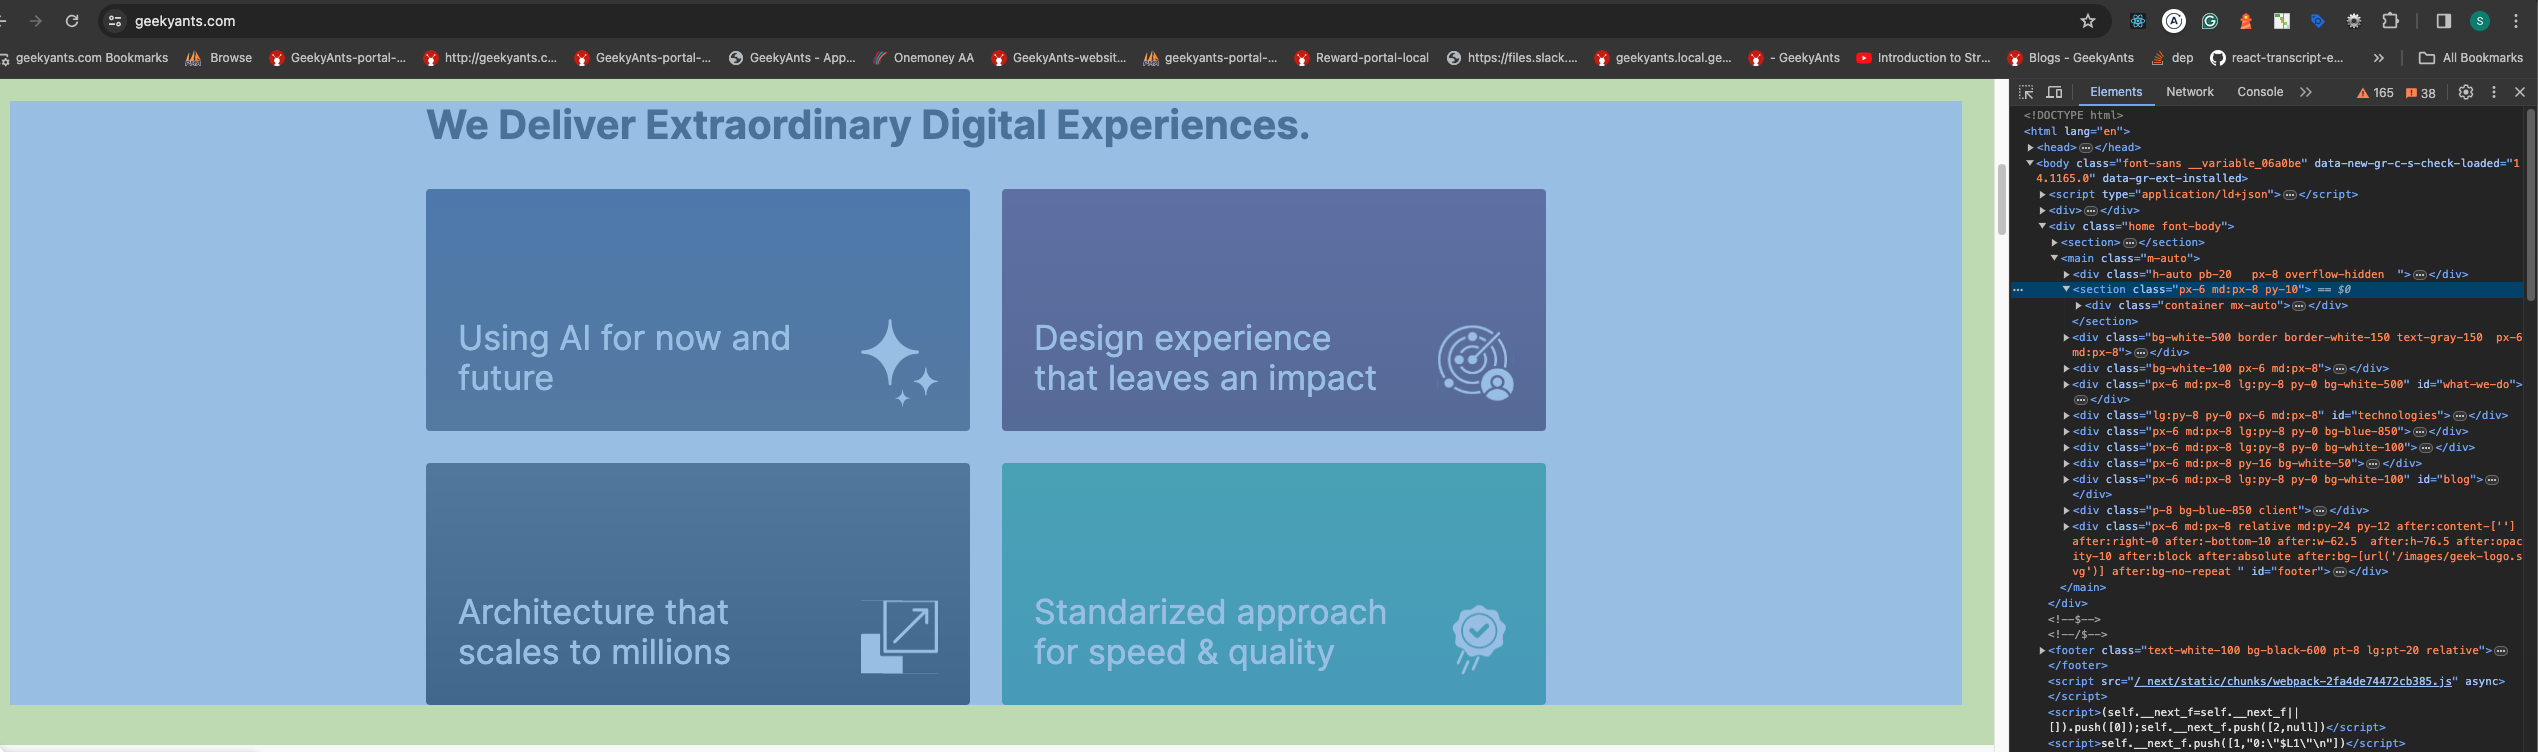
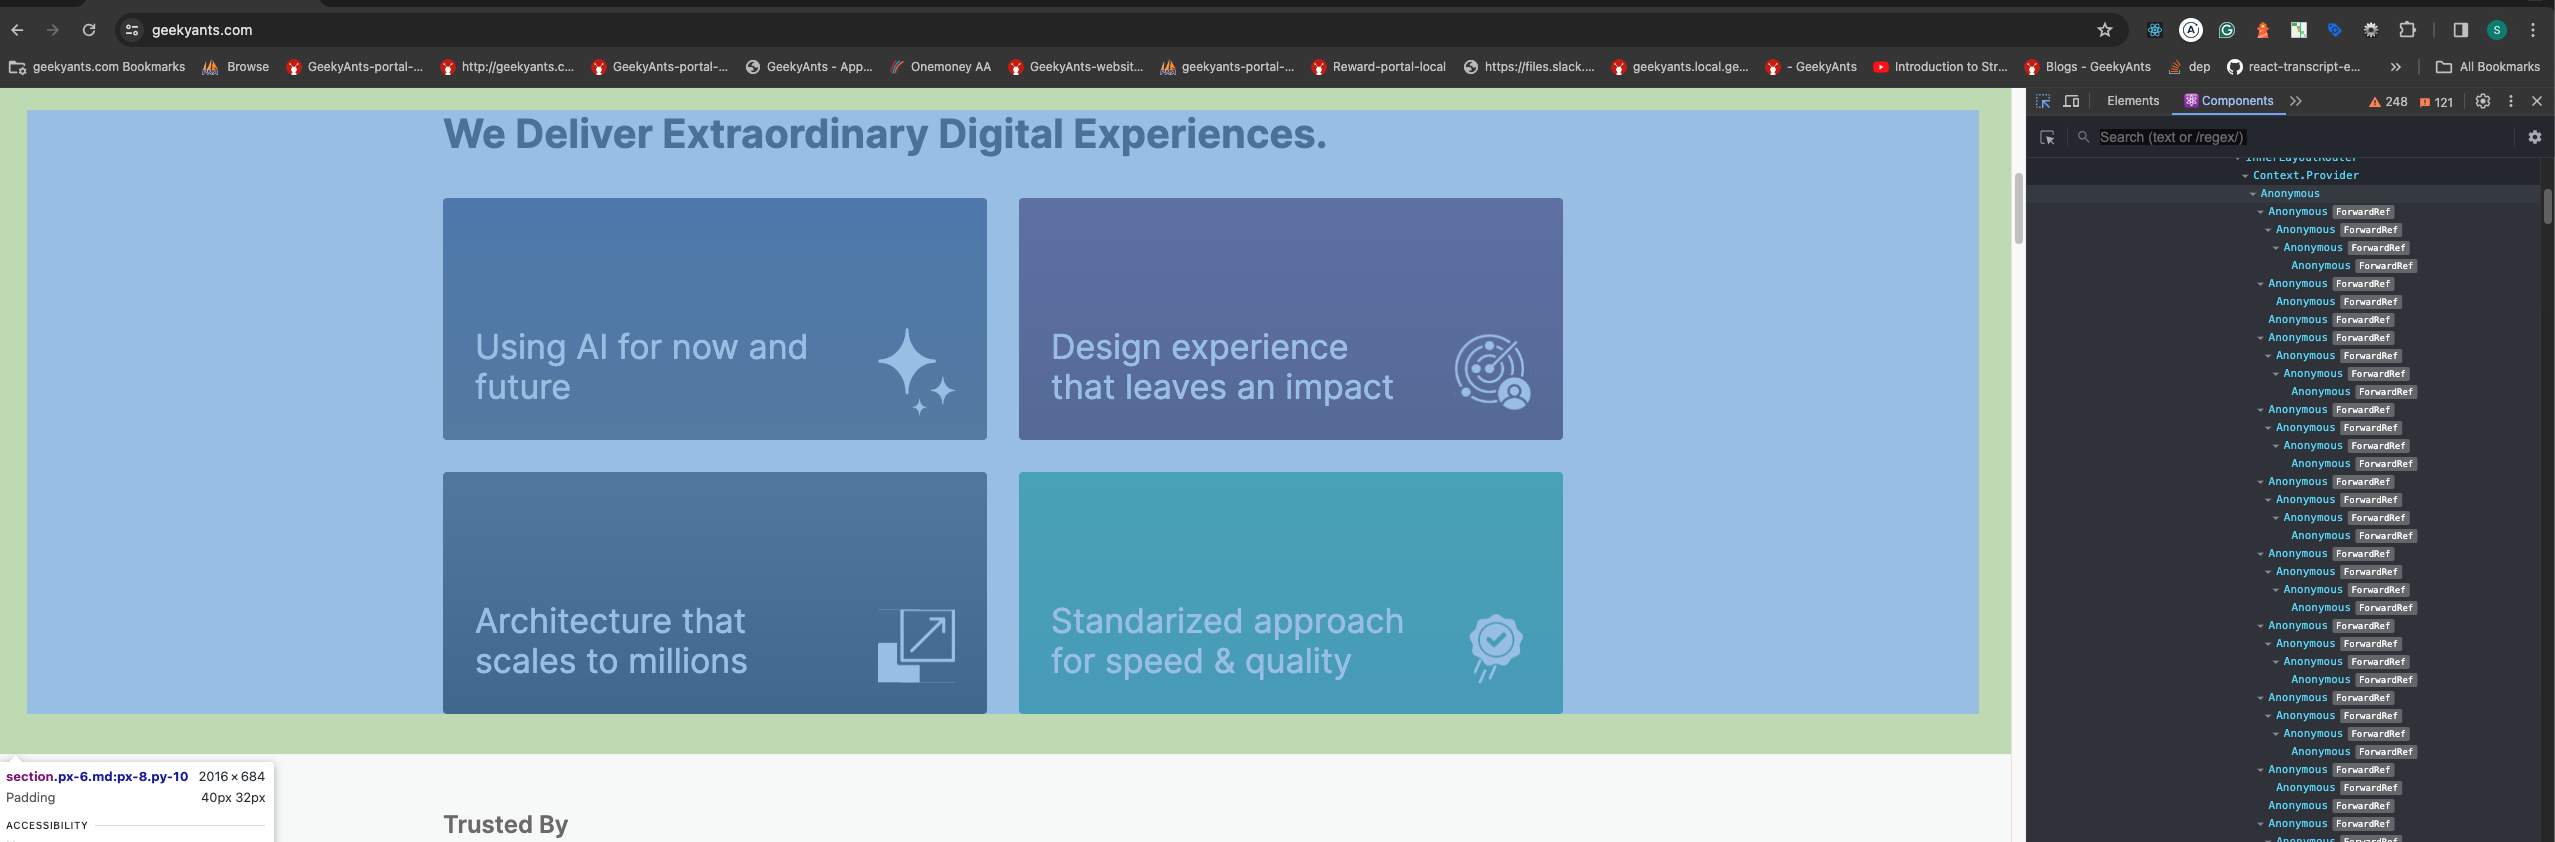
Using RSC, we reduced the need for client-side processing, making the site respond faster. This change resulted in less JavaScript being sent to the browser, which sped up how quickly the page could be interacted with and viewed. For example- The React tree is selective and doesn't create React Client components for all DOM elements.
2. SVG Optimization
We optimized our SVG handling by using CDN URLs for the SVGs, which helped speed up page loading without any additional DOM size.
When incorporating SVGs into your Next.js app, consider the following options:
- next/image Component: Next.js offers a powerful built-in feature for loading and rendering various image formats, including SVGs, with efficiency and performance optimizations. It extends the HTML image element, providing seamless integration and benefits such as automatic optimization.
- next-images Package: Alternatively, you can leverage the third-party next-images package for importing images. This package supports loading images from local machines or CDNs, and it offers additional features like embedding images with small bundle sizes in Base64 encoding and caching images with content hash. However, it lacks built-in image optimization techniques.
- SVGR Package: Another third-party option is SVGR, which converts SVG images into React components. By installing SVGR as a development dependency, you can import SVGs as React components within your Next.js application.
Keep in mind the trade-offs of using third-party packages, as they may add extra bundles to your application. While embedding SVGs inline is possible, it can complicate React components, increase their size, and negate the benefits of using the built-in next/image component.
In conclusion, Next.js' built-in next/image component provides comprehensive features for efficiently importing and utilizing images in a Next.js application, offering a balance of performance and convenience.
3. Hack to Add Interactivity to Server Components
We used wrapper client components to add interactive features without adding too much client-side JavaScript, keeping the site fast.
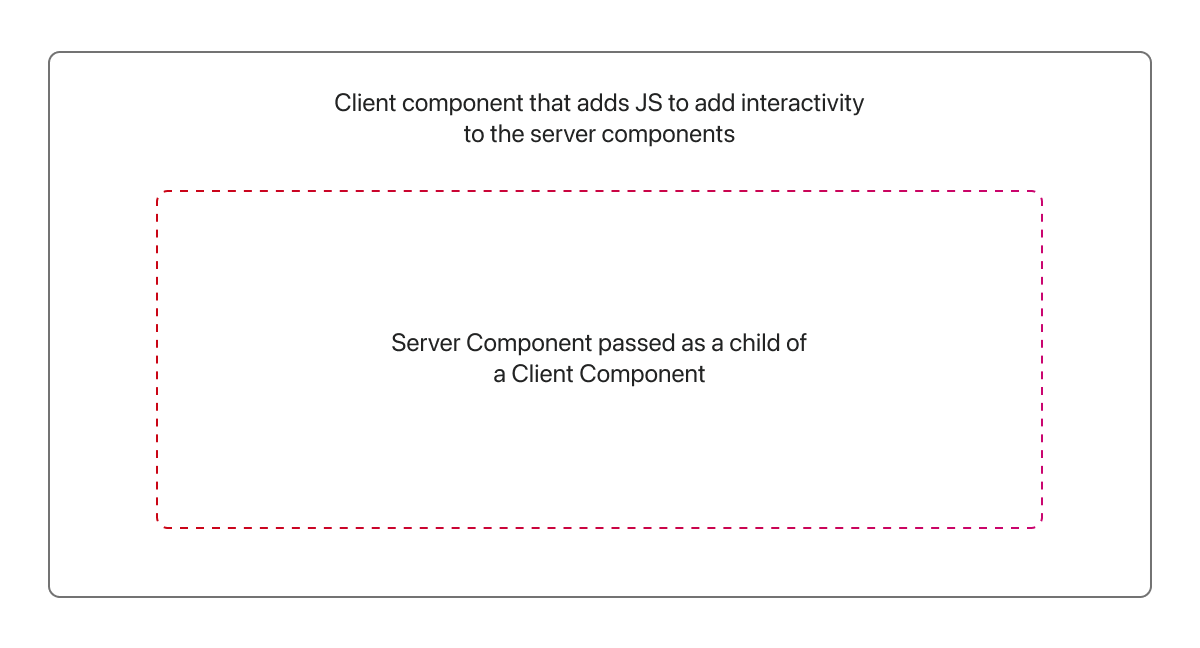
We aimed to make the menu header interactive, incorporating hover effects to show and hide items and a sticky header when scrolling, without converting the entire header into a client component. To achieve this, we've created a client component called ToggleHover.
ToggleHover.tsx
And then, we wrapped the DesktopMenu, which contains server-rendered HTML, under ToggleHover.
Header.tsx
4. Device-Specific Content Delivery
We started delivering optimised content for the device being used, reducing load times, especially for mobile users.
We aimed to ship the desktop menu and mobile menu separately. To achieve this, we fetched the user agent in the middleware and set it in the header, allowing us to utilize it in the layout.
Middleware.tsx
Whenever we wish to ship the component based on the device, we can retrieve the header and apply the necessary conditions.
Layout.tsx
Header.tsx
5. Third-Party Scripts Optimization
We changed how we load third-party scripts to reduce their impact on load times
@next/third-parties is presently an experimental library undergoing active development. We've utilized it for loading Google's third-party libraries such as Google Tag Manager and YouTube embeds.
(1) Using Next.js's advanced loading strategies
Layout.tsx
(2) Using setTimeout lazy loading of Chat
We created a distinct client component for loading the chat script with a delay and then utilized it in the Footer.tsx, which serves as a server component. This improved our TTFB.
ChatScript.js
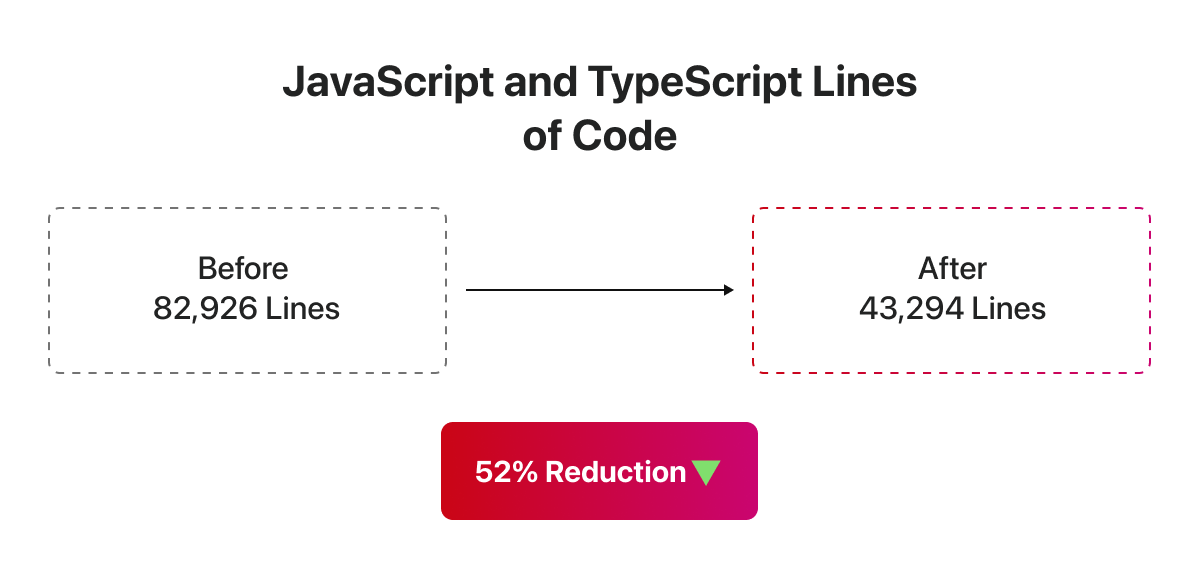
6. Code Reduction
We cut down our JavaScript and TypeScript code from 82,926 to 43,294 lines, which helped with faster build times, easier maintenance, and better performance.
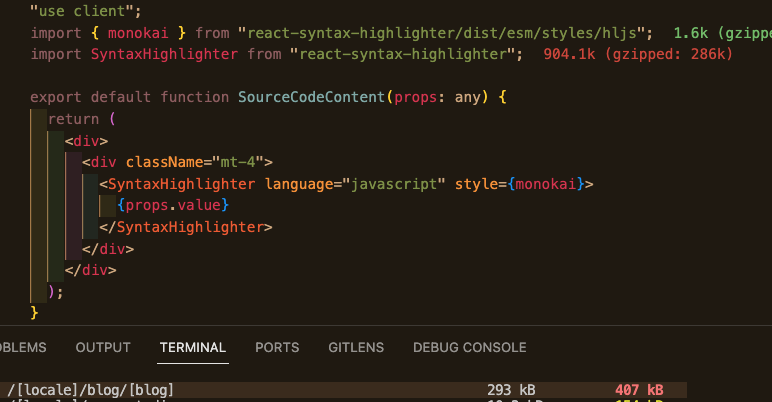
7. Using Dynamic Imports
Traditionally, applications load all the components and the CSS required by the application in the initial load. Dynamic import allows you to split your code into small chunks and load them on demand. This can be a huge performance boost, especially on mobile devices. This will also reduce the initial load time and the overall bundle size of the application.
We are utilizing the react-syntax-highlighter package to display code highlights on our article page. Previously, the build size was substantial; however, implementing dynamic import has significantly reduced the build size and contributed to performance improvement.

Key Takeaways and Best Practices
Our experience shows that improving a website's performance involves looking at all aspects, from asset handling to content delivery. If you're thinking about making similar changes, here are some tips:
Look at how you manage assets, like SVGs, to reduce load times.
- Use creative solutions, like wrapper components, to keep your site interactive without slowing it down.
- Deliver content based on the user's device to improve their experience.
- Manage third-party scripts wisely to avoid slowing down your site.
These changes have improved our scores and made the user experience on GeekyAnts.com much better, setting a new standard for our site's performance and efficiency.
What’s Next? Universal!
The next goal is to use Universal Components from gluestack-ui without compromising these lighthouse scores and ship a mobile app using the same codebase.
See you in the next experiment! 👨🔬
Dive deep into our research and insights. In our articles and blogs, we explore topics on design, how it relates to development, and impact of various trends to businesses.


