
A step-by-step guide on handling shared Google Drive collaboration through Next.js API route handlers
Recently, I had a requirement in my project to programmatically create folders within Shared Drives and upload files to those folders. I could not find any useful resources on how to do this. Therefore, I am writing this blog to assist others who might encounter the same need. This blog will explain how to use the newly introduced Next.js API Route handler to create folders and upload files to Shared Google Drives.
Prerequisites
To follow along, you'll need the following:
- A Google account
- A Google Drive to test
- Basic understanding of Next.js and React
- Node.js and a package manager like npm installed on your system
- Optional: Basic understanding of TypeScript as all of the code is in TypeScript, but even if you don't know TypeScript, you'll still be able to understand the code.
Setting up the Code
1. Let's start by creating a new Next.js project. You can do this by running the following command in your terminal:
npx create-next-app@latest2. Next, we need to install the googleapis package. This package will help us to interact with the Google Drive API. To install the package, run the following command in your terminal:
npm i googleapisThat's it for the code setup, we'll move on to the Google setup next.
Setting up the Google Cloud Console Project
To use the Google Drive API, we need to create a Google Cloud Console Project. To do this, follow the steps below:
- Go to the Google Cloud Console.
- Click on the Select a project dropdown at the top of the page.
- Click on New Project.
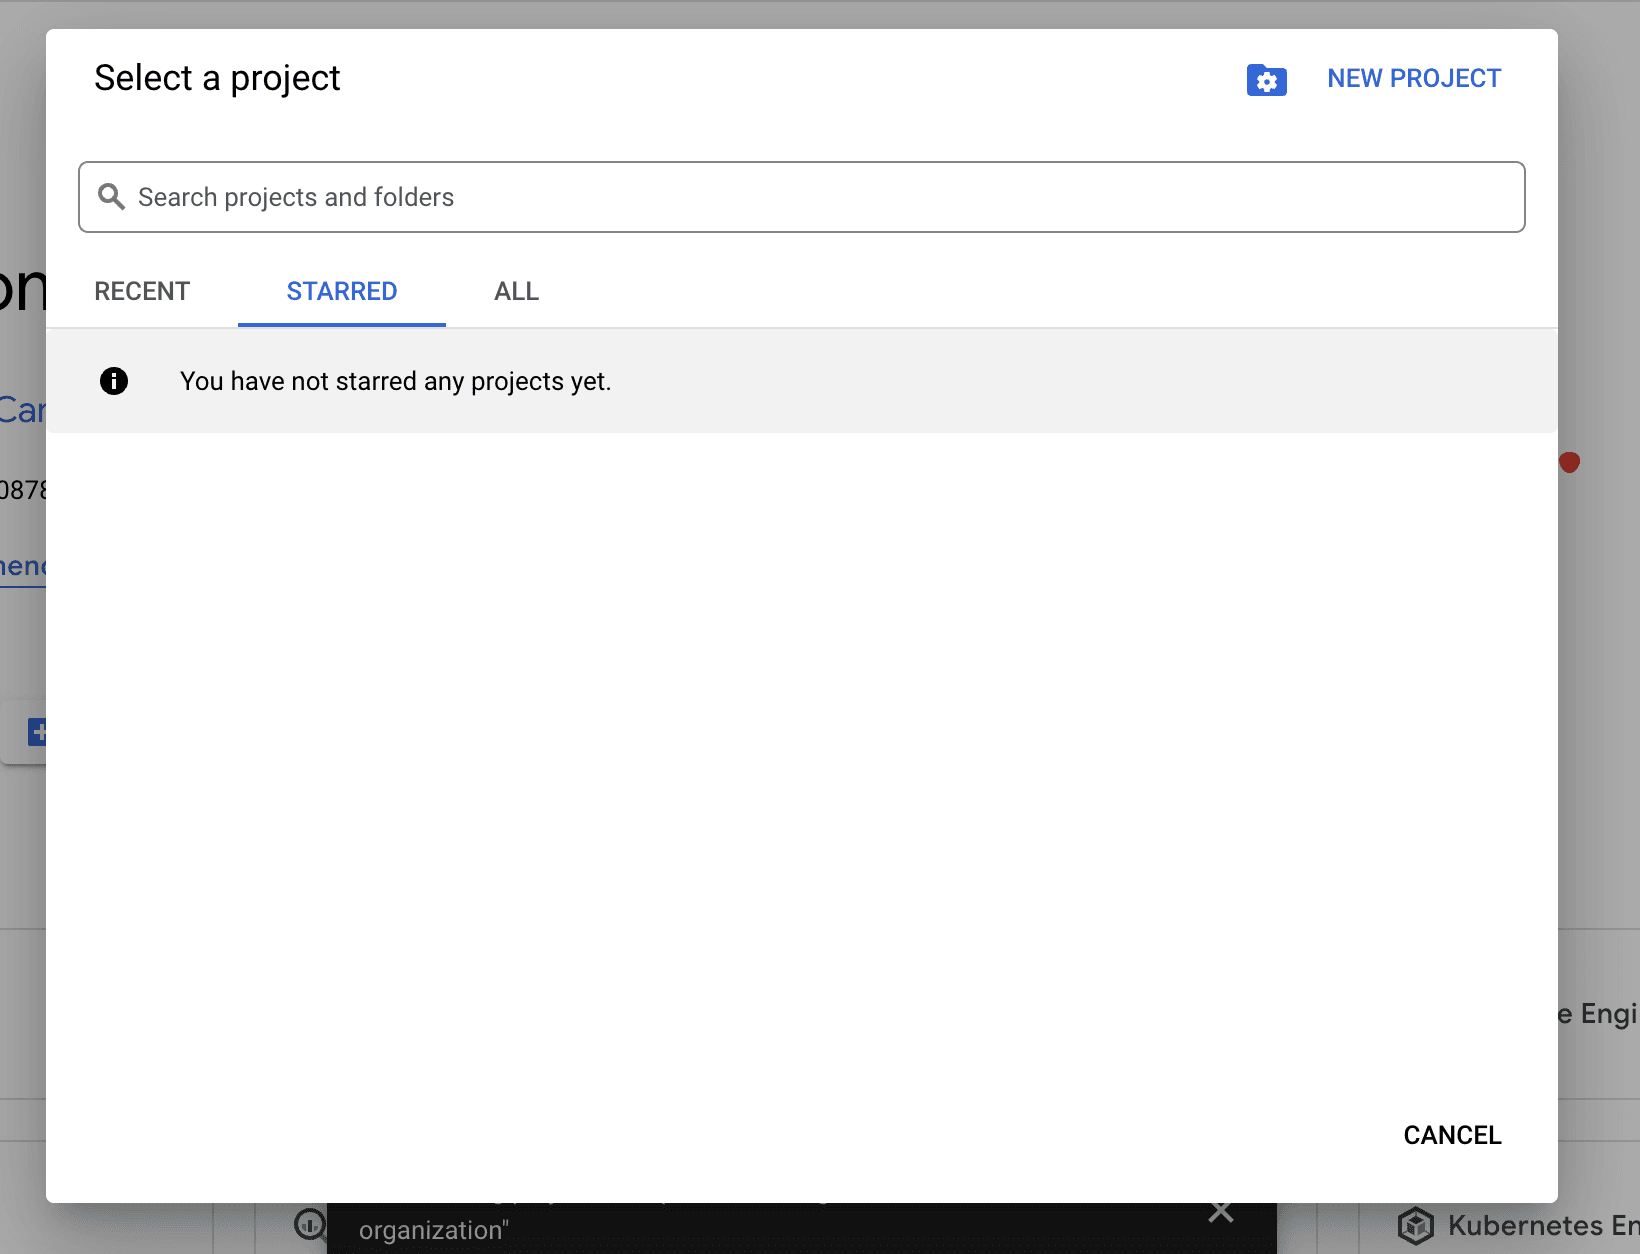
- Give your project a name and click on Create.
The project is now created, but to use the Google Drive API we need to enable it first. To do this, follow the steps below:
- Click on the navigation menu at the top left of the page.
- Click on “APIs & Services”.
- Click on “Library”.
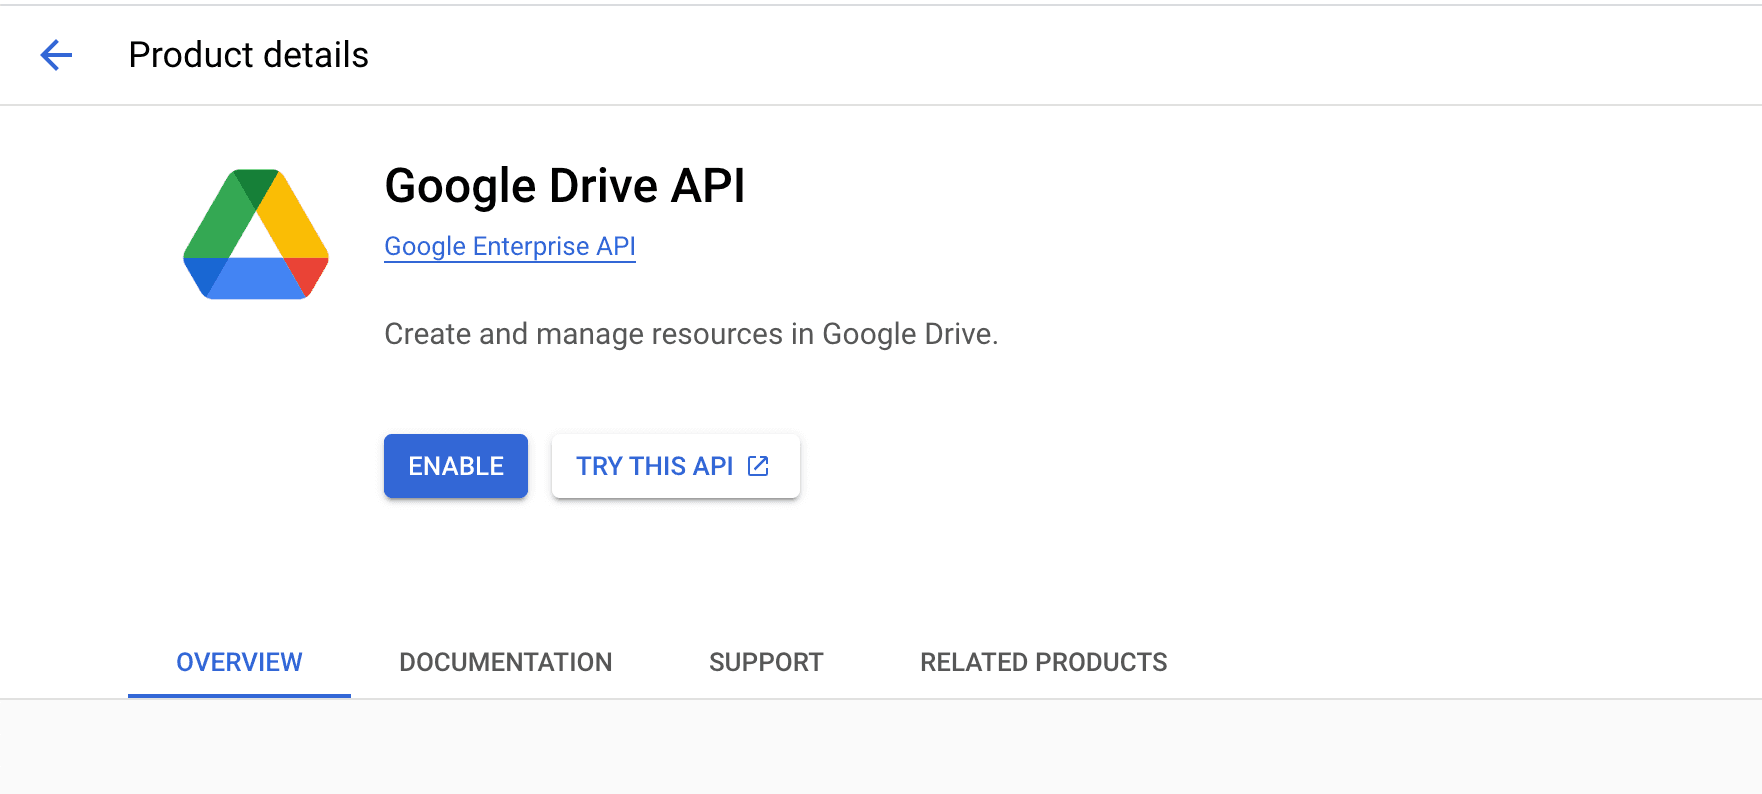
- Search for Google Drive API.
- Click on “Google Drive API”.
- Click on Enable.
Now that the Google Drive API is enabled, we need to create a service account to create the folders and upload the files. You can find out more about service accounts here. To do this, follow the steps below:
- Click on the navigation menu at the top left of the page.
- Click on “IAM & Admin”.
- Click on “Service Accounts”.
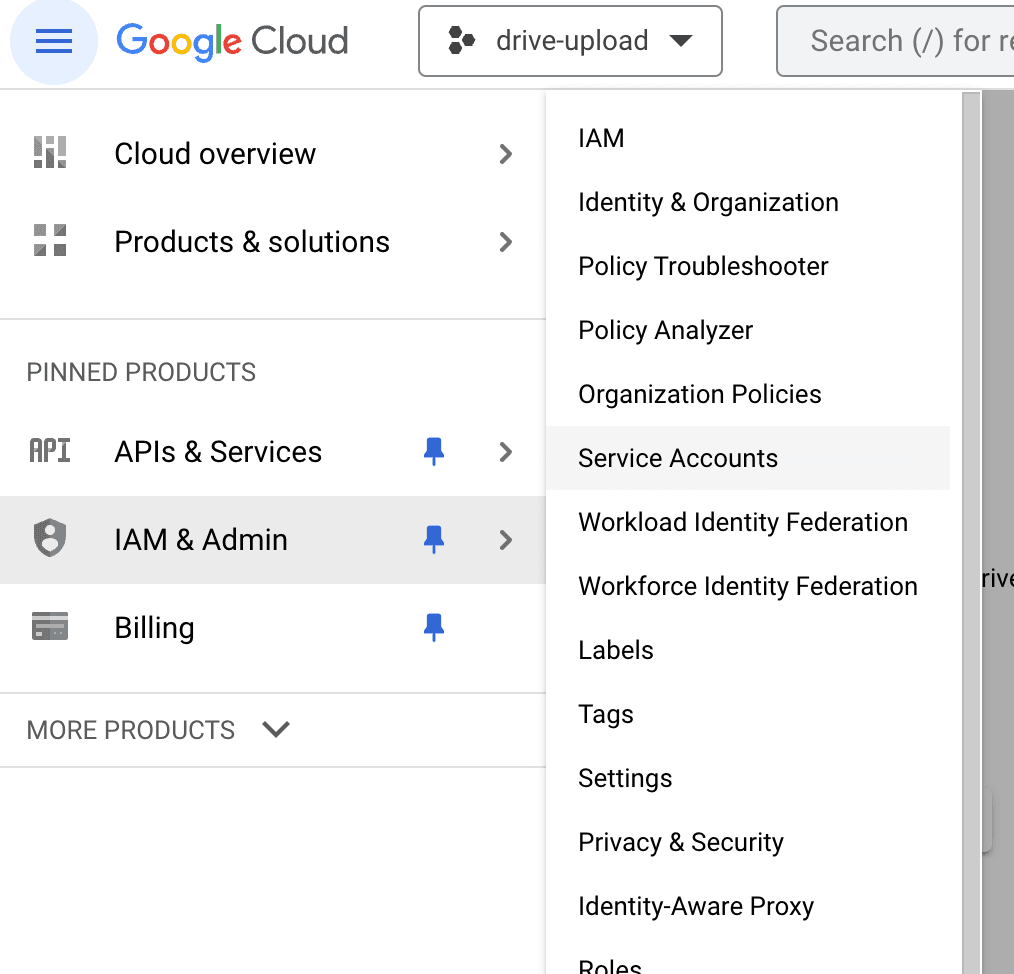
- Click on “Create Service Account”.
- Give your service account a name.
- Click on Create and Continue.
- Click on “Select a role” and select “Editor”
- Click on Continue.
- The next step is optional. You can add users to the service account if you want to. If you don't want to add any users, click on Done.
Why do we need a Service Account?
We need a Google account to create folders and upload files to Google Drive, but we don't want to use our personal Google accounts for this. So, we create a service account and use that to create folders and upload files to Google Drive.
The service account is successfully created; we will now need to create a key for the service account. To do this, follow the steps below:
- Click on the three dots next to the service account you just created.
- Click on “Manage keys”. Alternatively, you can click on the service account and then click on the Keys tab.
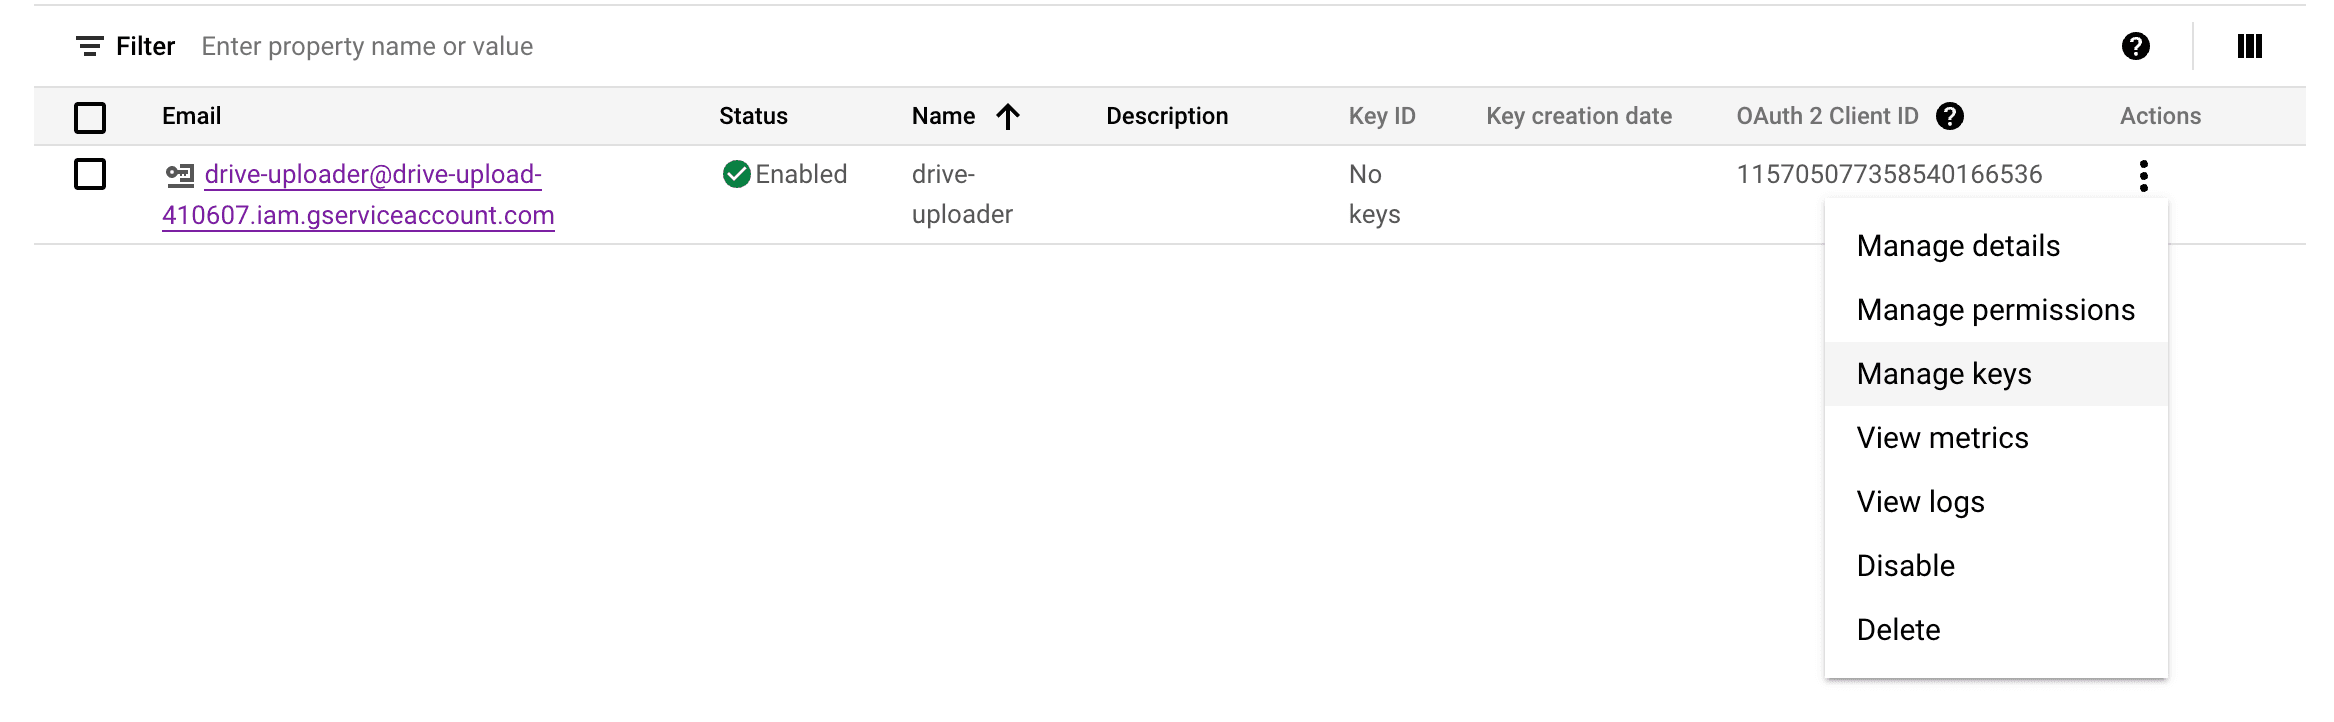
- Click on “Add Key”.
- Click on “Create new key”.
- Select JSON and click on Create.
- Your key will now be downloaded. Save this key somewhere as we will need it later.
Now that our Google Cloud Console Project is all set up, we can move on to the next step.
Creating a Shared Drive
Now, we need to create a shared drive where we will create the folders and upload the files. To do this, follow the steps below:
Note: You can create shared drives only if your edition supports them and your administrator allows you to create them. That means you can't create shared drives if you are using a personal account. It is usually supported by business and enterprise accounts.
- Go to Google Drive and click on “Shared drives”.
- Click on New.
- Give your shared drive a name and click on Create.
Now, we need to add the service account we created earlier to the shared drive so that it can create folders and upload files to it. To do this, follow the steps below:
- Click on the three dots next to the shared drive you just created.
- Click on “Manage members”.
- Click on “Add members”.
- Paste the email address of the service account you created earlier, you can find it in the JSON file you downloaded earlier.
- Select role as “Content manager”.
- Click on Send.
Now, our shared drive is all set up, and we can finally move on to writing some code.
Route Handlers
Next.js API Routes allow us to create API endpoints inside our Next.js application. In the pages router, we used to define our API routes in the pages/api directory. But in the new app router, we can define our API routes in the api directory. So let's create a folder called createFolder inside the api directory and create a file called route.ts inside it. This file will contain the code to create a folder inside the shared drive.
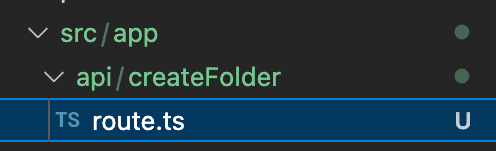
Now, before we start writing the code, remember the service account JSON key that we downloaded? We need to add some of the values from that JSON file to our .env.local file. So open the JSON file and copy the values of the client_email private_key and client_id and add them to your .env.local file like this:
NEXT_PUBLIC_PRIVATE_KEY="private_key"
NEXT_PUBLIC_CLIENT_EMAIL="client_email"
NEXT_PUBLIC_SERVICE_ACCOUNT_CLIENT_ID="client_id"
While we're at it, let's also add the ID of the shared drive we created earlier to our .env.local file. You can find the ID of the shared drive in the URL of the shared drive. For example, if the URL of the shared drive is drive.google.com/drive/folders/12345, then the ID of the shared drive is 12345. So add the ID of your shared drive to your .env.local file like this:
NEXT_PUBLIC_SHARED_DRIVE_ID=shared_drive_idNow that we have added our environment variables, let's get back to writing code.
Open createFolder/route.ts file and write the following code:
import { google } from "googleapis";
import { NextResponse } from "next/server";

const privateKey = process.env.NEXT_PUBLIC_PRIVATE_KEY;
const clientEmail = process.env.NEXT_PUBLIC_CLIENT_EMAIL;
const serviceAccountClientId =
  process.env.NEXT_PUBLIC_SERVICE_ACCOUNT_CLIENT_ID;

export const authenticateGoogle = () => {
  const auth = new google.auth.GoogleAuth({
    credentials: {
      type: "service_account",
      private_key: privateKey,
      client_email: clientEmail,
      client_id: serviceAccountClientId,
    },
    scopes: "https://www.googleapis.com/auth/drive",
  });

  return auth;
};

const uploadFolderToDrive = async (folderId: string, folderName: string) => {
  const auth = authenticateGoogle();
  const drive = google.drive({ version: "v3", auth });

  const folder = await drive.files.create({
    requestBody: {
      name: folderName,
      mimeType: "application/vnd.google-apps.folder",
      parents: [folderId],
      driveId: folderId,
    },
    supportsAllDrives: true, // required to allow folders to be created in shared drives
  });

  return {
    folder: folder,
  };
};

export async function POST(req: Request) {
  const res = await req.json();

  const { folderId, folderName } = res;

  const { folder } = await uploadFolderToDrive(folderId, folderName);

  return NextResponse.json(
    {
      folder,
    },
    {
      status: 200,
    }
  );
}
Now, let's go through the code line by line.
First, we import the googleapis package. Then we get the values of the environment variables we added to our .env.local file. Then, we define a function called authenticateGoogl,e which will authenticate our service account with the Google Drive API. Then we define a function called uploadFolderToDrive which will create a folder inside the shared drive. Then we define a POST request handler which will handle the POST request to our API route. Inside the POST request handler, we get the folderId and folderName from the request body. Then we call the uploadFolderToDrive function and pass the folderId and folderName to it. Then we return the folder in the response along with a status code of 200.
Now let's create another folder called uploadFile inside the api directory and create a route.ts file inside it. This file will contain the code to upload a file to the shared drive.
import { NextResponse } from "next/server";
import { google } from "googleapis";
import { authenticateGoogle } from "@/app/api/createFolder/route";
import mime from "mime";
import { Readable } from "stream";

// upload function
const uploadFileToDrive = async (
  folderId: string,
  file: any,
  driveId: string
) => {
  const auth = authenticateGoogle();
  const drive = google.drive({ version: "v3", auth });

  const mimeType = mime.getType(file.name);

  const fileMetadata = {
    name: file.name,
    parents: [folderId],
    driveId: driveId,
    mimeType: mimeType,
  };

  const fileBuffer = file.stream();

  const response = await drive.files.create({
    requestBody: fileMetadata,
    media: {
      mimeType: mimeType!,
      body: Readable.from(fileBuffer),
    },
    fields: "id", // only return the file ID, we don't need all the other information
    supportsAllDrives: true, // required to allow folders to be created in shared drives
  });

  // get file link
  const fileLink = await drive.files.get({
    fileId: response.data.id!,
    fields: "webViewLink",
    supportsAllDrives: true,
  });

  return fileLink.data;
};

// POST request handler
export async function POST(req: Request) {
  const res = await req.formData();

  const folderId = res.get("folderId") as string;
  const driveId = res.get("driveId") as string;
  const file = res.get("file") as File;

  if (!folderId || !driveId || !file) {
    return NextResponse.json(
      {
        error: "Missing folderId, driveId, or file",
      },
      {
        status: 400,
      }
    );
  }

  const fileLink = await uploadFileToDrive(folderId, file, driveId);

  return NextResponse.json(
    {
      fileLink,
    },
    {
      status: 200,
    }
  );
}
Now, let's go through the code line by line.
First, we add the necessary imports, including the authenticateGoogle function that we used for the createFolder route. Next, we define a function called uploadFileToDrive, which will upload the file to the shared drive. Within this function, we call our authenticateGoogle function just as we did in the createFolder route. Then, we obtain the mimeType of the file using the mime package, which you'll need to install. After that, we define the fileMetadata that we use as the request body for the drive.files.create method. Once the file is created, we fetch the link to the created file so that we can return it in the response. Next, we define a POST request handler to manage the POST requests to our API route. Inside this handler, we retrieve the folderId, file, and driveId from the request body. Then, we call the uploadFileToDrive function, passing in the folderId, file, and driveId. Finally, we return the fileLink in the response.
Testing our API routes with the UI
Now that we have created the route handlers, let's test them with the UI. To do this, we will develop a simple UI that allows us to create folders and upload files to the shared drive. First, let's create a folder called' drive' inside the app directory and then create a file named' page.tsx' inside it. This file will contain the code for the UI. Keep in mind, this UI is solely for testing purposes, so we won't delve into much detail; particularly regarding the segregation of client and server components, since this blog focuses more on the API route handlers and the Google Drive API. Now, proceed to write the following code in the' page.tsx' file:
"use client";

import React, { useState } from "react";

const driveId = process.env.NEXT_PUBLIC_SHARED_DRIVE_ID;

const Page = () => {
  const [folderId, setFolderId] = useState("");
  const [folderName, setFolderName] = useState("");
  const [file, setFile] = useState<File | null>(null);

  const createFolder = async () => {
    const body = {
      folderId: driveId,
      folderName,
    };

    const res = await fetch("/api/createFolder", {
      method: "POST",
      body: JSON.stringify(body),
    });

    const data = await res.json();

    const id = data.folder.data.id;
    const link = `https://drive.google.com/drive/folders/${id}`;

    // redirect to folder link
    const win = window.open(link, "_blank");
    win!.focus();
  };

  const uploadFile = async () => {
    if (!file) return;

    const formData = new FormData();

    formData.append("folderId", folderId);
    formData.append("file", file);
    formData.append("driveId", driveId!);

    const res = await fetch("/api/uploadFile", {
      method: "POST",
      body: formData,
    });

    const data = await res.json();

    const link = data.fileLink.webViewLink;

    // redirect to file link
    const win = window.open(link, "_blank");
    win!.focus();
  };

  return (
    <div>
      <div>
        <h1>Create Folder</h1>

        <input
          type="text"
          placeholder="Folder Name"
          value={folderName}
          onChange={(e) => setFolderName(e.target.value)}
        />

        <button onClick={createFolder}>Create Folder</button>
      </div>

      <div>
        <h1>Upload File</h1>

        <input
          type="text"
          placeholder="Parent Folder ID"
          value={folderId}
          onChange={(e) => setFolderId(e.target.value)}
        />

        <input
          type="file"
          placeholder="File"
          onChange={(e) => setFile(e.target.files![0])}
        />

        <button onClick={uploadFile}>Upload File</button>
      </div>
    </div>
  );
};

export default Page;
Now let's have a look at what's going on in the code.
We have created a simple UI with two forms. The first form is for creating a folder, and the second form is for uploading a file. We have two handler functions called createFolder and uploadFile. These functions handle the POST requests to our API routes. Inside the createFolder function, we retrieve the folderName from the state and the folderId from the environment variable that stores the shared drive's ID. Then, we make a POST request to our createFolder API route and pass the folderId and folderName to it. After that, we get the folderId from the response, create a link to the folder, and redirect the user to that link. Similarly, inside the uploadFile function, we obtain the folderId and file from the state and the driveId from the same environment variable used in the createFolder handler. Then, we make a POST request to our uploadFile API route and pass the folderId, file, and driveId to it. Finally, we get the file link from the response, create a link to the file, and redirect the user to that link.
That's it for the UI part; we have successfully tested our API route handlers!
Conclusion
We have successfully expanded the capabilities of Next.js API Routes by using them to create folders and upload files to Google Drive. Feel free to play around with the code and let me know if you have any questions or suggestions in the comments below. I hope you found this blog helpful.