

In-app purchases (IAPs) are a key feature for many mobile apps, enabling developers to monetize their apps through subscriptions, consumables, or one-time purchases.
IAP allows users to buy content, subscriptions, or services within an app. IAPs are commonly used to sell additional features, virtual goods, premium content, or access to subscriptions. There are four primary types of IAPs:
- Consumables: Items that can be purchased, used, and repurchased (e.g., game currency, power-ups).
- Non-Consumables: One-time purchases that provide permanent access to content or features (e.g., unlocking a premium feature or removing ads).
- Subscriptions: Recurring payments that provide access to content or services for a defined period (e.g., monthly or yearly premium access).
- Non-Renewing Subscriptions: These are time-limited purchases that do not auto-renew (e.g., season passes)
Advantages of IAP:
- Monetization Flexibility: IAP provides flexible monetization strategies. Developers can offer one-time purchases, consumables, or recurring subscriptions, diversifying revenue streams.
- User Convenience: Users can easily make purchases within the app without leaving the app environment, offering a seamless experience and driving more sales.
- Global Reach: App stores handle currency conversions, taxes, and compliance, allowing developers to sell to global users with ease.
- Recurring Revenue: With subscriptions, apps can maintain a steady revenue flow by providing ongoing services (e.g., access to content libraries, premium features).
Retention and Engagement: Offering premium features or content through IAP can improve user retention and engagement by incentivizing continued app usage.
Implementing in-app purchases can be complex due to the various platform-specific intricacies and challenges. Fortunately, using RevenueCat simplifies this process.
In this blog, we'll walk through the full implementation of in-app purchases in a React Native app using RevenueCat and its library, react-native-purchases.
Introduction to RevenueCat and React Native Purchases
RevenueCat is a powerful service that simplifies managing in-app purchases and subscriptions for mobile apps. It abstracts the complexities of platform-specific APIs like StoreKit for iOS and Google Play Billing for Android. The react-native-purchases library is RevenueCat's official React Native SDK, enabling seamless integration with both Android and iOS platforms. You can read more about it here.
Key Benefits:
- Cross-platform support (iOS and Android)
- Real-time subscription management
- Easy access to customer purchase history
- Server-side receipt validation and revenue tracking
Setting Up RevenueCat
Before diving into code, you'll need to set up your RevenueCat account and configure your app.
Step 1: Sign Up and Create an App
- Visit the RevenueCat dashboard and sign up for an account.
- Once signed in, create a new app under the "Apps" section. This app will hold the details of your product offerings (subscriptions, consumables, etc.).
Step 2: Add Product Offerings
- Navigate to "Products" and define the different in-app purchases (IAPs) your app will support. For example, you could offer monthly, yearly subscriptions, or one-time purchases.
Step 3: Configure API Keys
- In your app's settings, you’ll find the "API Keys" section. Copy the Public API Key, as it will be used in your React Native app to authenticate with RevenueCat.
Installing and Setting Up the React Native Purchases Library
Now that you’ve set up your RevenueCat account, it’s time to integrate the library into your app.
Step 1: Install the Library
Use the following commands to install the react-native-purchases library and link it to your project:
npm install react-native-purchases
npx pod-install
Step 2: Configure iOS
In the ios/ directory, open the .xcworkspace file in Xcode. Then:
- Navigate to your project’s target and select Signing & Capabilities.
- Ensure that In-App Purchases and App Store Connect capabilities are enabled.
Additionally, ensure you have added your products and subscription groups in App Store Connect.
Step 3: Configure Android
For Android, update the AndroidManifest.xml with the necessary permissions:
<uses-permission android:name="com.android.vending.BILLING" />Also, ensure that your in-app products are created and available in Google Play Console under your app's "In-App Products" section.
Configuring In-App Purchases on Google Play and App Store
To allow your app to sell products, you'll need to configure the products in both App Store Connect (iOS) and Google Play Console (Android).
iOS:
- In App Store Connect, navigate to your app.
- Under the Features tab, create your in-app purchase products or subscriptions.
- Ensure that you assign them to the correct subscription group (for subscriptions).
Android:
- In Google Play Console, go to your app’s dashboard.
- Under Monetize > Products, create your in-app products and subscriptions.
Once both platforms are configured you’ll be able to test them using sandbox environments.
Implementing In-App Purchases in Your React Native App
Let's get into the actual implementation of IAPs in your app.
Step 1: Initialise RevenueCat in Your App
In your app's entry point (App.js or index.js), initialise the RevenueCat Purchases SDK with your Public API Key:
import Purchases from 'react-native-purchases';
import { Platform } from 'react-native';

const apiKey = Platform.select({
  ios: 'your_ios_public_api_key',
  android: 'your_android_public_api_key',
});

Purchases.configure({ apiKey });
This will initialize the SDK and connect it to RevenueCat’s backend.
Step 2: Fetch Available Products
You need to fetch the available products (subscriptions, consumables, or non-consumables) to display to the user:
async function fetchProducts() {
  try {
    const offerings = await Purchases.getOfferings();
    if (offerings.current) {
      // Display available products
      return offerings.current.availablePackages;
    }
  } catch (e) {
    console.log("Error fetching offerings: ", e);
  }
}
Step 3: Display Products to Users
You can now render a list of available products in your UI:
{products.map((product) => (
  <TouchableOpacity key={product.identifier} onPress={() => purchaseProduct(product)}>
    <Text>{product.product.title} - {product.product.priceString}</Text>
  </TouchableOpacity>
))}
Step 4: Purchase a Product
Handle product purchases by calling the Purchases.purchasePackage method:
async function purchaseProduct(package) {
  try {
    const { purchaserInfo, productIdentifier } = await Purchases.purchasePackage(package);

    if (purchaserInfo.entitlements.active['premium']) {
      // Unlock premium features
      console.log("User has premium!");
    }
  } catch (e) {
    console.log("Purchase error: ", e);
  }
}
Step 5: Handle Purchase Restores
When a user reinstalls the app or switches devices, you’ll need to allow them to restore their previous purchases:
async function restorePurchases() {
  try {
    const purchaserInfo = await Purchases.restoreTransactions();
    if (purchaserInfo.entitlements.active['premium']) {
      // Unlock premium features
    }
  } catch (e) {
    console.log("Restore error: ", e);
  }
}
Handling Purchases and Subscriptions
RevenueCat simplifies subscription management. The Purchases.getPurchaserInfo() method allows you to check the current state of a user's subscriptions.
async function checkSubscription() {
  const purchaserInfo = await Purchases.getPurchaserInfo();
  if (purchaserInfo.entitlements.active['premium']) {
    // User has access to premium
  }
}
RevenueCat’s backend automatically handles receipt validation and renewals, reducing the effort required to manage the purchase flow.
Best Practices and Troubleshooting
1. Test in Sandbox Mode:
Use the sandbox environment in App Store Connect and Google Play Console to test your in-app purchases before going live. Read more about it here.
2. Handle Cancellations and Refunds:
Use RevenueCat’s webhooks to receive notifications when subscriptions are cancelled or refunded. Learn more about it here.
3. Monitor with RevenueCat Dashboard:
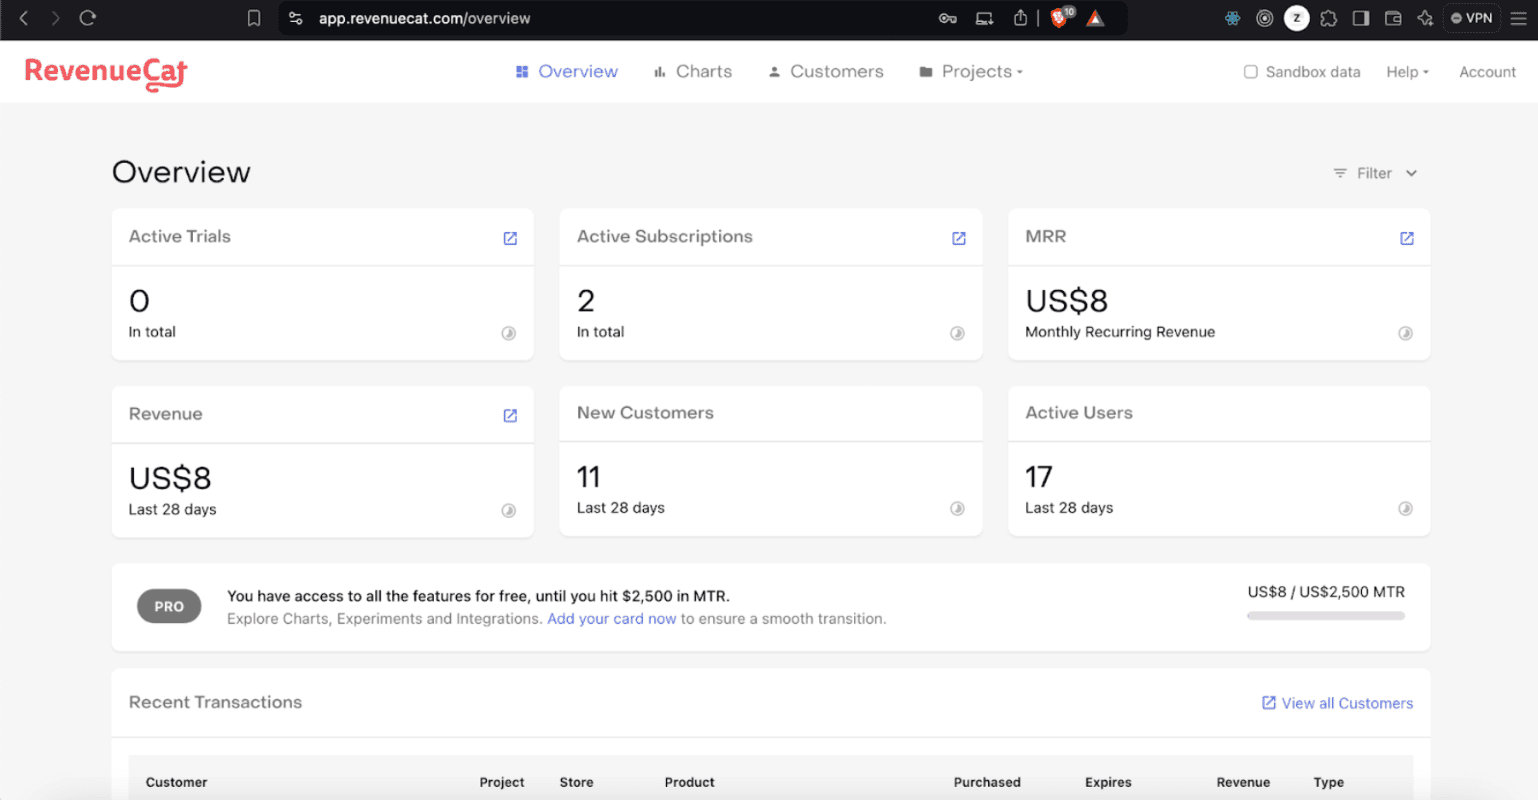
The RevenueCat dashboard provides real-time insights into purchases and customer status. Use it to monitor user activities and revenue metrics.
4. Fallbacks:
Always implement proper fallbacks in case of network issues, failed purchases, or unexpected errors to ensure a smooth user experience.
Conclusion
Implementing in-app purchases in a React Native app can be simplified with RevenueCat. The react-native-purchases SDK allows you to manage both iOS and Android in-app purchases under one unified interface, reducing complexity and enhancing maintainability. With the step-by-step guide in this blog, you should be able to seamlessly integrate IAPs into your app, monetize your app, and manage subscriptions effortlessly.
Happy coding!







