Nov 30, 2020
Strapi.io - Design APIs Fast
Design APIs fast, manage content easily.
Author


Book a call
Strapi is a flexible, open-source Headless CMS that gives developers the freedom to choose their favorite tools and frameworks, while also allowing editors to easily manage and distribute their content. By making the admin panel and API extensible through a plugin system, Strapi enables the world's largest companies to accelerate content delivery while building beautiful digital experiences.
Why Strapi.io?
Strapi can generate an admin panel in a few clicks and get your whole CMS set up in a few steps.
Strapi’s admin panel gives you an intuitive interface to create, edit and delete your content and automatically creates logic to handle CRUD operations, including filtering and permissions.
It has a built-in user system that allows you to manage users Roles & Permissions
Moreso, every part of your application can be easily customized. Strapi’s architecture allows you to extend your app to match your exact use case and install plugins like GraphQL etc. to your application.
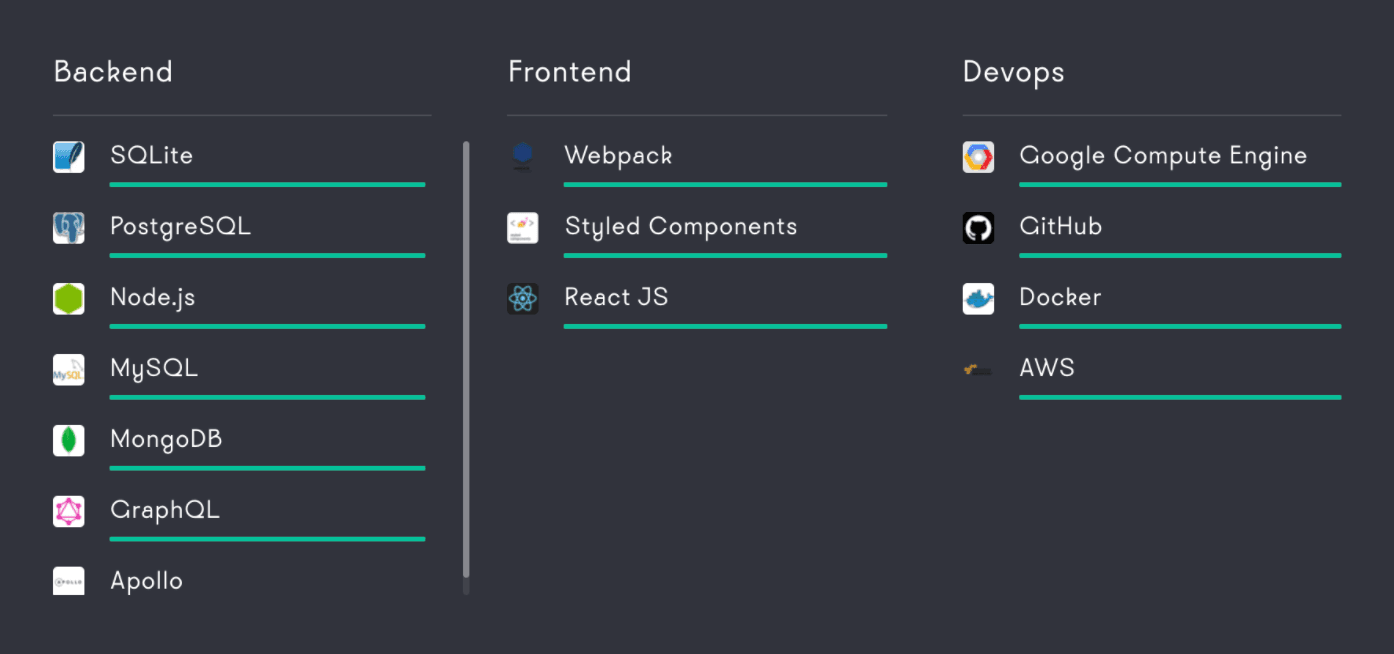
Strapi's Tech Stack
To build, deploy, and manage Strapi, use the following recommended frameworks and programming languages for best results:
How To Use Strapi-CLI.
Before you engage in creating a new project, it is very important to update your Node.js to (>v12.x). Go ahead and update it before reading on.
1. Create a new project:
If you want to use a specific database, you don’t have to use the --quickstart flag. The CLI will let you choose the database of your choice.
By default, create-strapi-app will generate an empty Strapi project. If you want an application that is pre-configured for a specific use case than you can use --template with template GitHub URL
2. Start the project:
Note: If created with --quickstart, then it will automatically run your application.
Navigate to http://localhost:1337/admin and create the first admin user.
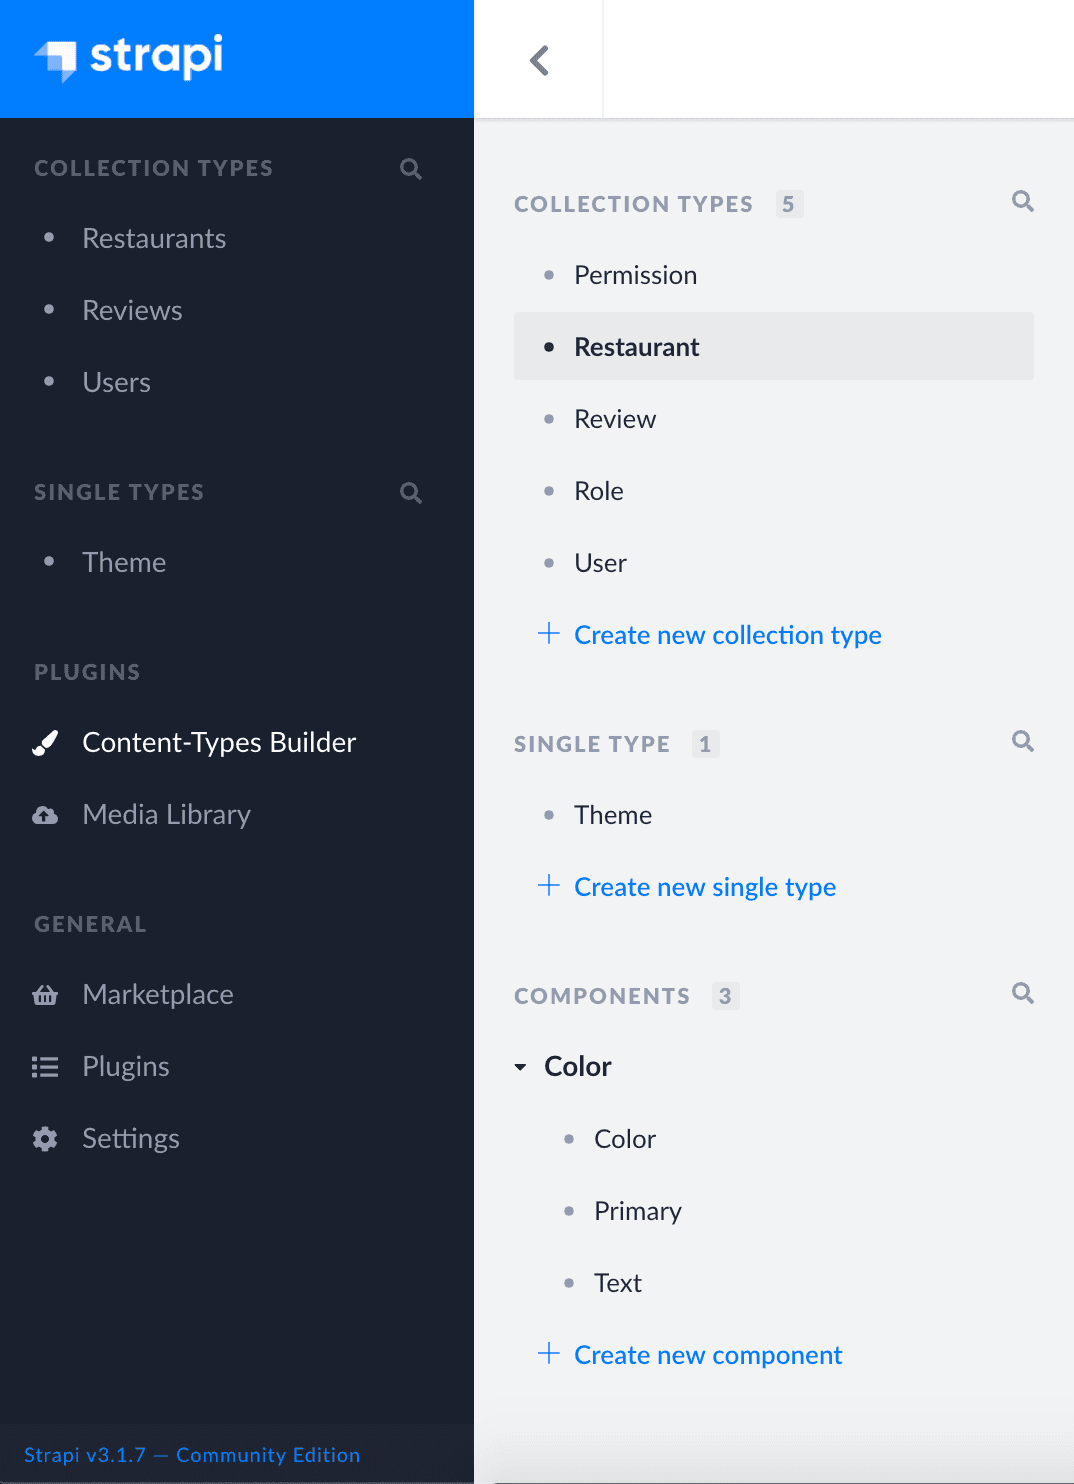
- Navigate to
Content-Type Builderfrom the side panel under Plugins. - Click on
+ Create new collection typelink and create a new collection.
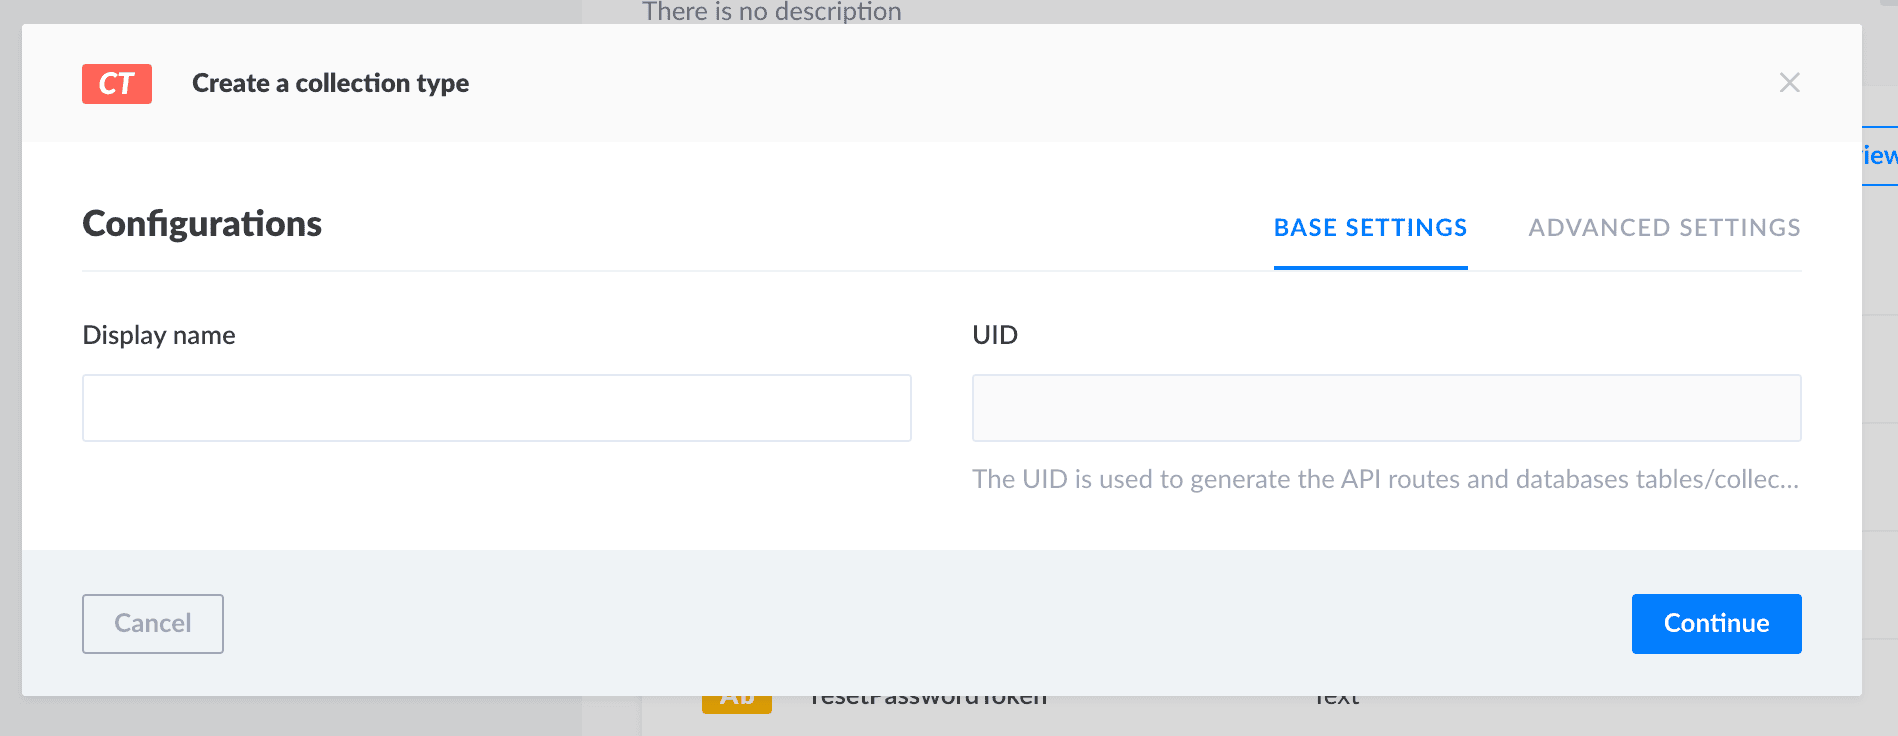
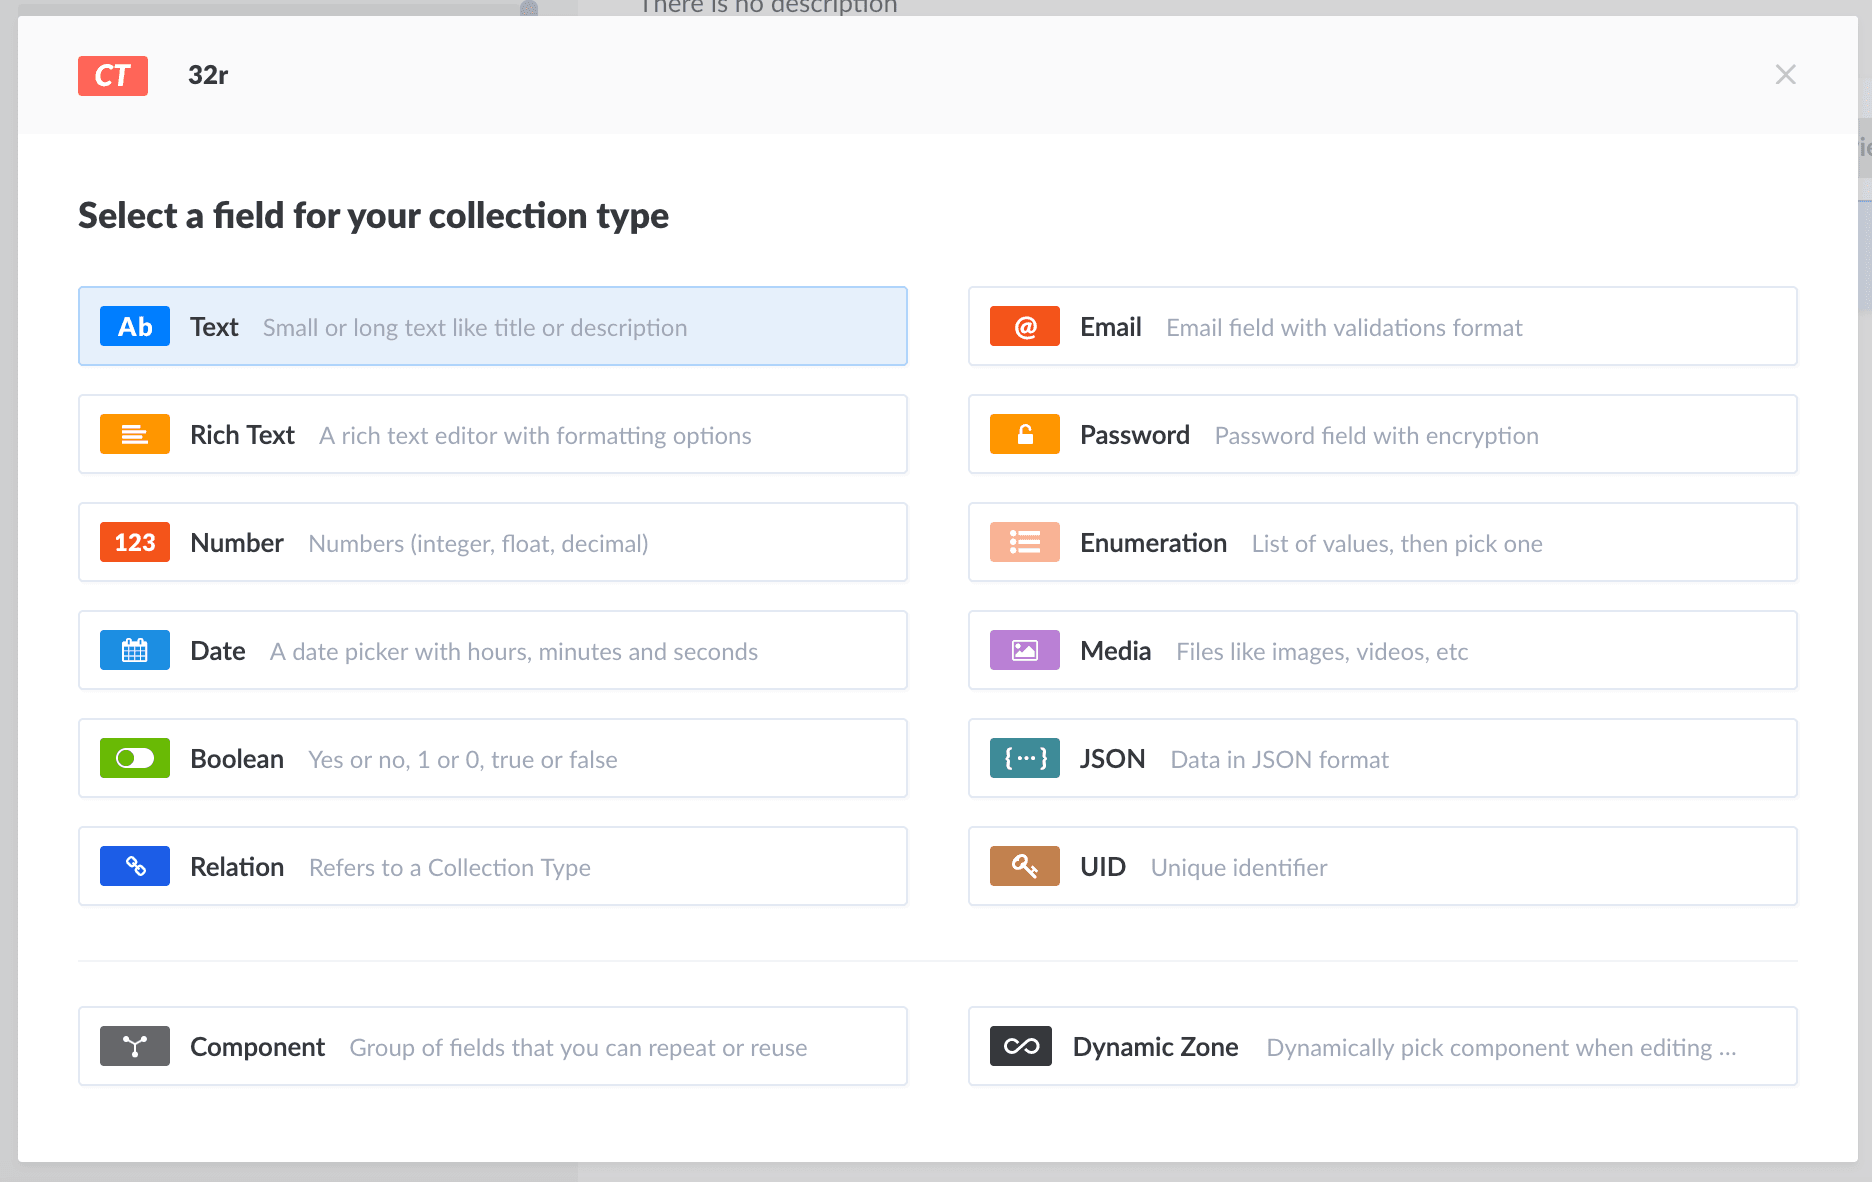
- Add one or more fields for your collection.
- Edit
BASE SETTINGandADVANCE SETTINGto add field names and properties. - Click
finishto update all the fields to collection. - Finally, click
Saveto save the collection.
5. Add content to your collection
- Navigate to COLLECTION TYPES from the side panel.
- Click on the
+ Add New Restaurantbutton to add a new entry.
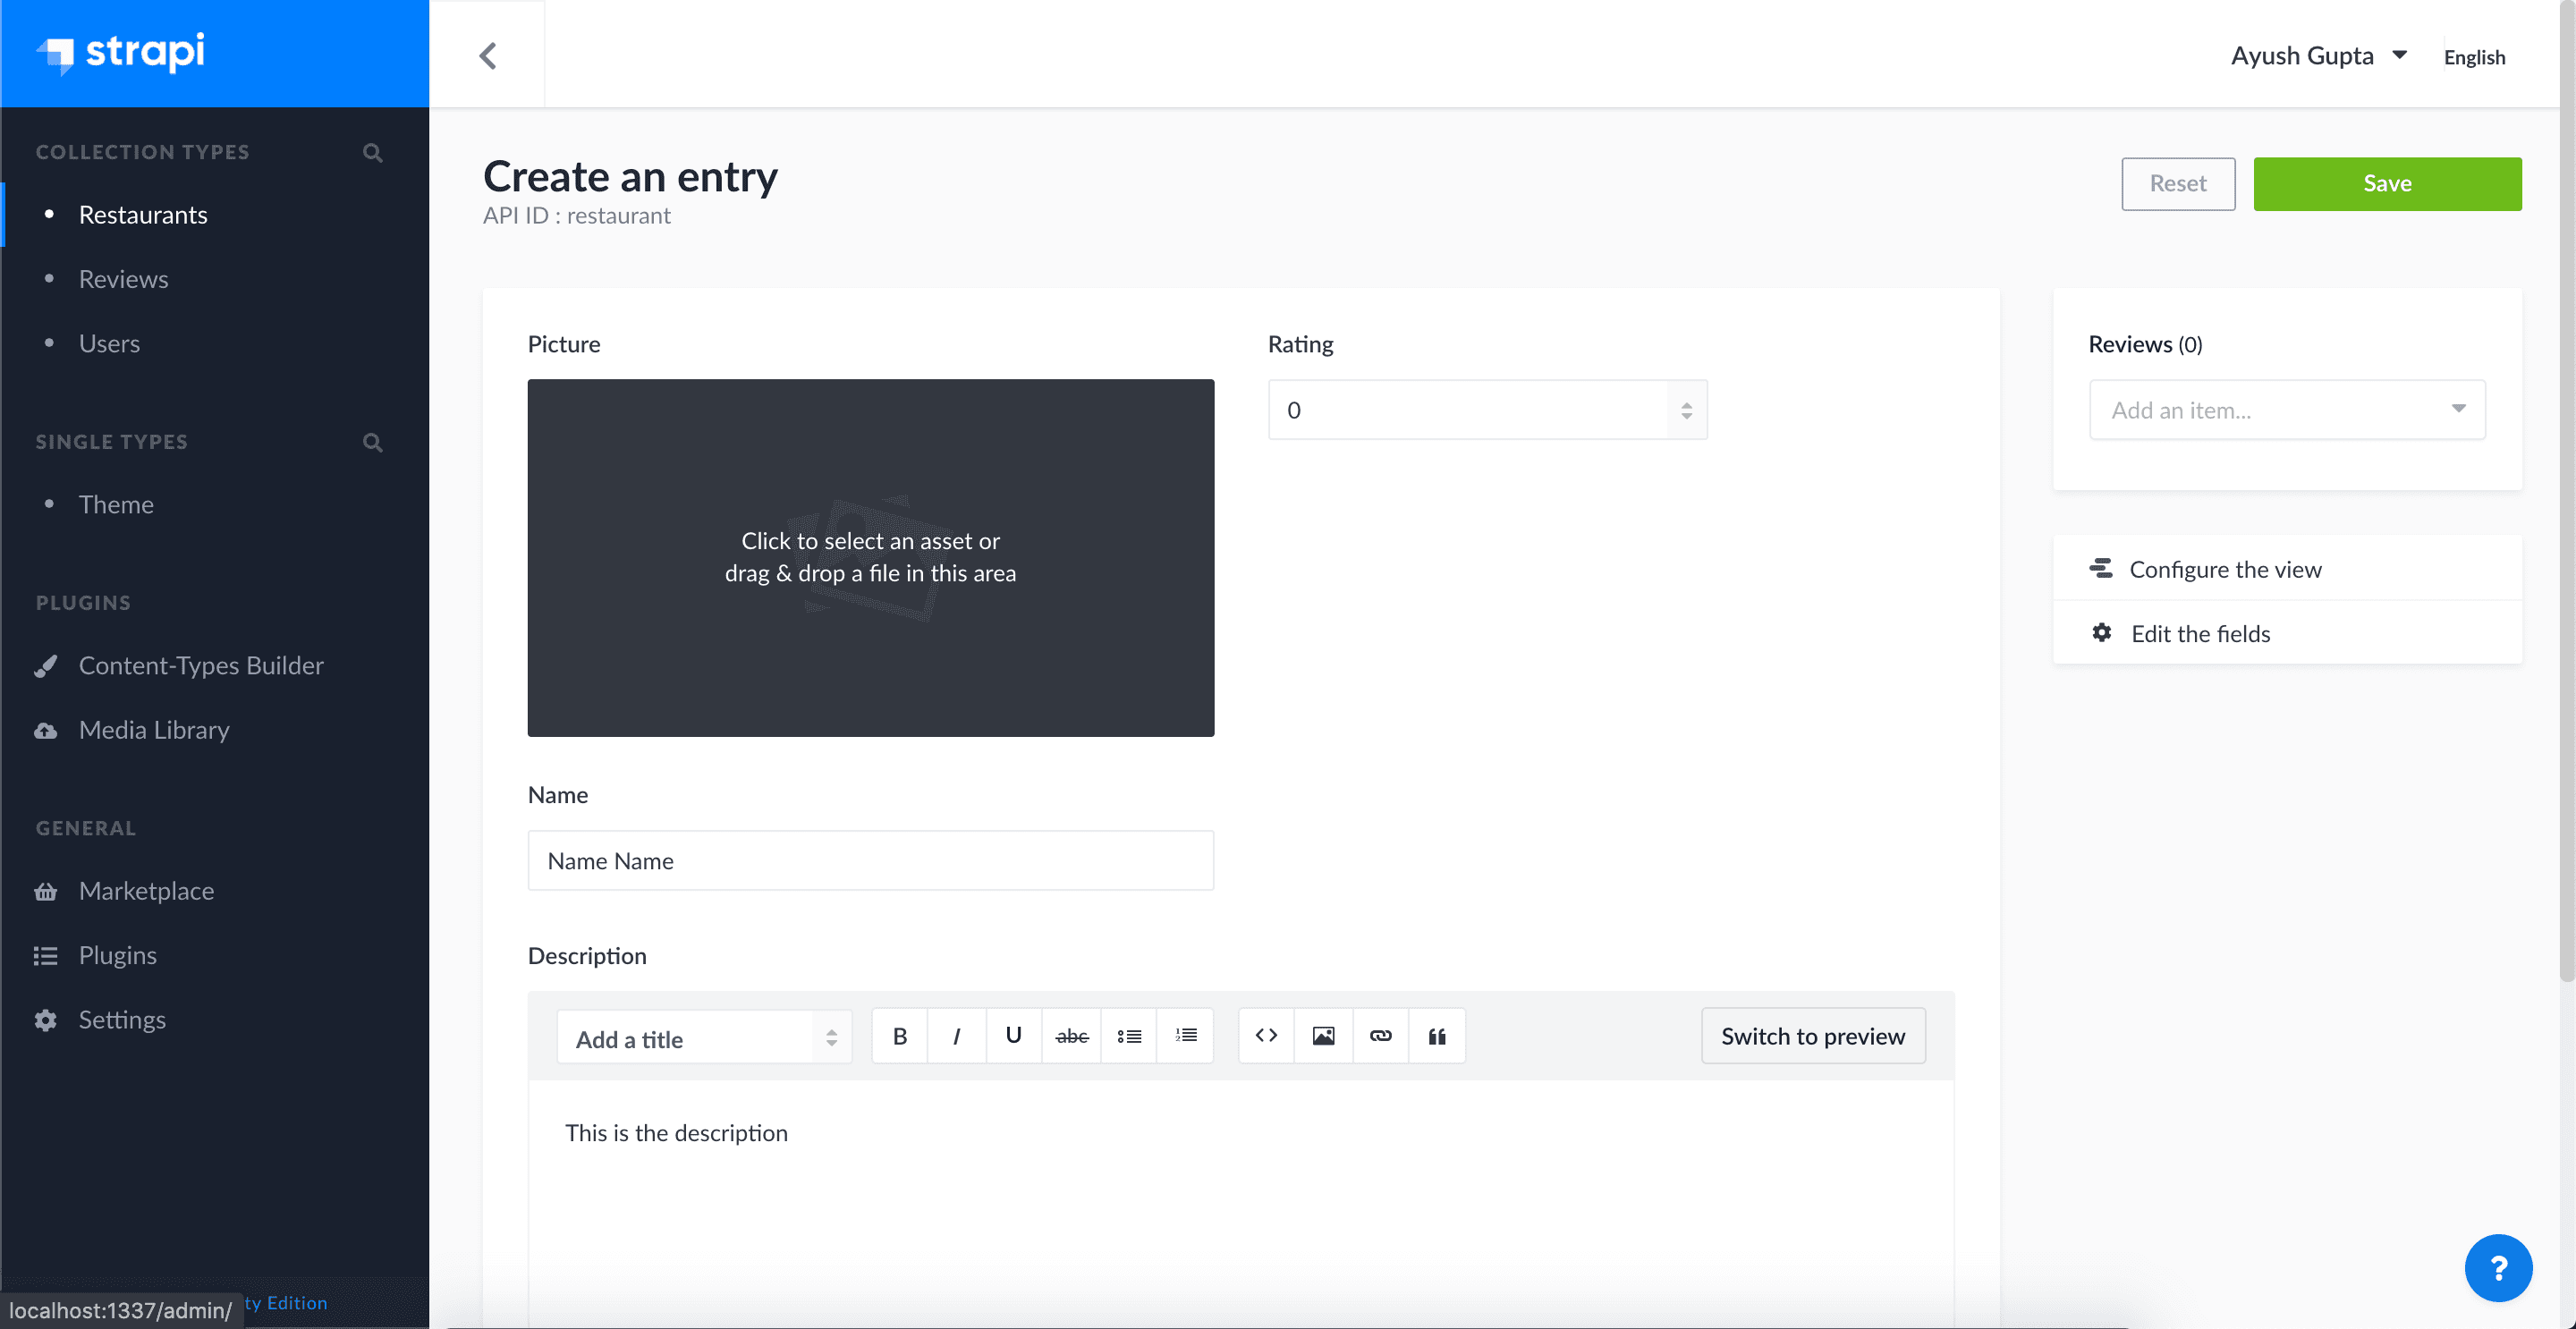
- Click on
Saveto update the changes.
6. Set roles and permissions
- Navigate to
SETTINGS > USERS & PERMISSIONS PLUGIN > ROLES - Click on
Public Rolesand scroll down to Permissions.
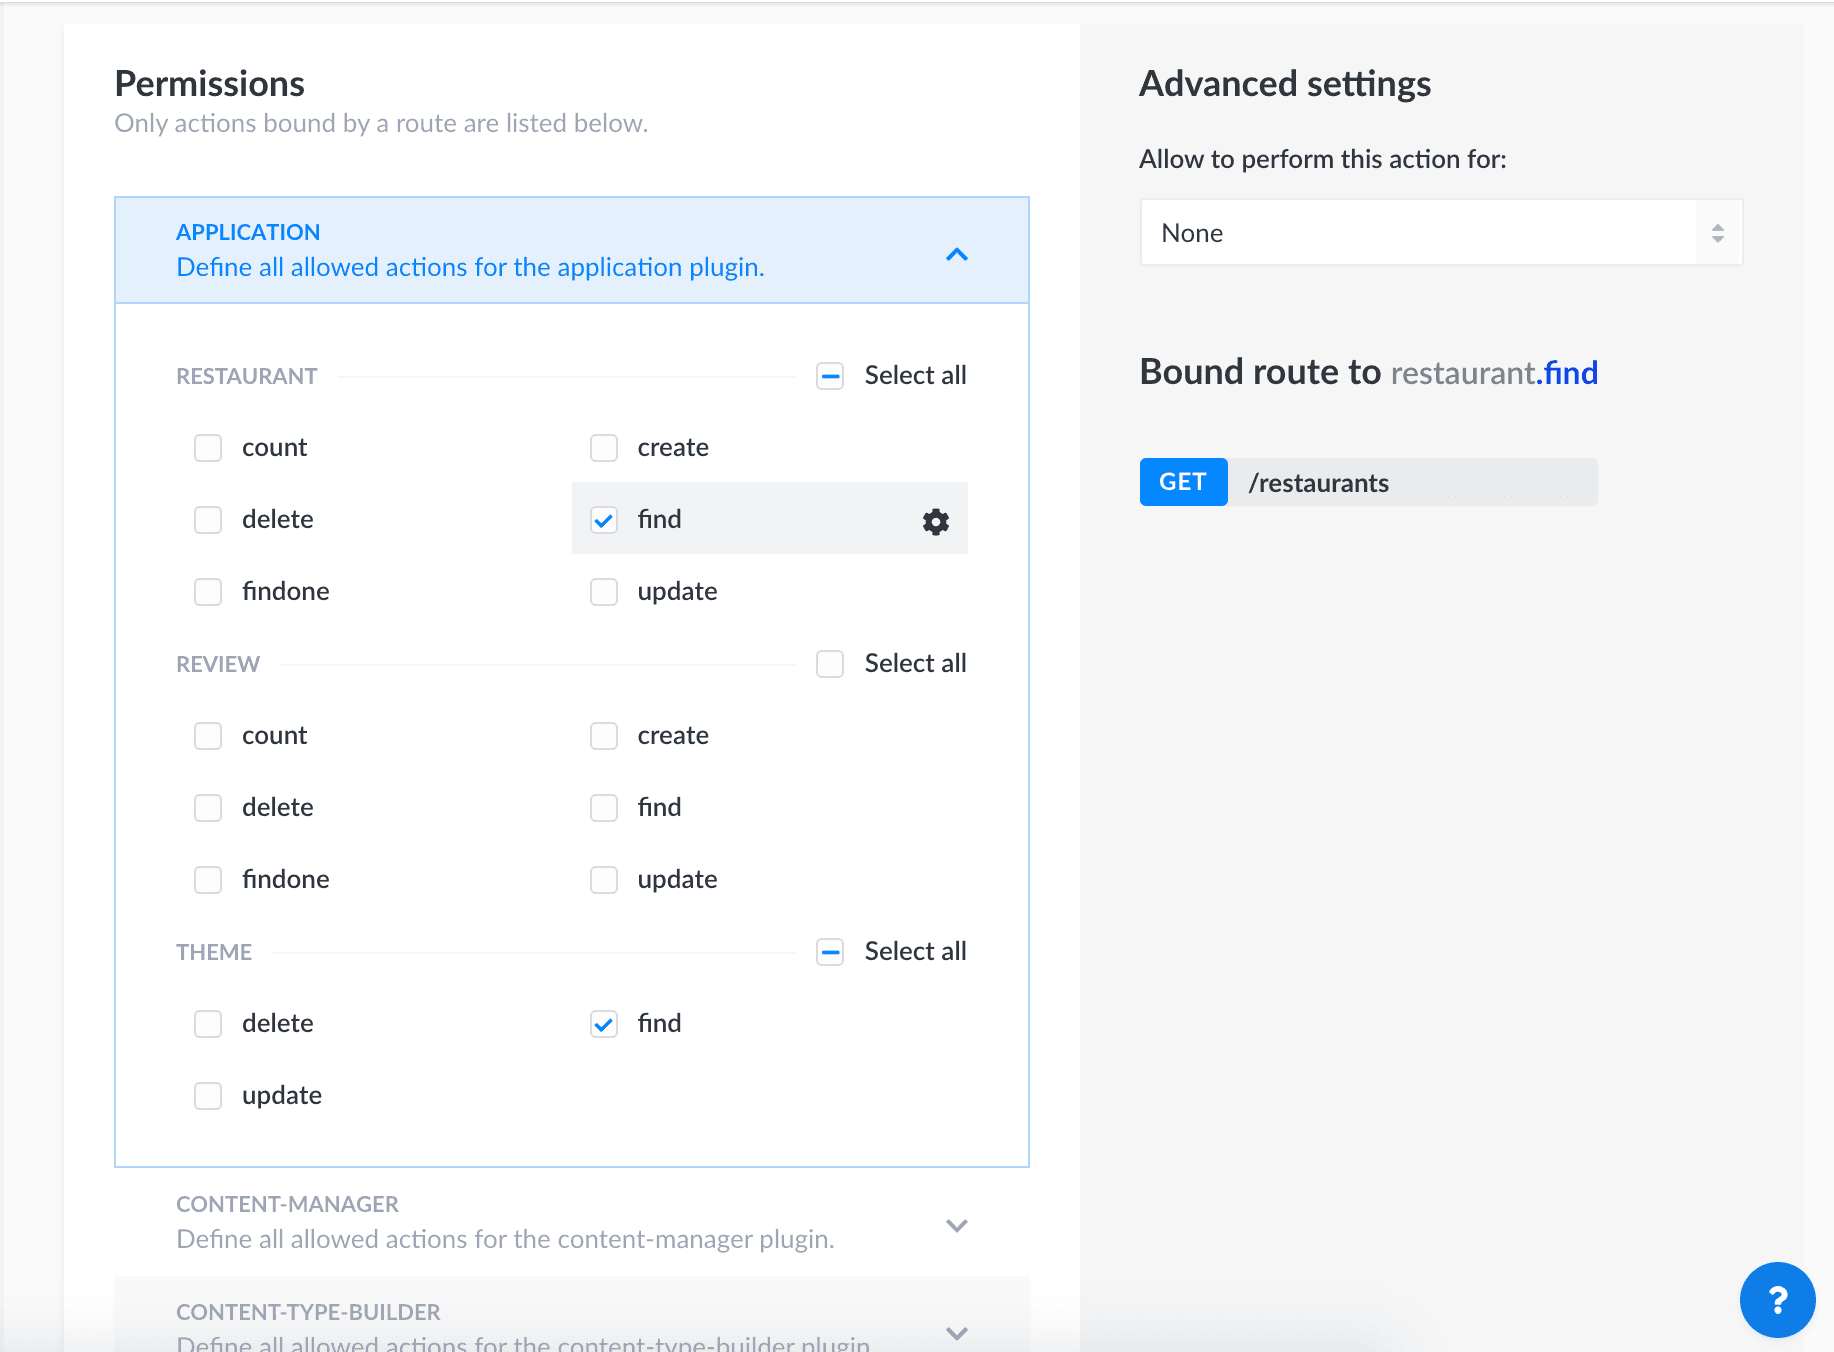
- Change the
Permissionfor the collections routes that can access withoutauthand can update the action for every route fromAdvanced Settings - Change the
USERS-PERMISSIONSpublic routes.
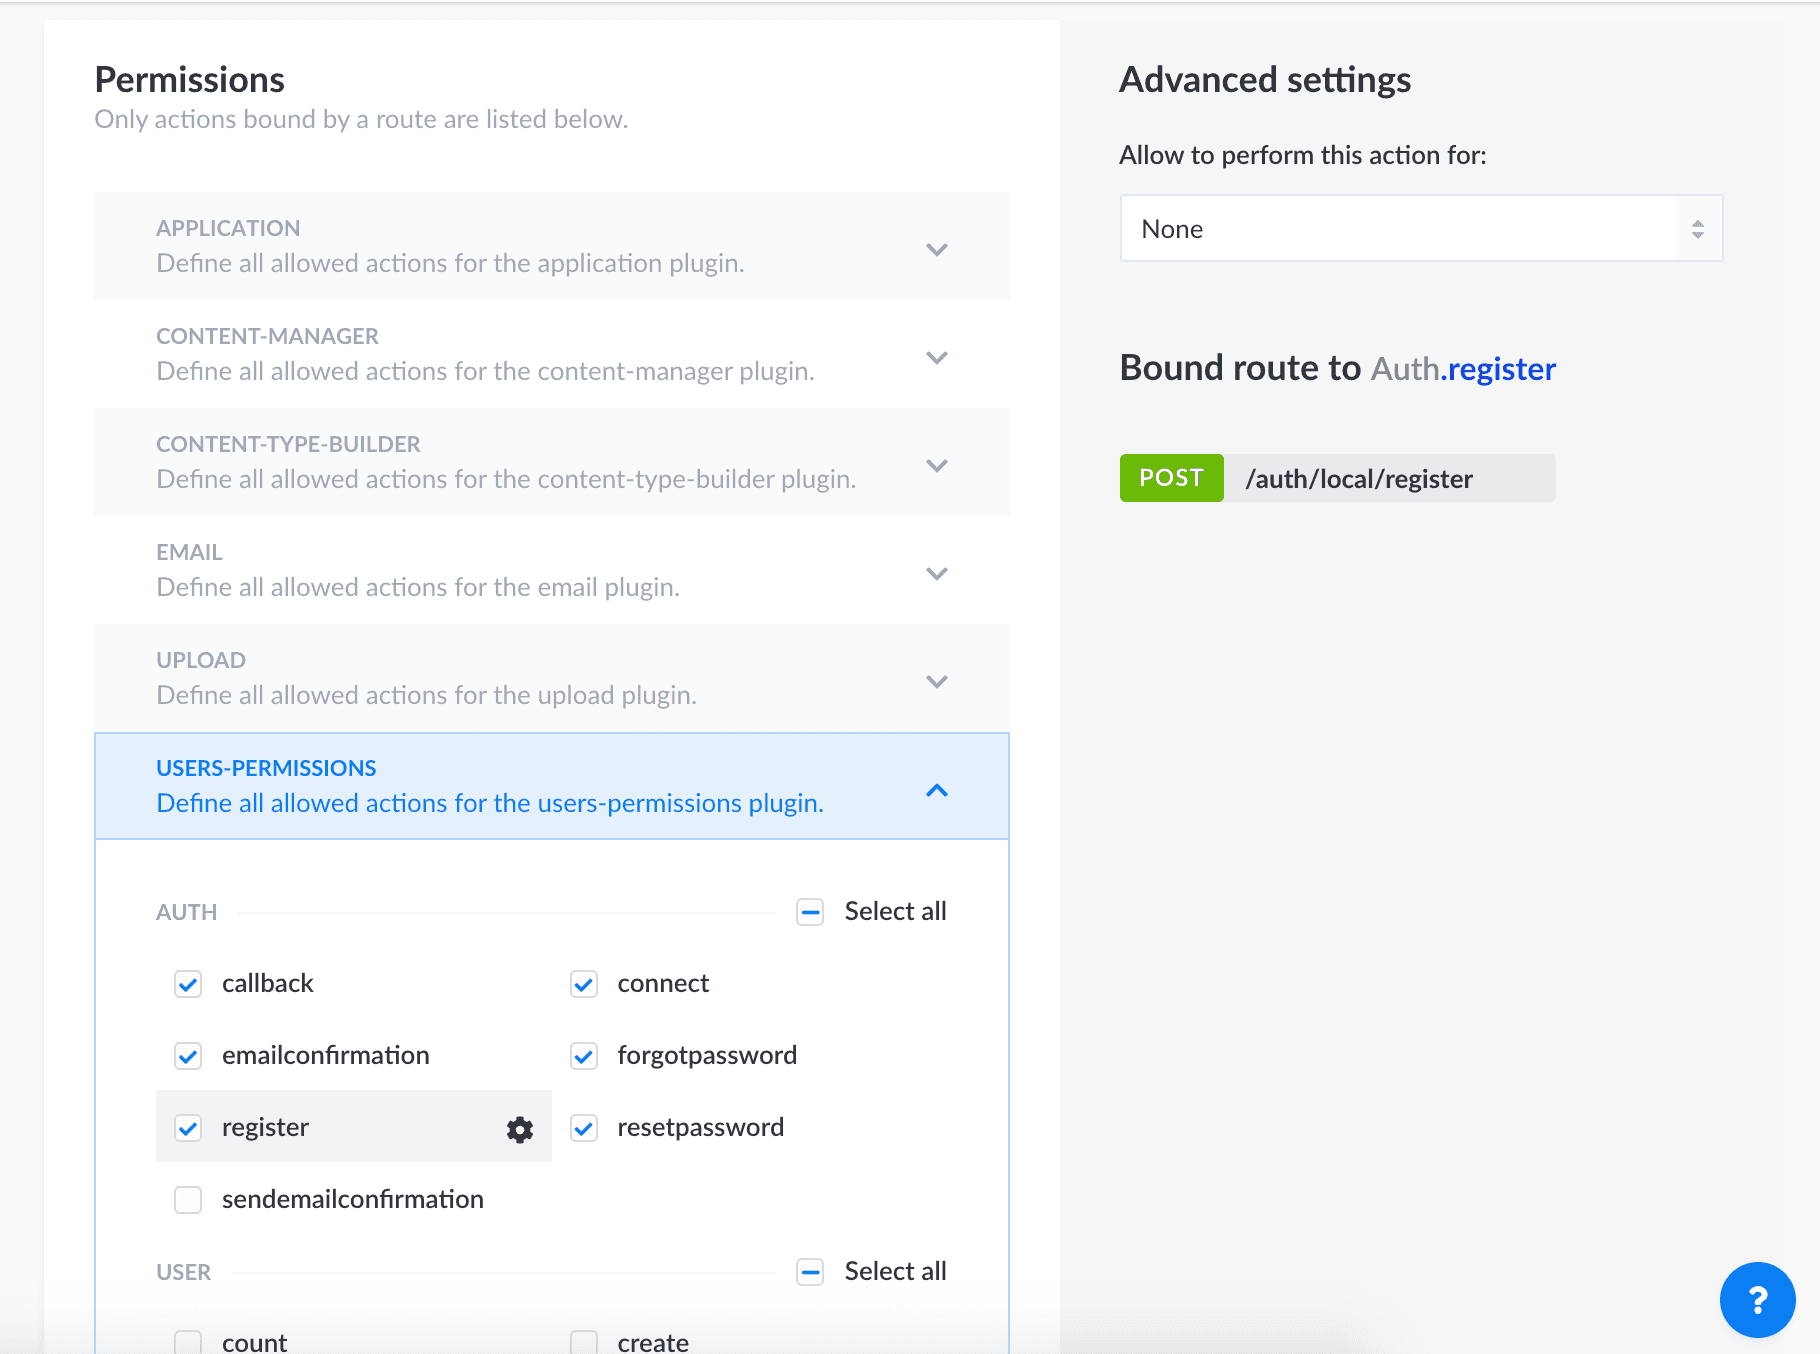
Note: In a similar manner, we can update the Roles and Permissions for authenticated routes also.
Add plugins to your application
- Navigate to
Marketplace
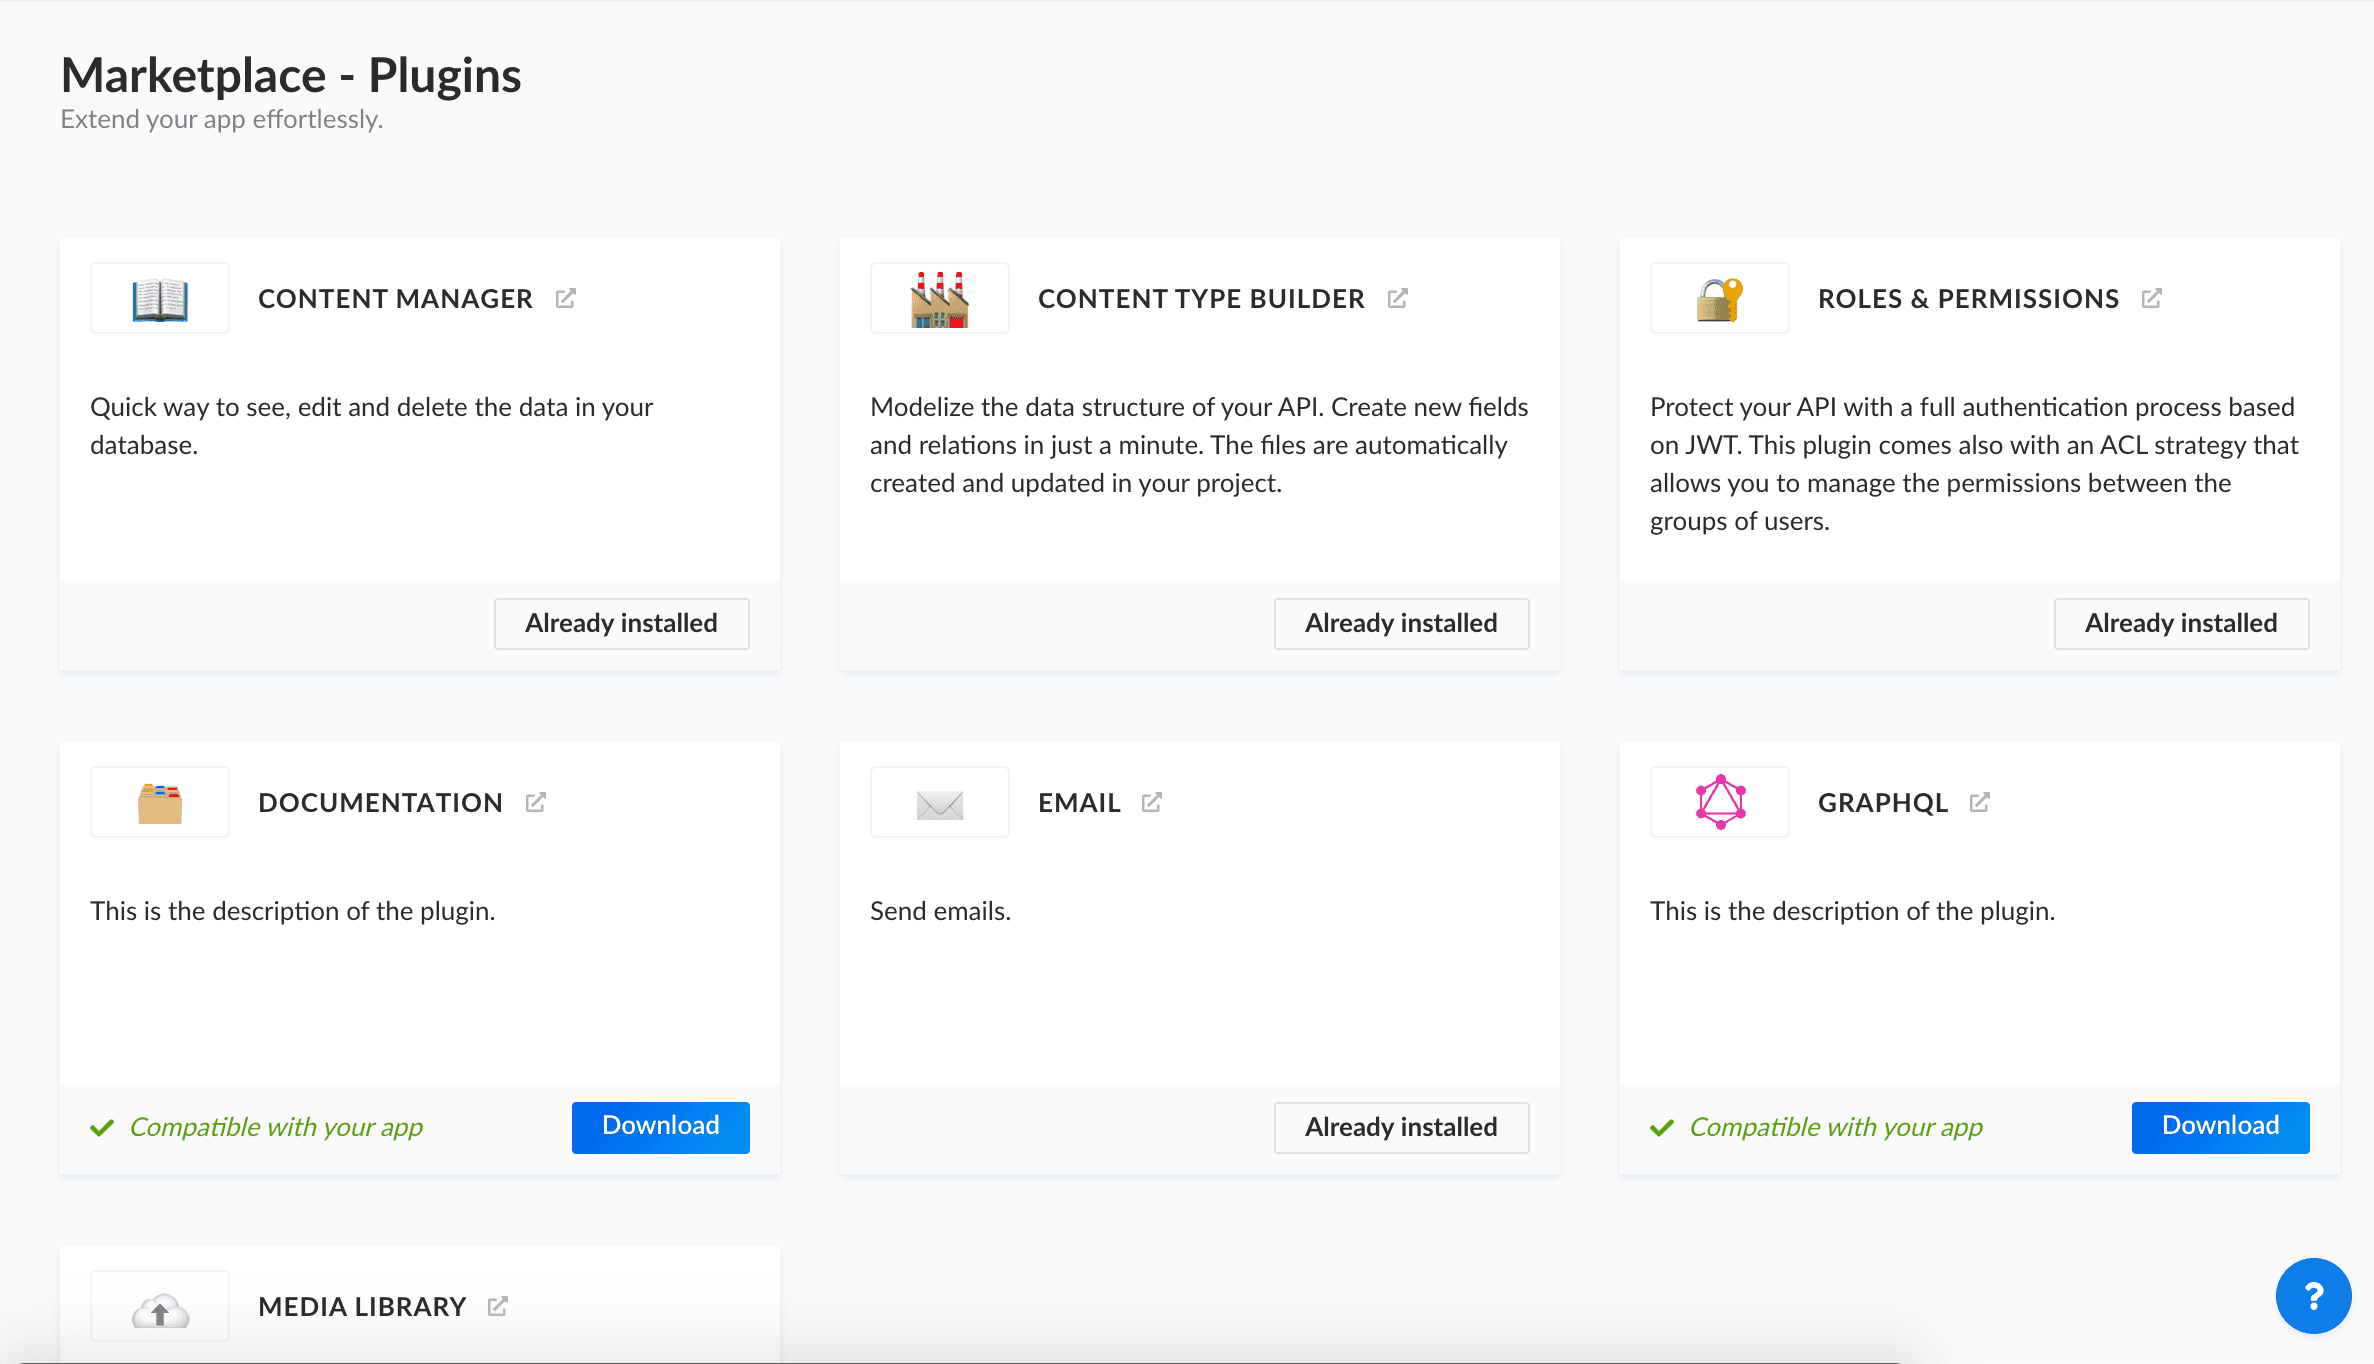
- Add your required Plugin for the application like
Roles & PermissionsforJWTauthentication, GraphQL, etc.
Note:Roles & Permissionsare pre-installed if you created with--quickstartso, you only need to update the roles and permissions from the Setting tab.
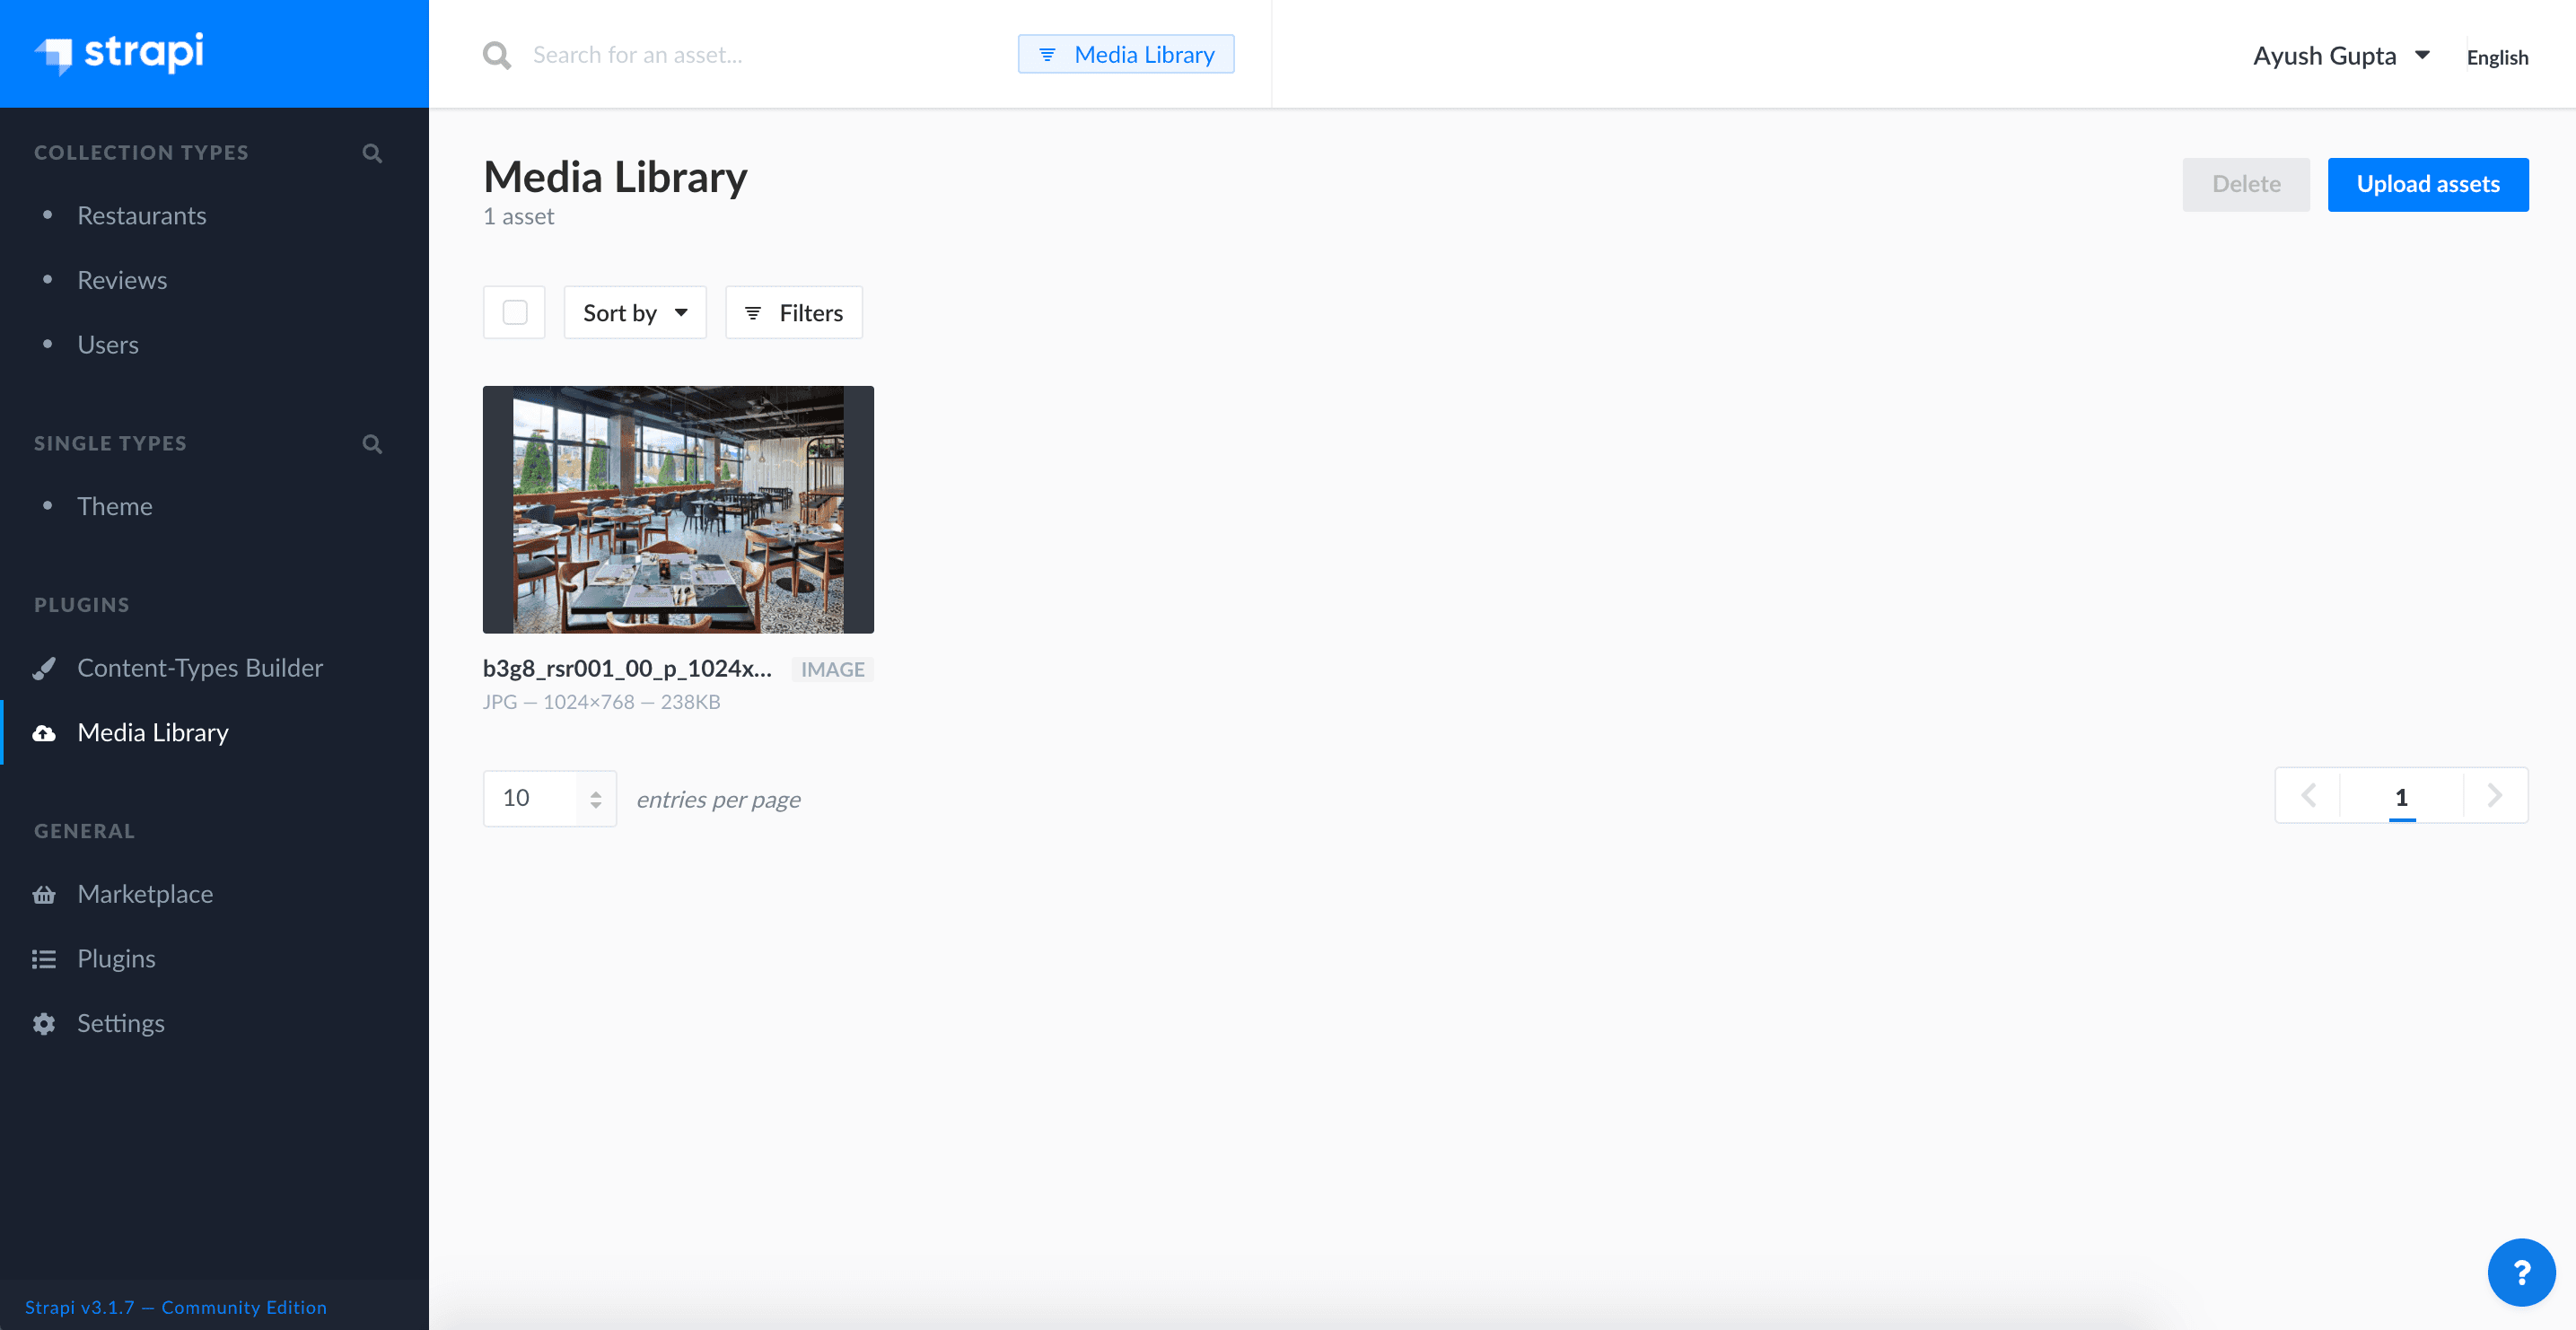
Manage Your Media Library
- Navigate to
Media Library. - You can add/update/delete your media assets from a single panel here.
Additional Features:
We can create Themes and Components by using + Create New Single Type and + Create New Component in Content-Type Builder
Conclusion
Here we are! Your collection is now accessible at http://localhost:1337/
Consume your API with your favorite frameworks as well as frontend or backend programming languages like React, Vue.js, React Native, Ruby and many more.
Find the complete example project on Github, and Postman files for Postman Collection and Postman Environment at the links.
Thank you for reading!
Subscribe to Our Newsletter
Subscribe to RSS
Press & Media Hub RSS FeedRelated Articles.
More from the engineering frontline.
Dive deep into our research and insights on design, development, and the impact of various trends to businesses.

Jul 10, 2026
How We Built the Missing Bridge from Code to Figma

Jun 27, 2026
Building a Resilient Hybrid-Cloud Network with WireGuard HA, Route-Based Failover, and Deep Observability

Jun 19, 2026
We Built a 114-Second AWS-to-Azure Failover. Here’s What We Learned

Jun 12, 2026
Cloud-Native and Cloud-Agnostic Are Not Ideologies; They Are Business-Stage Decisions

Jun 8, 2026
Geeklego: The Open-Source Design System Built to Work With AI

May 18, 2026