Automation Testing of Mobile & Web Apps With Katalon Studio
Author

Date

Book a call
Once the development of a product is ready, we need to make sure that a quality product is delivered to the customer. Now it has become easy for QAs to test mobile & web apps in very less time using Katalon Studio, which is an advanced version of Selenium. It allows developers and QAs to efficiently set up, create, run, report, and manage their automated tests script.
One can find each and every step from scratch in detail along with the Screenshots & GIF and find it very useful to run the app.
Prerequisites to download Katalon Studio:
1.Create an account [https://www.katalon.com/sign-up/]
2. Install Katalon Studio [https://www.katalon.com/download/] (Version-7.0.6)
3. Install Appium [http://appium.io/]
4. Install older versions of Katalon Studio from its Github Repository [https://github.com/katalon-studio/katalon-studio/releases]
Environment Requirements:
Operating System: macOS(10.14.3)
Memory: 8 GB RAM
Browsers:
Firefox: 70.0.1 (64-bit)
Mobile:
Android: 8.x, 9.x(mac os), Appium- 1.13.0
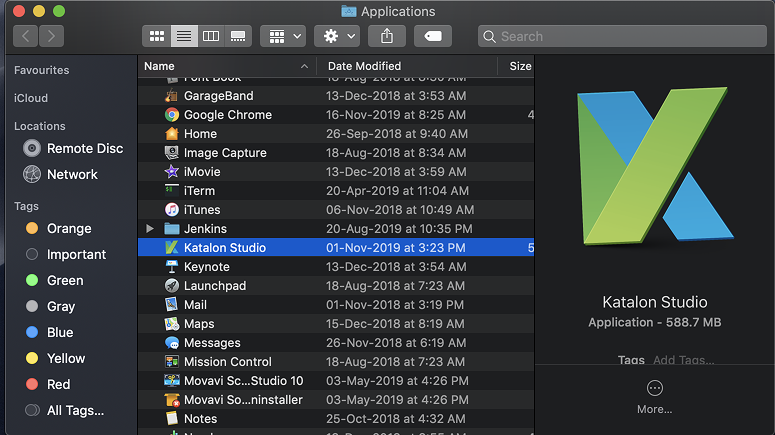
To start Katalon Studio(macOS), Go to Applications and Click:
Activate Katalon:
Create an account. If your account is created already then Sign in with the required credentials:

Create a New Project:
Click File→New→Project, enter the details and click on Ok.
What is good about this tool?
1) Easy to install. Works on most common Operating systems and Browsers
2) Web, Mobile, and WebService testing- All in one
3) Completely free to use
4) Works for both technical and non-technical testers
5) Eliminates the complexity of setup and framework definition
Record Web Utility (Web Dashboard)☟
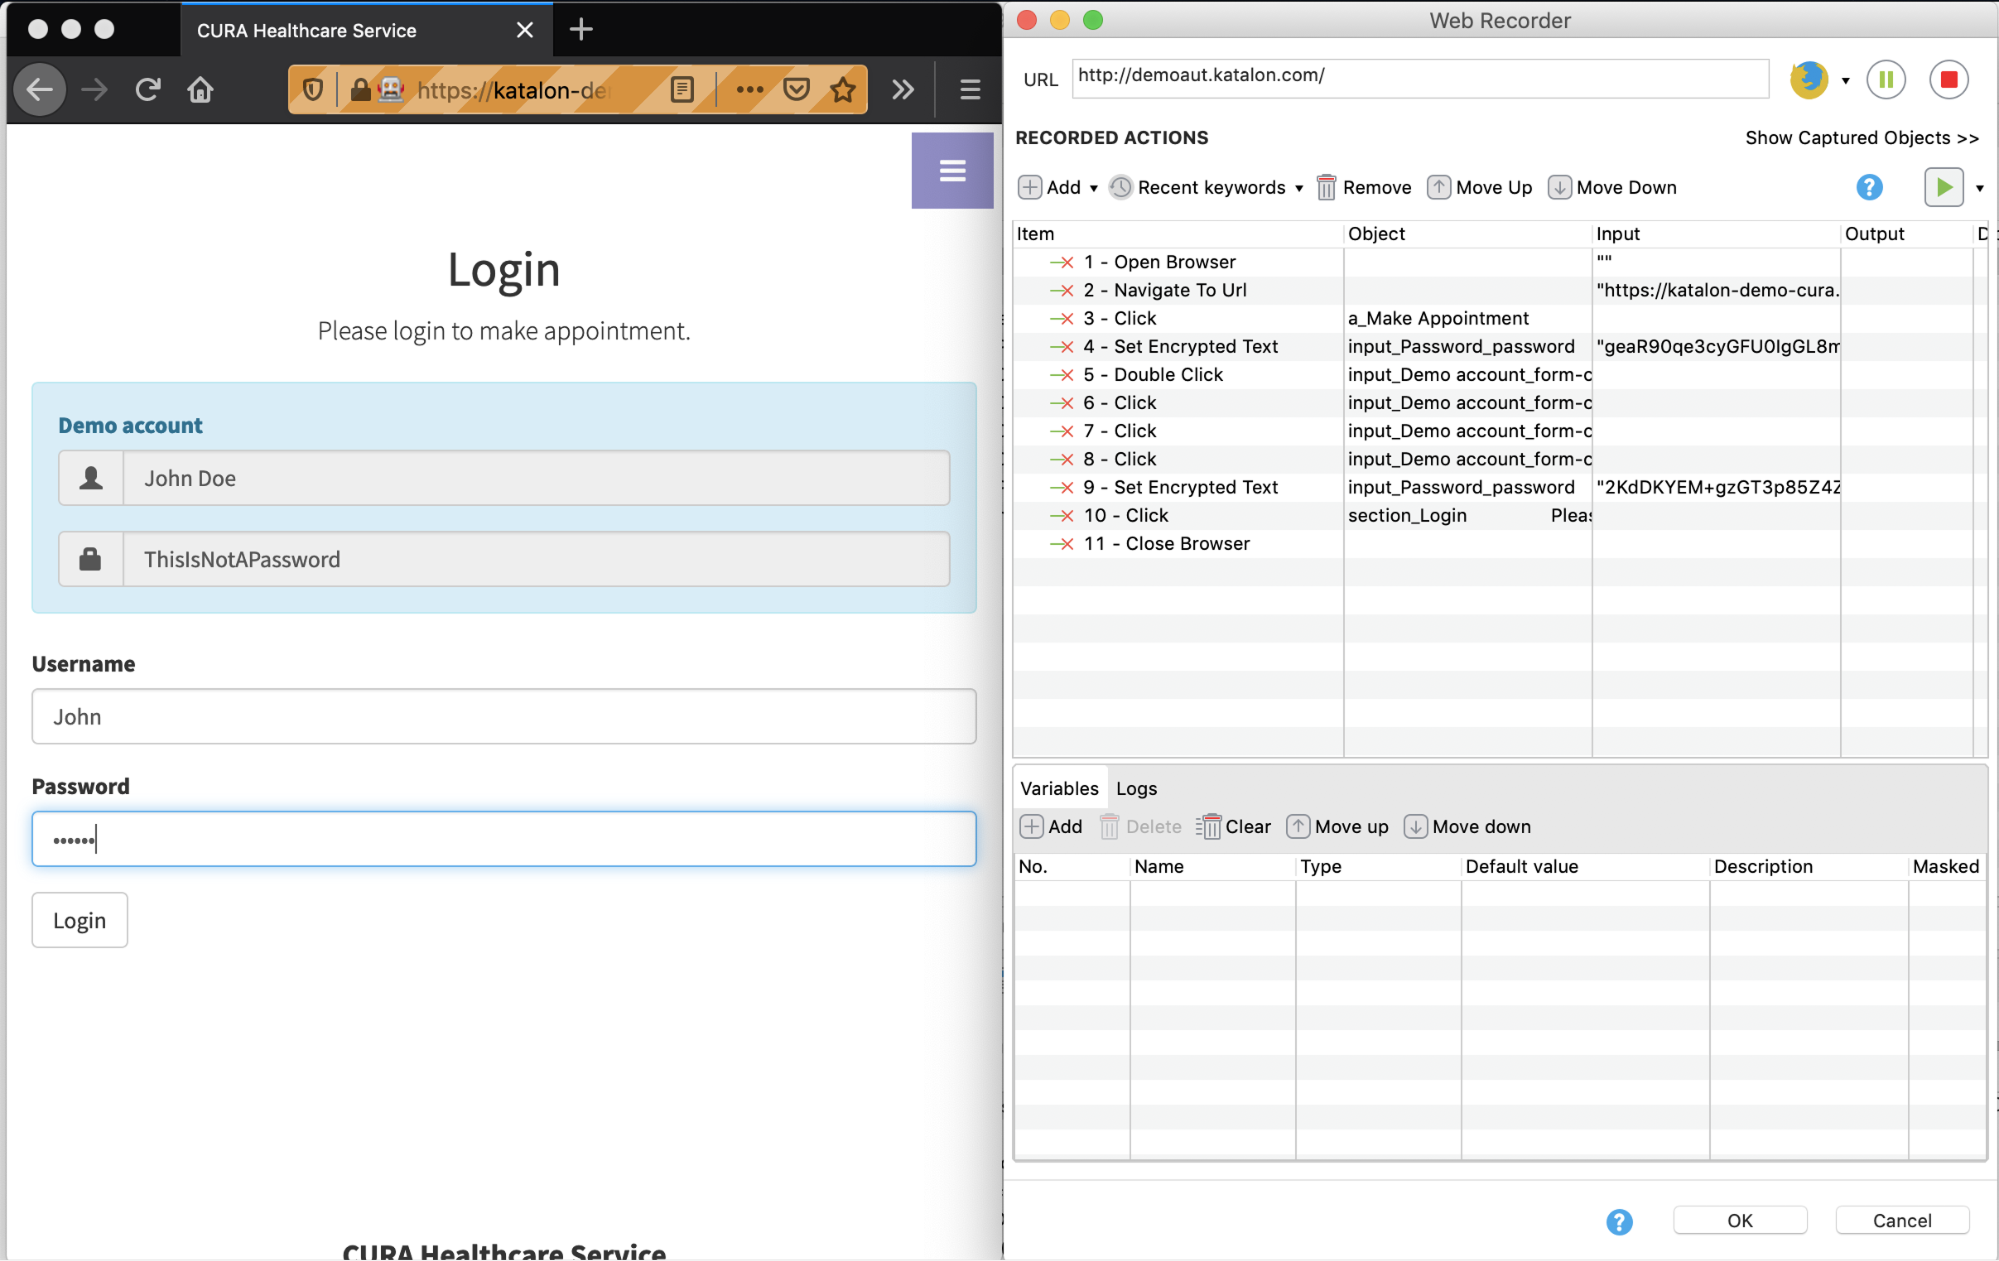
Click on Web Record  ->Enter the URL->Click on Firefox.
- The browser will highlight and display its correspondent Xpath when you hover the mouse on that element.
- Recorded steps will generate in Recorded Actions.
- When you type in a Password field, Web Recorder will automatically use the ‘Set Encrypted Text’ keyword and input’s value will be encrypted to increase security.
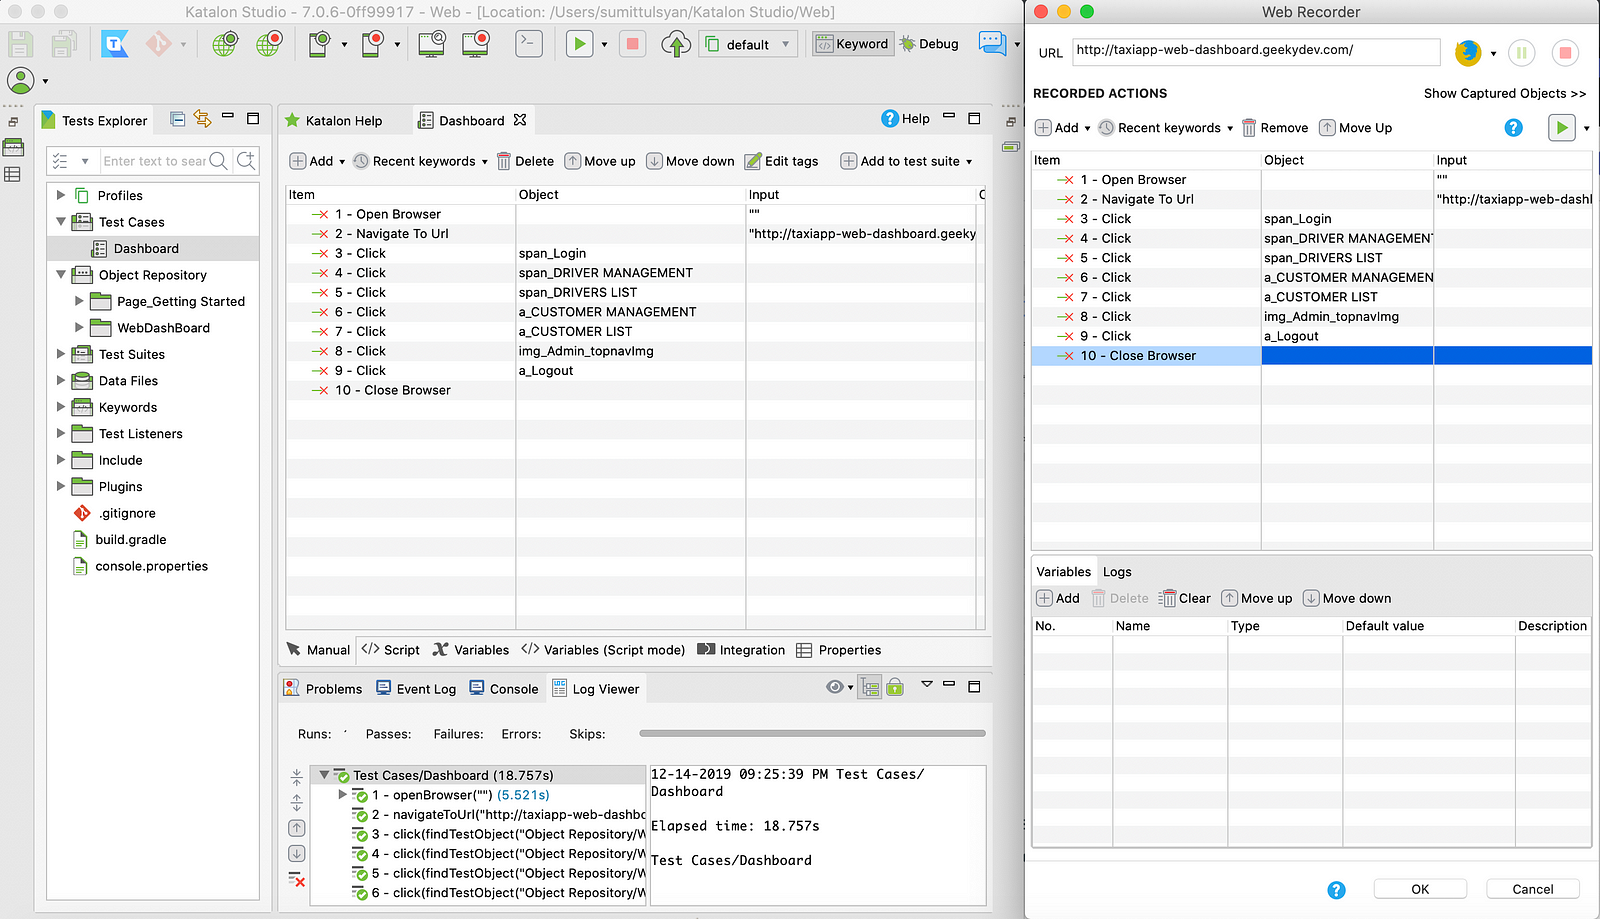
Record Using Existing Test Case
- Open any existing test case to continue recording.
- Click on Record icon to open Web Recorder.
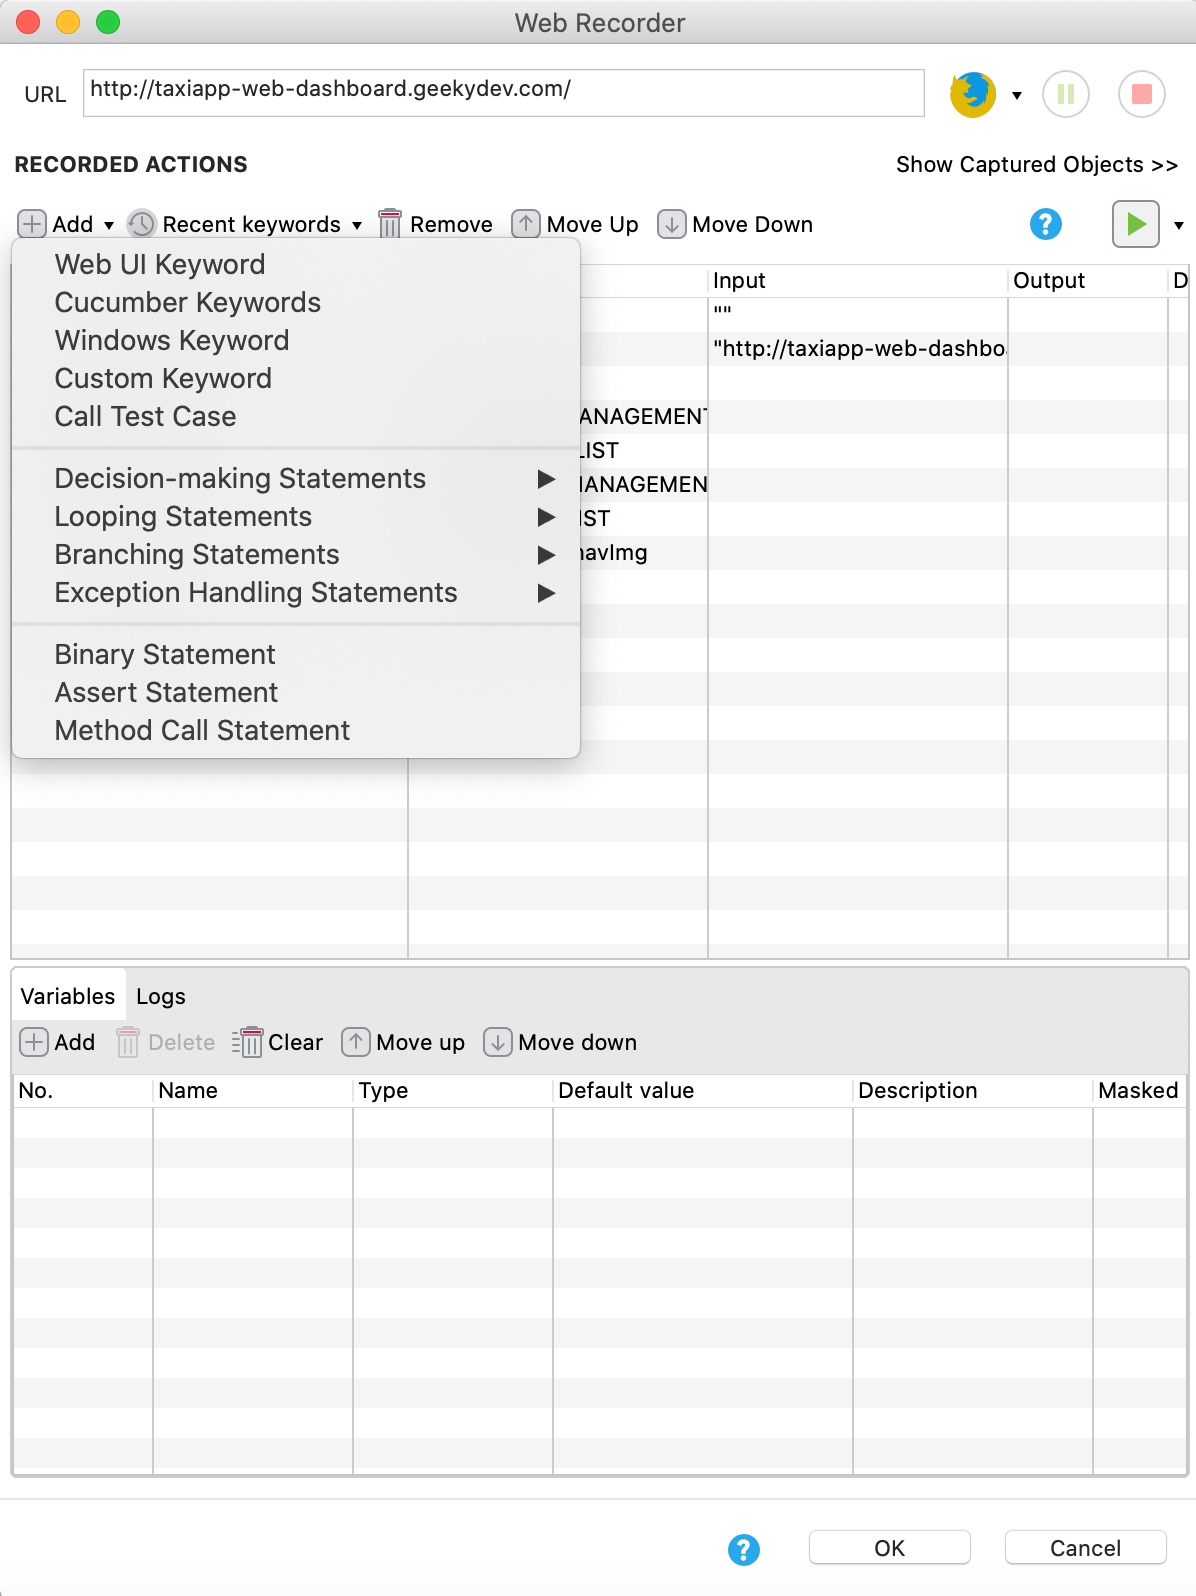
Modify Recorded Actions
You can add any action, call another test case, and/or use Custom Keywords.
Click on Add dropdown button->Action.
Modify Recorded Objects
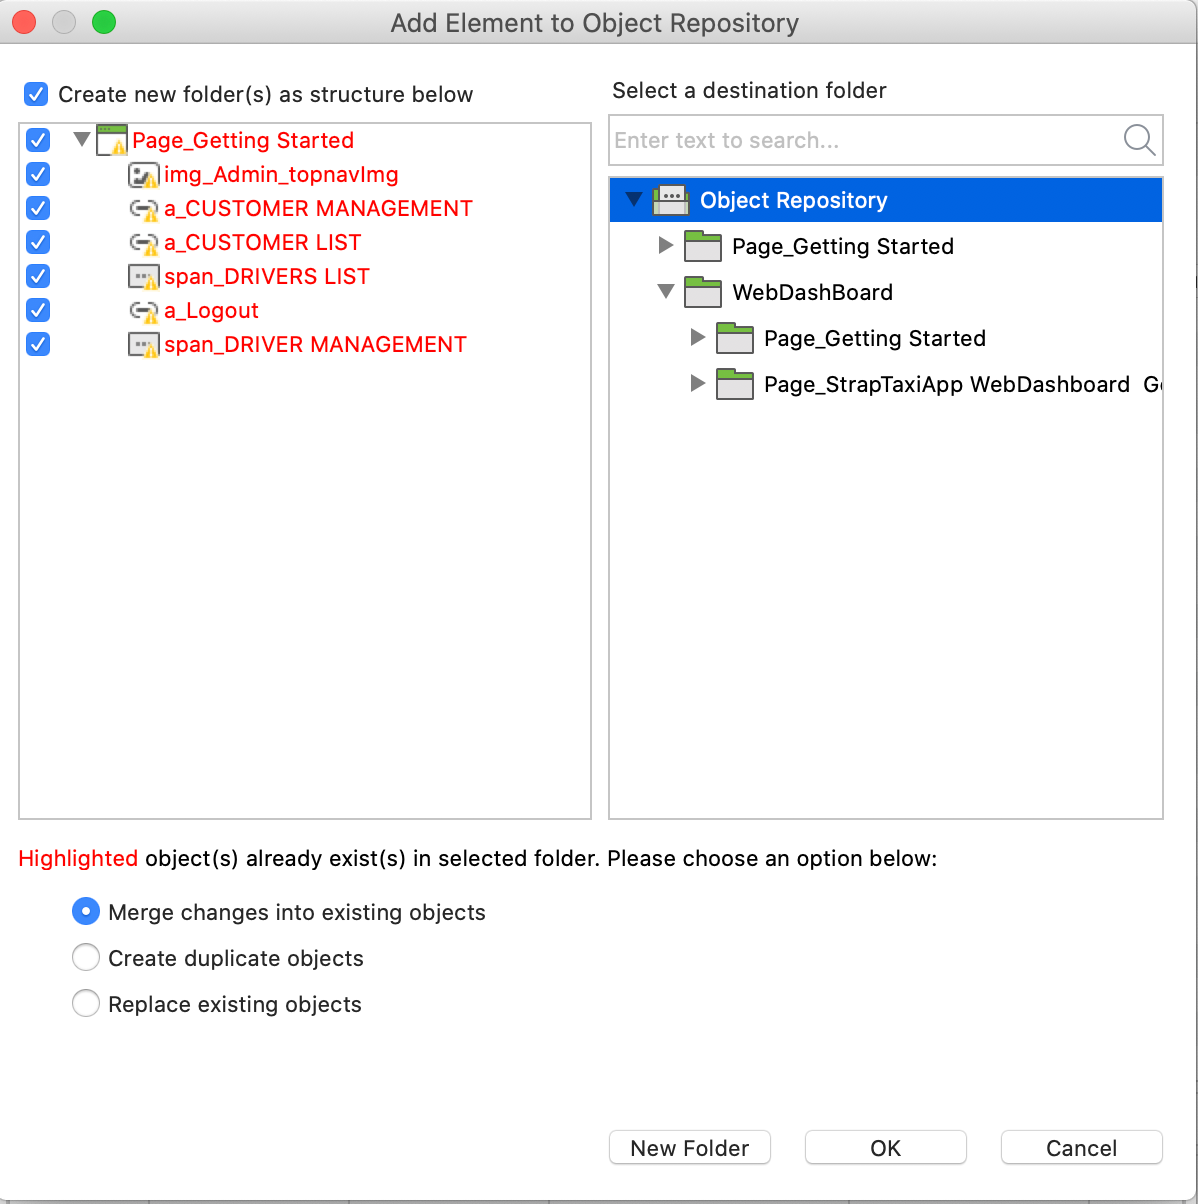
After you finish your recording, Web Recorder will export a list of test objects used in the test case.
Click OK to add the objects☟
Execute Test Case
- Click on the run button and select the browser of your choice.
- In many cases, you only want to execute some steps:
Choose the option of your choice ☝
Upon selecting any type of Run to execute, execution logs are displayed on the Logs tab.
Configuring headless browsers:
- Execute automation tests by setting the browse as default as Headless either Firebox or Chrome.
- Add more desired capabilities to those headless browsers if you want:
Go to Project > Settings > Desired Capabilities > WebUI >Chrome . (Headless)/Firefox (Headless).
Record Mobile Utility:
Follow the below steps to perform Record and Playback feature for the mobile test:
- Click on File >New >Test Case >Enter the Name >OK.
- Click on Mobile Symbol and the platform you want to run, in the main toolbar.

3. Specify the information at Configuration section
Device Name- The connected device will be displayed here
Application File- The path for the mobile application file( .apk file for Android or .ipa file for iOS)
4. Click Start when you’re done with the settings.
5. The Device View dialog is displayed to show the current screenshot of your real device (Rider).
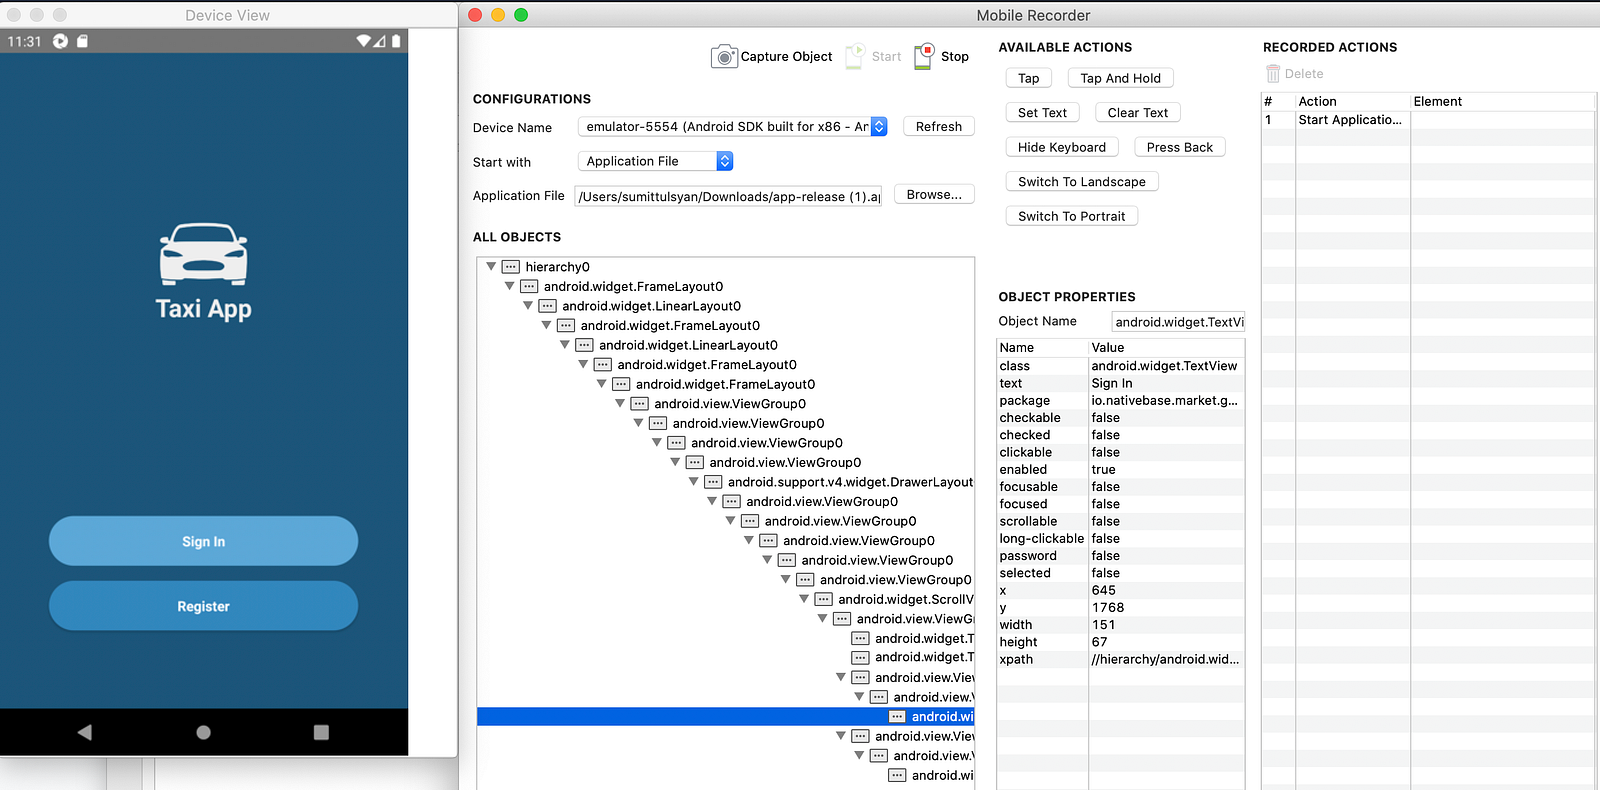
6. After selecting the element, you can choose the actions to be executed at AVAILABLE ACTIONS section.
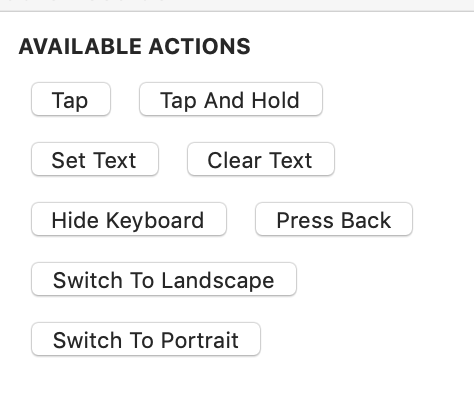
7. The selected action will be displayed in the RECORDED ACTIONS section.
8. Save the captured objects into Object Repository. Click OK to continue.
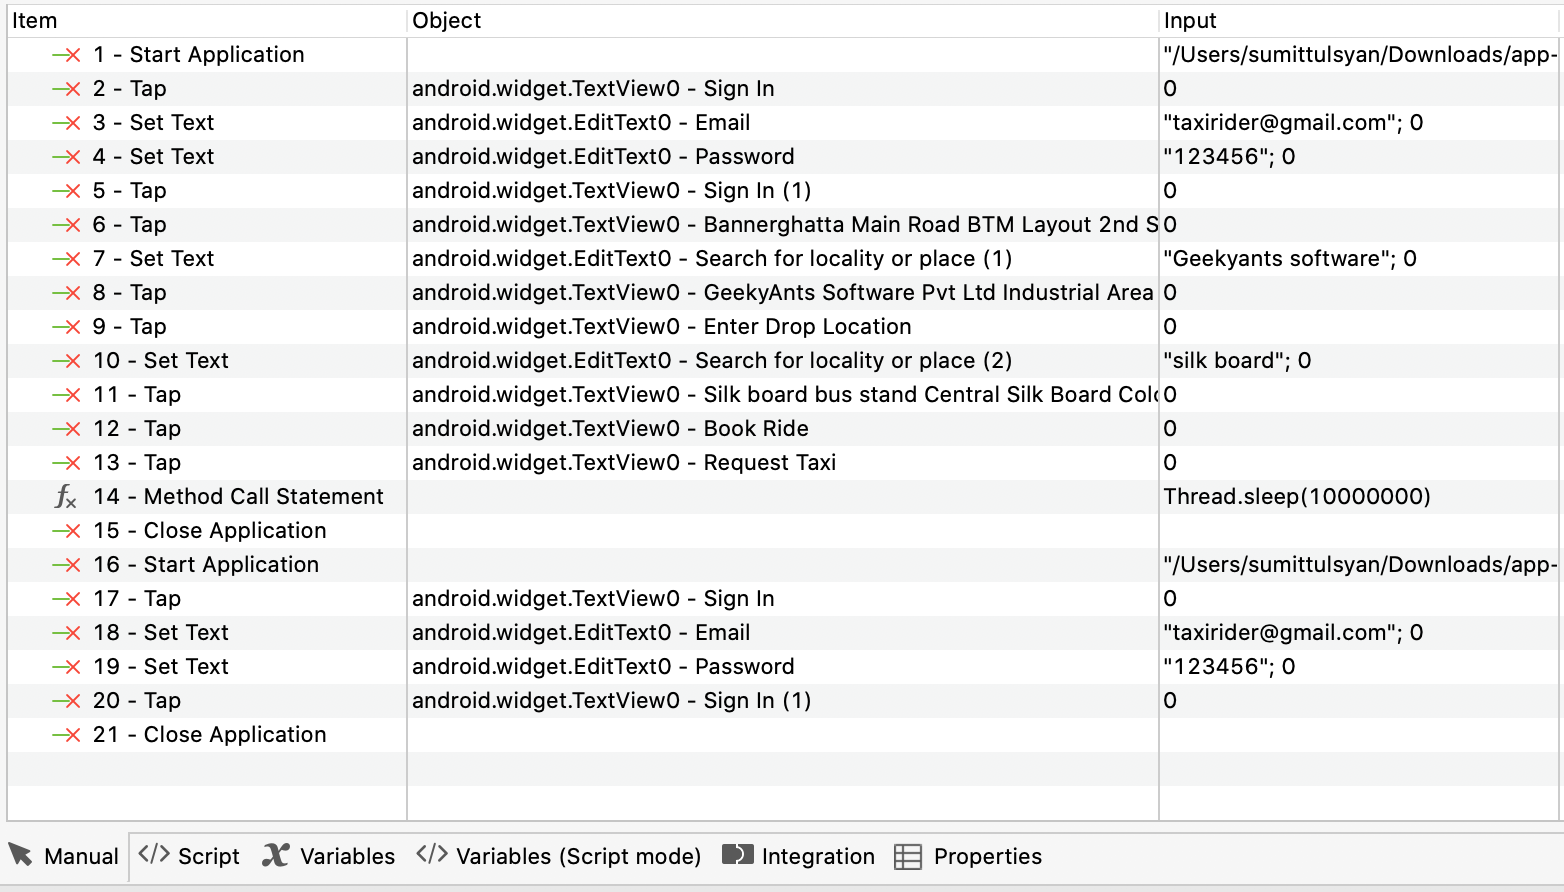
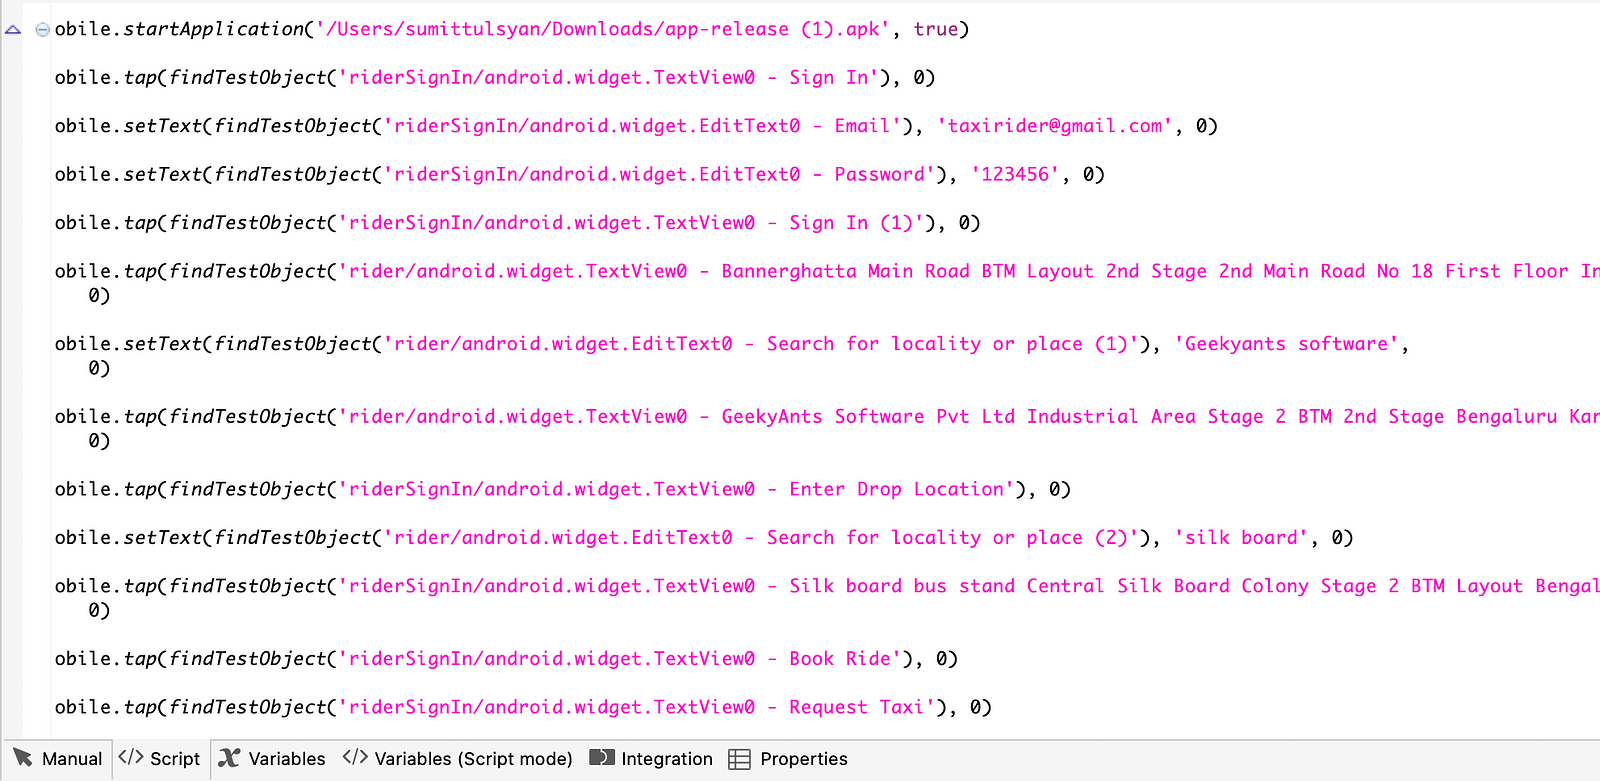
9. Recorded objects and actions are saved in the test case as shown below and automation test script as well.
Manual
Script
Note: Perform all the above 9 steps for Driver
Create a Test Suite: ☟
Go to File > New > Test Suite
Test Suite Collection:
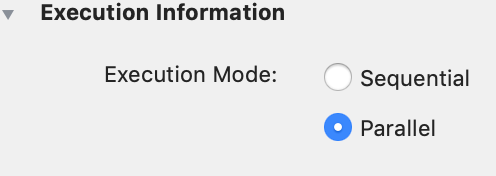
It is a list of test suites. It allows users to execute test suites in two ways:
1.Sequential
2.Parallel
Where:
Sequential- Test Suites are executed one after another.
Parallel- Test Suites are executed at the same time.
Add Test Suites:
You can add test suite into a collection by following the steps below:
- Open a test suite collection, then select an option to add Add Test Suite from the command toolbar.
- All the test suites will be displayed in the Test Suite Browser. Select the test suites you want to execute and then click OK.
- Test Suites added will be displayed accordingly in the test suite collection.

Execute Test Suite Collection:
- To run a Test Suite Collection, click Execute in Toolbar.
- Test Suites will be executed accordingly.
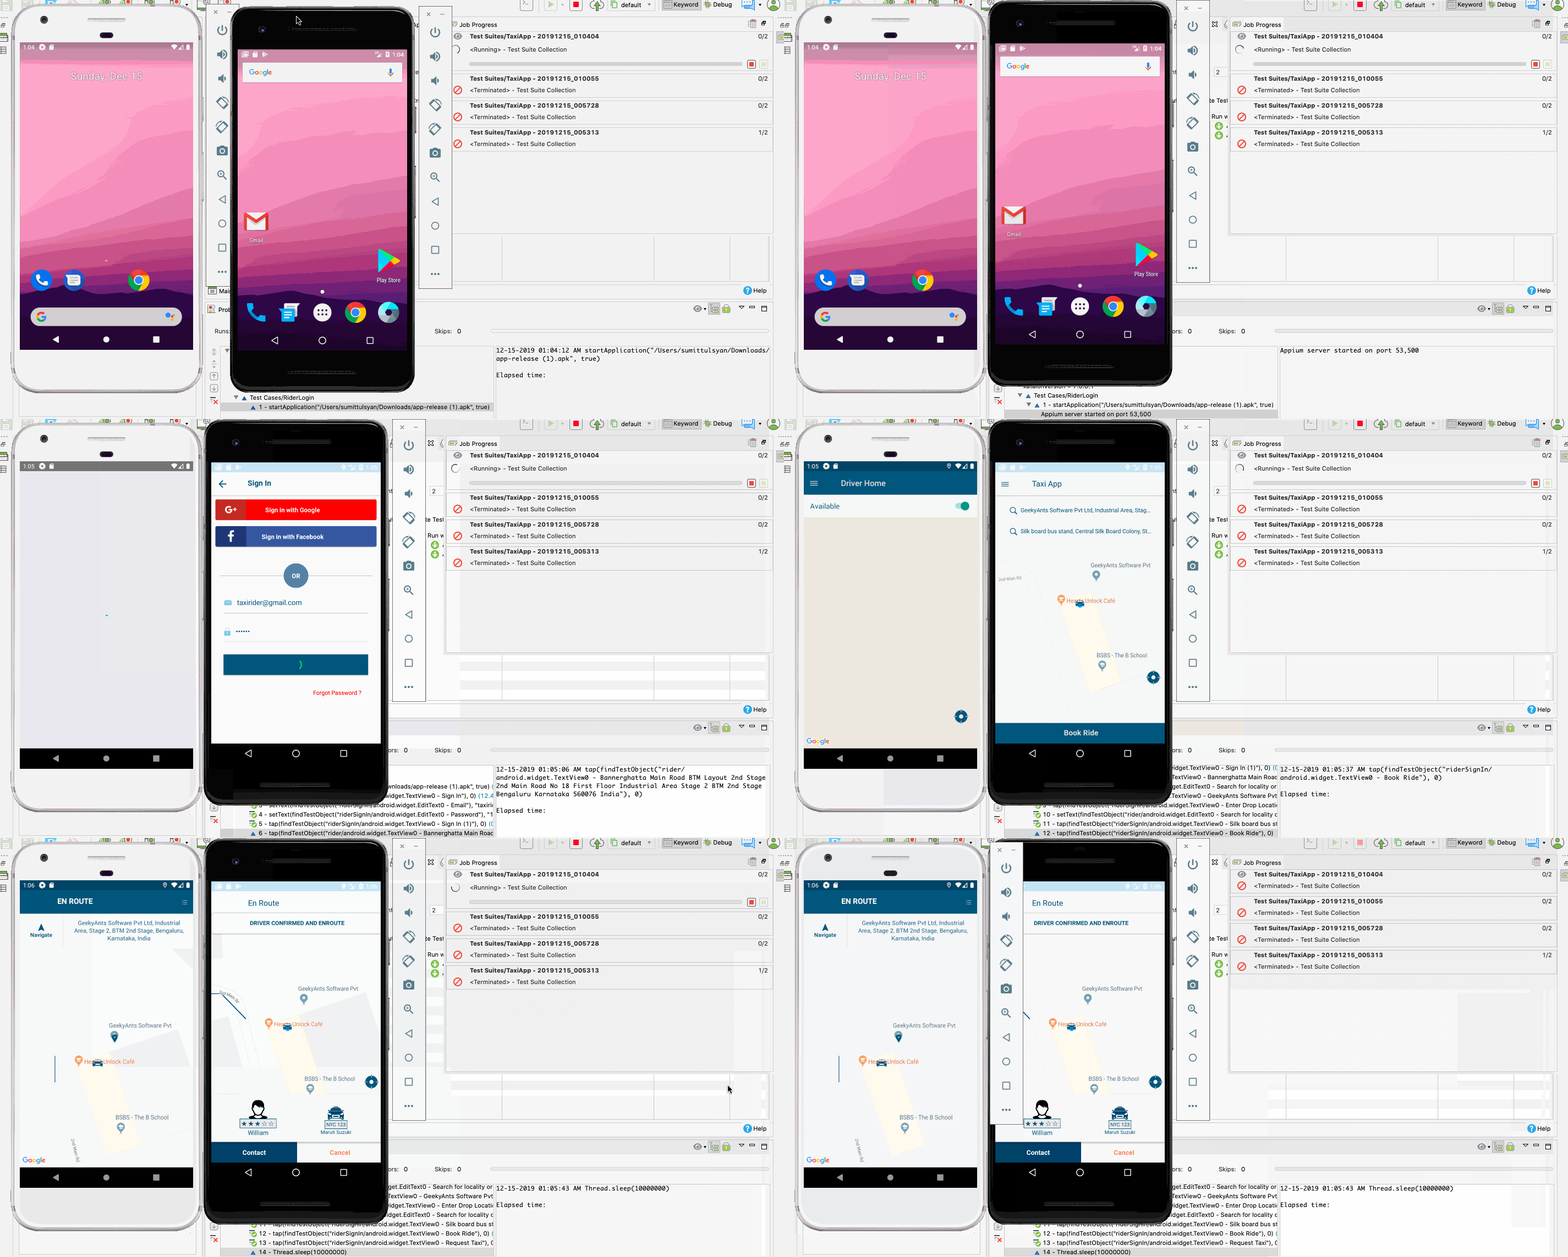
3. Test Execution history can be found in the Reports section.
Automation testing of mobile & web apps is just as simple and straightforward as that. It is efficient and does not compromise on the quality of testing and QA.
Thank you.
Book a Discovery Call
Related Articles
Dive deep into our research and insights. In our articles and blogs, we explore topics on design, how it relates to development, and impact of various trends to businesses.


