Jan 18, 2023
How to Build Simple Card Flip Animation in React Native Using ReAnimated V2
A simple Card Flip animation to help you get started with animations in React Native.
Author


Book a call
Table of Contents
Introduction
Objects in motion are always more attention-grabbing. The same goes for components in apps. This is why animations are crucial to delivering an excellent application experience.
Today, I will explain how to build a simple yet cool animation — the Card Flip. This can help you get started with Animations in React Native. We will be using Reanimated for this.
What is Reanimated?
Reanimated is a powerful and flexible API for animating components in React Native. It provides a low-level, declarative approach to animations, allowing developers to create complex and engaging animations with minimal code.
Unlike other animation libraries for React Native, Reanimated uses the native animation capabilities of the host platform, resulting in smooth and performant 60 FPS animations.
In this introductory example, we will explore its core concepts and how to use them.
Getting Started
We first need to create two Views of a card. Let us call them F=FrontView and B=BackView , and we need to position F behind B using the absolute position. We will be using Animated View to pass them animated styles later.
Let us create basic cards and styles for them. You can style your cards however you like.
Now let us understand what we need to do to achieve the animation.
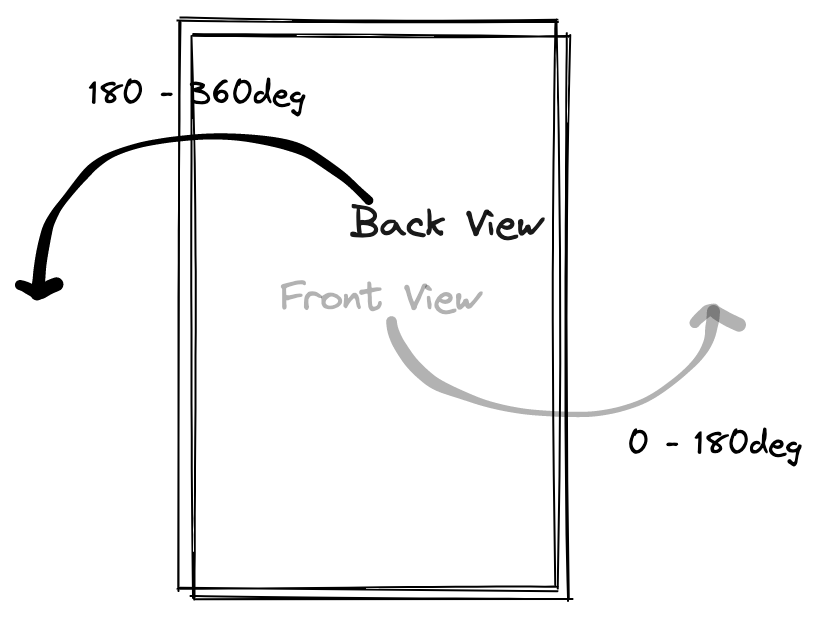
- The
BackViewinitial position will already be rotated to 180 degrees, withbackfaceVisibilityset to hidden. Hence, it is not visible at the start. - Next, rotate the Front Card from 0 to 180 degrees.
- At the same time, rotate the Back View from 180 to 360 degrees.
- Once step 2 and step 3 are done simultaneously, it will create a nice flip-rotate animation for us.
A Basic Illustration of What We Need To Do
Now let's create a shared value that we will use to drive our animation. Shared values are variables, as the name suggests, that are shared between UI thread and JS Thread.
When we press the flip button, we will toggle the spin value between 0 and 1.
When these values change, we will have to apply rotation to our cards, as discussed above.
To calculate our rotation style values for cards based on the spin shared value, we will use interpolate function available in Reanimated. It takes a shared value and input range of that shared value and gives us a value between output range.
So for our F view, we need to rotate it from 0 to 180 degrees when the spin value changes from 0 to 1.
And similarly, for the B view, we need to rotate it from 180 degrees to 360 degrees when the spin value changes from 0 to 1.
Now we cannot pass these to our cards as plain styles because these are animated values. For that, we will use the useAnimatedStyle hook present in Reanimated. It returns us a style object which we can pass to our Animated Views like this
And similarly, for the B view:
Now let's add these animated styles to our cards.
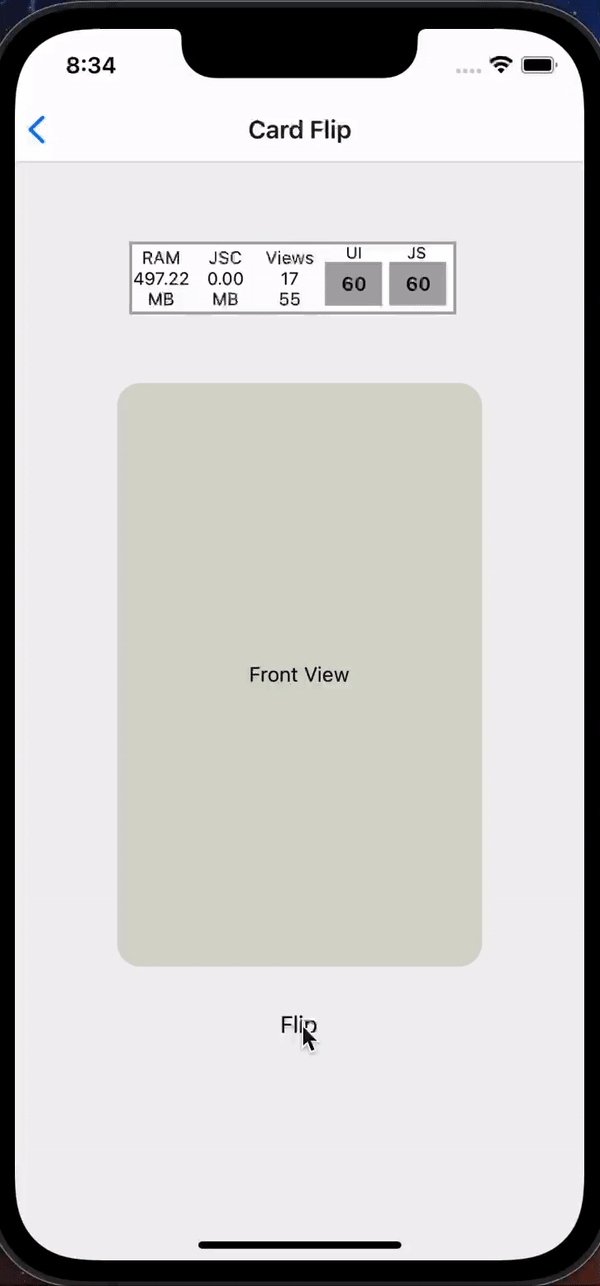
After we have completed the steps, your card should look like the demo I have attached below. We can also see that our animation runs smoothly at 60 FPS without any stutter.
Conclusion
I hope this article was helpful in understanding the steps involved in Card Flip animation in React Native. You can now build some cool animations with Reanimated and share your experiences with us.
Subscribe to Our Newsletter
Subscribe to RSS
Press & Media Hub RSS FeedRelated Articles.
More from the engineering frontline.
Dive deep into our research and insights on design, development, and the impact of various trends to businesses.

May 14, 2026
Building a Production-Ready Image Cropper in React Native

Apr 14, 2026
The Keyboard Bounce of Death: Handling Inputs on Complex React Native Screens

Mar 3, 2026
Performant Vertical Feed in Expo: HLS Caching on iOS

Jan 28, 2026
Brewminate Spotlights GeekyAnts' Technical Breakthrough in EV Supply Chain Management

Jan 27, 2026
We Break Into the Top 10 for AI and Software Development in the US

Jan 27, 2026