Feb 27, 2020
Full Stack (MERN) + GraphQL Boilerplate / Starter Part-I
Next.js + React + GraphQL + Express + Apollo + MongoDB + TypeScript
Author

Book a call
Before we get started, I want to let you, the reader know, I plan to keep this updated for the foreseeable future. So, if something is broken, do leave a comment on the GitHub repo so I can fix it. I’m hoping to never have package installs with explicit version numbers unless absolutely necessary.
In this tutorial, we will create a next.js, react.js, and express app with apollo integration. I will be using MongoDB Database you can use whatever you find suitable for your project.
This is the first article of the Full Stack (MERN) + GraphQL Boilerplate / Starter series:

Repository Link: - https://github.com/garganurag893/Next.js_GraphQL_Express_Apollo_Boilerplate
Before we proceed we should know what features we are going to cover while learning from this tutorial.
Features.
GraphQL
GraphQL is a query language for APIs used for fulfilling queries with your existing data. GraphQL provides a complete and understandable description of the data in your API, gives clients the power to ask for exactly what they need and nothing more, makes it easier to evolve APIs over time and enables powerful developer tools.
Express
Express is a minimal and flexible Node.js web application framework that provides a robust set of features for web and mobile applications.
Next.js
Next.js extends React to provide a powerful method for loading a page's initial data, no matter where it is coming from. With a single place to prepopulate page context, server-side rendering with Next.js seamlessly integrates with any existing data-fetching strategy.
React
React makes it painless to create interactive UIs. Design simple views for each state in your application and React will efficiently update and render just the right components when your data changes.
React Apollo
React Apollo allows you to fetch data from your GraphQL server and use it in building complex and reactive UIs using the React framework. React Apollo may be used in any context that React may be used; in the browser, in React Native, or in Node.js when you want to do server-side rendering.
TypeScript
TypeScript is an open-source programming language developed and maintained by Microsoft. It is a strict syntactical superset of JavaScript and adds optional static typing to the language. TypeScript is designed for development of large applications and trans-compiles to JavaScript.
Why choose this boilerplate?
Github GraphQL API
You may be wondering why Github chose to start supporting GraphQL. Their API was designed to be RESTful and hypermedia-driven. They’re fortunate to have dozens of different open-source clients written in a plethora of languages & businesses grew around these endpoints. Like most technology, REST is not perfect and has some drawbacks. Their ambition to change their API is focused on solving two problems:
Read more about this here: https://github.blog/2016-09-14-the-github-graphql-api/
GraphQL At Artsy
Their team started using a GraphQL orchestration layer that connects various APIs with multiple front-end apps including iOS. It also handles caching and extracts some business logic out of their client apps. This helped them not only to be more consistent with the way they fetch data across apps but also improved developer happiness and even bridged teams by having their web and iOS developers work with the same API layer.
Read more at: https://artsy.github.io/blog/2016/11/02/improving-page-speed-with-graphql/ & https://www.graphql.com/case-studies/
Why choose Apollo for GraphQL?
Apollo platform is an implementation of GraphQL that can transfer data between the cloud (server) to the UI of your app. In fact, Apollo builds its environment in such a way that we can use it to handle GraphQL on the client as well as the server-side of the application.
Setting Up The Server:
So, Let’s start by creating a new project directory :
Navigate to project directory and run command :
Installing Dependencies:
Now we will install all the dependencies which are required for the basic setup as mentioned below:
Install dependencies using the command:
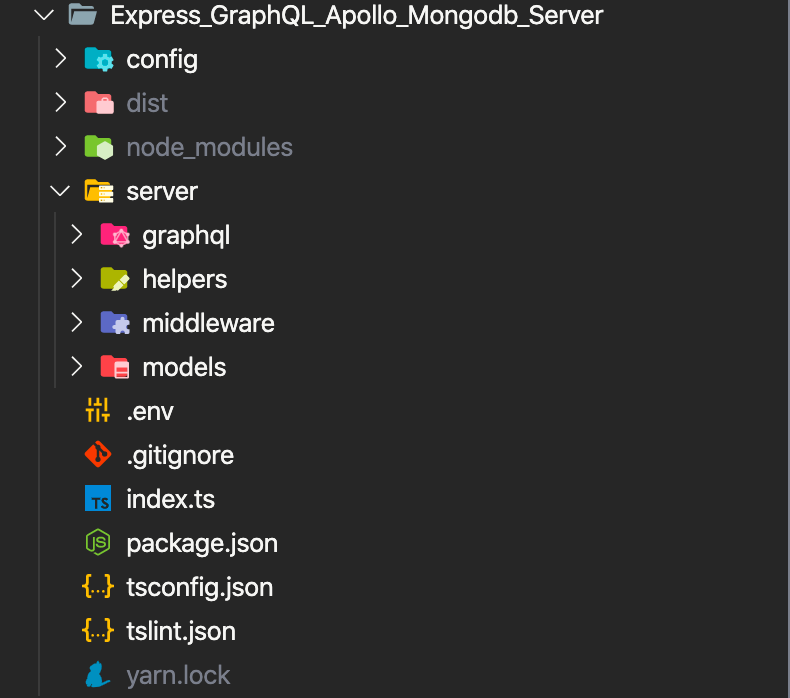
Folder Structure
Make the following folder structure to house everything:
Adding TypeScript:
TypeScript is a typed superset of JavaScript that compiles to plain JavaScript.
The presence of a tsconfig.json file in a directory indicates that the directory is the root of a TypeScript project. The tsconfig.json file specifies the root files and the compiler options required to compile the project. A project is compiled in one of the following ways:
Using tsconfig :
tsconfig.json☟
{
  "compilerOptions": {
    "target": "es6",
    "module": "commonjs",
    "pretty": true,
    "sourceMap": true,
    "outDir": "dist",
    "importHelpers": true,
    "strict": true,
    "noImplicitAny": false,
    "strictNullChecks": false,
    "noImplicitThis": true,
    "alwaysStrict": true,
    "noUnusedLocals": true,
    "noUnusedParameters": false,
    "noImplicitReturns": true,
    "noFallthroughCasesInSwitch": true,
    "moduleResolution": "node",
    "baseUrl": ".",
    "allowSyntheticDefaultImports": true,
    "experimentalDecorators": true,
    "emitDecoratorMetadata": true,
    "resolveJsonModule": true,
    "esModuleInterop": true,
    "lib": [
      "es5",
      "es6",
      "dom",
      "es2015.core",
      "es2015.collection",
      "es2015.generator",
      "es2015.iterable",
      "es2015.promise",
      "es2015.proxy",
      "es2015.reflect",
      "es2015.symbol",
      "es2015.symbol.wellknown",
      "esnext.asynciterable"
    ]
  },
  "include": ["server/**/*", "config/**/*", "index.ts"]
}
Environment Setup:
Before we begin coding, we should set up the development environment.
Dotenv is a zero-dependency module that loads environment variables from a .env file into process.env.
config/index.ts☟
/**
 * Config file
 */

import dotenv from 'dotenv';
dotenv.config();
export default {
    db: process.env.DB,
    jwtSecret: process.env.JWT_SECRET,
    port: process.env.PORT,
    allowedOrigins: ['http://localhost:3000', 'http://yourapp.com', 'http://localhost:4020']
};
After setting up the environment, let's proceed by setting up the Schema.
GraphQL Schema Setup:
It is required by GraphQL as every GraphQL service defines a set of types that completely describe the set of possible data you can query on that service. Then when queries come in, they are validated and executed against that Schema.
server/graphql/schema/index.js ☟
/**
 * Primary file for GraphQL Schema
 */

import { gql } from 'apollo-server-express';
import { ApolloServerExpressConfig } from 'apollo-server-express';
import resolvers from '../resolvers/index';

const typeDefs = gql`
  type Query {
    users: [User!]!
    user(userId: ID!): User!
    login(email: String!, password: String!): AuthData!
  }
  type Mutation {
    createUser(userInput: UserInput): AuthData!
    updateUser(userId: ID!, updateUser: UpdateUser): User!
  }
  type Subscription {
    userAdded: User
  }
  type User {
    _id: ID!
    email: String!
    name: String!
    password: String
    createdAt: String!
    updatedAt: String!
  }
  type AuthData {
    userId: ID!
    token: String!
    tokenExpiration: Int!
  }
  input UserInput {
    email: String!
    name: String!
    password: String!
  }
  input UpdateUser {
    email: String
    name: String
    password: String
  }
`;

const schema: ApolloServerExpressConfig = {
  typeDefs,
  resolvers,
  introspection: true,
  context: async ({ req, connection, payload }: any) => {
    if (connection) {
      return { isAuth: payload.authToken };
    }
    return { isAuth: req.isAuth };
  },
  playground: true
};

export default schema;
Now to complete the GraphQL setup we have to add Resolvers.
Adding GraphQL Resolvers:
It provides the instructions for turning a GraphQL operation (a query, mutation, or subscription) into data. They either return the same type of data we specify in our schema or a promise for that data.
server/graphql/resolvers/index.ts ☟
/**
 * Exporting all resolvers
 */

import { UserMutation, UserQueries, UserSubscription } from './user';

const rootResolver = {
  Query: {
    ...UserQueries
    // Add other queries here
  },
  Mutation: {
    ...UserMutation
    // Add other mutations here
  },
  Subscription: {
    ...UserSubscription
    // Add other subscriptions here
  }
};

export default rootResolver;
server/graphql/resolvers/user.ts ☟
/**
 * File containing all user queries, mutations and subscriptions
 */

import { PubSub } from 'apollo-server';
import jwt from 'jsonwebtoken';
import mongoose from 'mongoose';
import config from '../../../config';
import User from '../../models/user';
import { transformUser } from './merge';
const pubsub = new PubSub();

const USER_ADDED = 'USER_ADDED';

/**
 * User Queries
 */
const UserQueries = {
  users: async (parent, args, context) => {
    try {
      const users = await User.find();
      return users.map((user) => {
        return transformUser(user);
      });
    } catch (err) {
      throw err;
    }
  },
  user: async (parent, { userId }) => {
    try {
      const user = await User.findById(userId);
      return transformUser(user);
    } catch (err) {
      throw err;
    }
  },
  login: async (parent, { email, password }) => {
    try {
      const user: any = await User.findOne({ email, password });
      if (!user) {
        throw new Error('User does not Exists');
      }
      const token = jwt.sign({ userId: user.id }, config.jwtSecret, {
        expiresIn: '1h'
      });
      return {
        userId: user.id,
        token,
        tokenExpiration: 1
      };
    } catch (err) {
      throw err;
    }
  }
};

/**
 * User Mutations
 */
const UserMutation = {
  createUser: async (parent: any, { userInput }: any) => {
    try {
      const user = await User.findOne({
        email: userInput.email
      });
      if (user) {
        throw new Error('User already Exists');
      } else {
        const newUser = new User({
          _id: new mongoose.Types.ObjectId(),
          email: userInput.email,
          name: userInput.name,
          password: userInput.password
        });
        const savedUser = await newUser.save();
        pubsub.publish(USER_ADDED, {
          userAdded: transformUser(savedUser)
        });
        const token = jwt.sign({ userId: savedUser.id }, config.jwtSecret, {
          expiresIn: '1h'
        });
        return {
          userId: savedUser.id,
          token,
          tokenExpiration: 1
        };
      }
    } catch (error) {
      throw error;
    }
  },
  updateUser: async (parent, { userId, updateUser }, context) => {
    // If not authenticated throw error
    if (!context.isAuth) {
      throw new Error('Non Authenticated');
    }
    try {
      const user = await User.findByIdAndUpdate(userId, updateUser, {
        new: true
      });
      return transformUser(user);
    } catch (error) {
      throw error;
    }
  }
};

/**
 * User Subscriptions
 */
const UserSubscription = {
  userAdded: {
    subscribe: () => pubsub.asyncIterator([USER_ADDED])
  }
};

export { UserQueries, UserMutation, UserSubscription };
To save time, I created a function for transforming user return objects so that I can call it every time I need to return a user object.
/**
 * Primary file for extracting proper schema structured objects
 */

import dateToString from '../../helpers/date';
import User from '../../models/user';

/**
 * Get user object with schema typing
 * @param id
 */
const getUser = async (id: string) => {
  try {
    const user: any = await User.findById(id);
    return {
      ...user._doc,
      _id: user.id,
      createdAt: dateToString(user._doc.createdAt),
      updatedAt: dateToString(user._doc.updatedAt)
    };
  } catch (err) {
    throw err;
  }
};

/**
 * Get user object with schema typing
 * @param user
 */
const transformUser = (user: any) => {
  return {
    ...user._doc,
    _id: user.id,
    createdAt: dateToString(user._doc.createdAt),
    updatedAt: dateToString(user._doc.updatedAt)
  };
};

export { getUser, transformUser };
That's it! The GraphQL Setup is complete. Now it's time to configure express to set up the server.
Setting Up Express:
Setting up express is not difficult at all. Create a .ts file in the config folder and follow the code below:
config/express.ts☟
/**
 * File containing Express Configuration
 */

import { ApolloServer } from 'apollo-server-express';
import cors from 'cors';
import express from 'express';
import * as http from 'http';
import schema from '../server/graphql/schema/index';
import auth from '../server/middleware/auth';
import config from './index';

class Express {
  public express: express.Application;
  public server: ApolloServer = new ApolloServer(schema);
  public httpServer: http.Server;
  public init = (): void => {
    /**
     * Creating an express application
     */
    this.express = express();
    /**
     * Middlerware for using CORS
     */
    this.express.use(cors({
      origin(origin, callback) {
        /**
         * Allow requests with no origin
         * Like mobile apps or curl requests
         */
        if (!origin) { return callback(null, true); }
        if (config.allowedOrigins.indexOf(origin) === -1) {
          const msg = `The CORS policy for this site does not
          allow access from the specified Origin.`;
          return callback(new Error(msg), false);
        }
        return callback(null, true);
      }
    }));
    /**
     *  Middlerware for extracting authToken
     */
    this.express.use(auth);
    this.server.applyMiddleware({ app: this.express });
    this.httpServer = http.createServer(this.express);
    /**
     * Installing subscription handlers
     */
    this.server.installSubscriptionHandlers(this.httpServer);
  }
}

export default Express;
Now create a file index.js in the project directory where we will connect our database to the server.
index.ts☟
/**
 * Bootstrap your app
 */

import Promise from 'bluebird';
import mongoose from 'mongoose';
import config from './config';
import Express from './config/express';

/**
 * Promisify All The Mongoose
 * @param mongoose
 */
Promise.promisifyAll(mongoose);

/**
 * Connecting Mongoose
 * @param uris
 * @param options
 */
mongoose.connect(config.db, {
  bufferMaxEntries: 0,
  keepAlive: true,
  reconnectInterval: 500,
  reconnectTries: 30,
  socketTimeoutMS: 0,
  useNewUrlParser: true,
  useUnifiedTopology: true
});

/**
 * Throw error when not able to connect to database
 */
mongoose.connection.on('error', () => {
  throw new Error(`unable to connect to database: ${config.db}`);
});

/**
 * Initialize Express
 */
const ExpressServer = new Express();
ExpressServer.init();

/**
 * Listen to port
 */
ExpressServer.httpServer.listen(process.env.PORT || config.port, () => {
  console.log(`?  Server ready at ${config.port}`);
  console.log(
    `? Server ready at http://localhost:${config.port}${ExpressServer.server.graphqlPath}`
  );
  console.log(
    `? Subscriptions ready at ws://localhost:${config.port}${ExpressServer.server.subscriptionsPath}`
  );
});
That’s it. Run the server and go live.?
Visit the below link to learn about the Next.js Client Setup ☟
https://geekyants.com/blog/full-stack-mern--graphql-boilerplate--starter-part-ii
Book a Discovery Call
Subscribe to Our Newsletter
Subscribe to RSS
Press & Media Hub RSS FeedRelated Articles.
More from the engineering frontline.
Dive deep into our research and insights on design, development, and the impact of various trends to businesses.

Jul 10, 2026
How We Built the Missing Bridge from Code to Figma

Jun 27, 2026
Building a Resilient Hybrid-Cloud Network with WireGuard HA, Route-Based Failover, and Deep Observability

Jun 19, 2026
We Built a 114-Second AWS-to-Azure Failover. Here’s What We Learned

Jun 12, 2026
Cloud-Native and Cloud-Agnostic Are Not Ideologies; They Are Business-Stage Decisions

Jun 8, 2026
Geeklego: The Open-Source Design System Built to Work With AI

May 18, 2026