Table of Contents
Building A Rapido Clone in Flutter and Spring Boot
Author

Subject Matter Expert


Date
Book a call
The online bike taxi service in India is rising in popularity. Customers using the services of a bike taxi service report the following advantages:
- Faster transit routes
- Lower prices for individual travels
- Better accessibility advantages
Rapido is the market leader in this sector. It has a great UI, and the app delivers a user experience perspective.
Ridde is our attempt to clone the application using Flutter and Spring Boot. It provides commuters with the convenience of booking a bike taxi online anytime they want. Users can also book an immediate bike ride or schedule a ride for later in advance.
This is a walkthrough on how to create the clone app.
Prerequisites
To follow this tutorial, you must have a basic understanding of
- Flutter with Riverpod state management
- Web sockets
- Java Springboot ( JWT, JPA, H2 database, MVC Architecture) [Backend]
- Firebase (FCM Notifications)
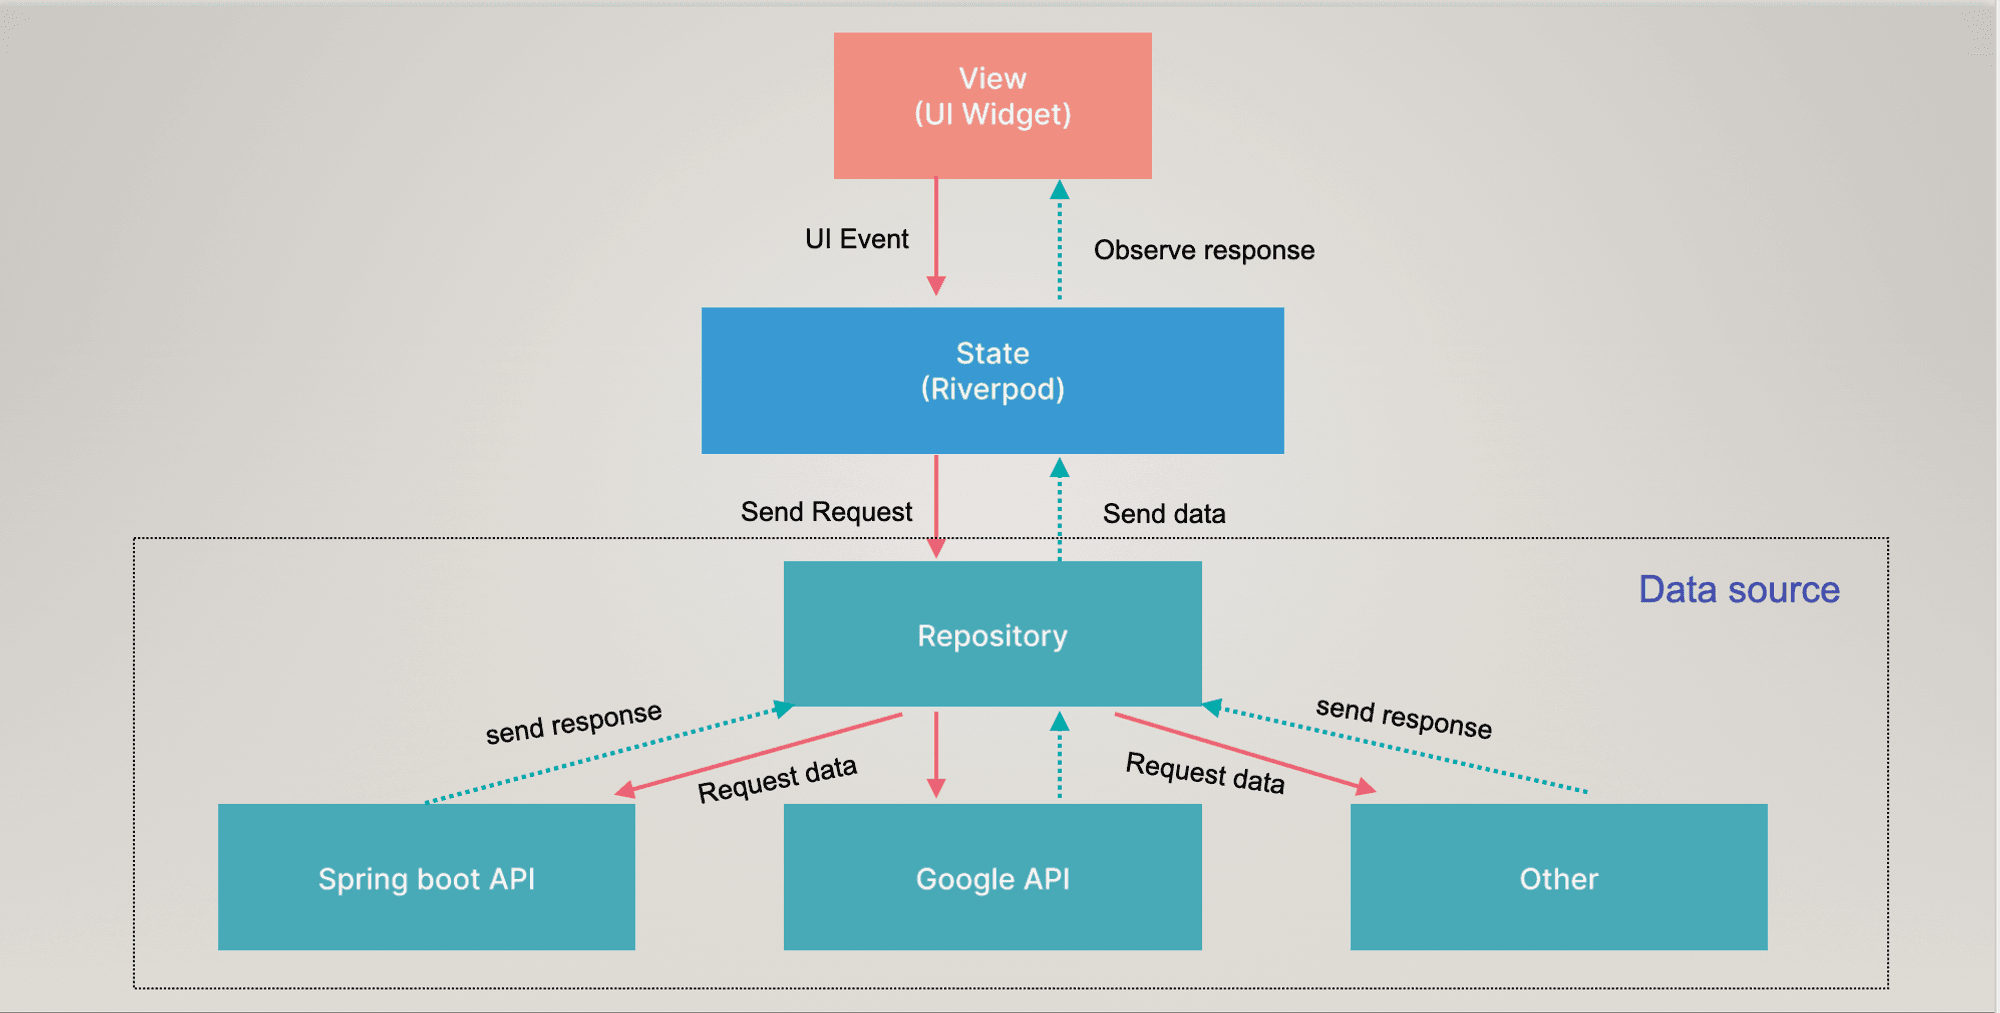
Flow Diagram
What are Web Sockets?
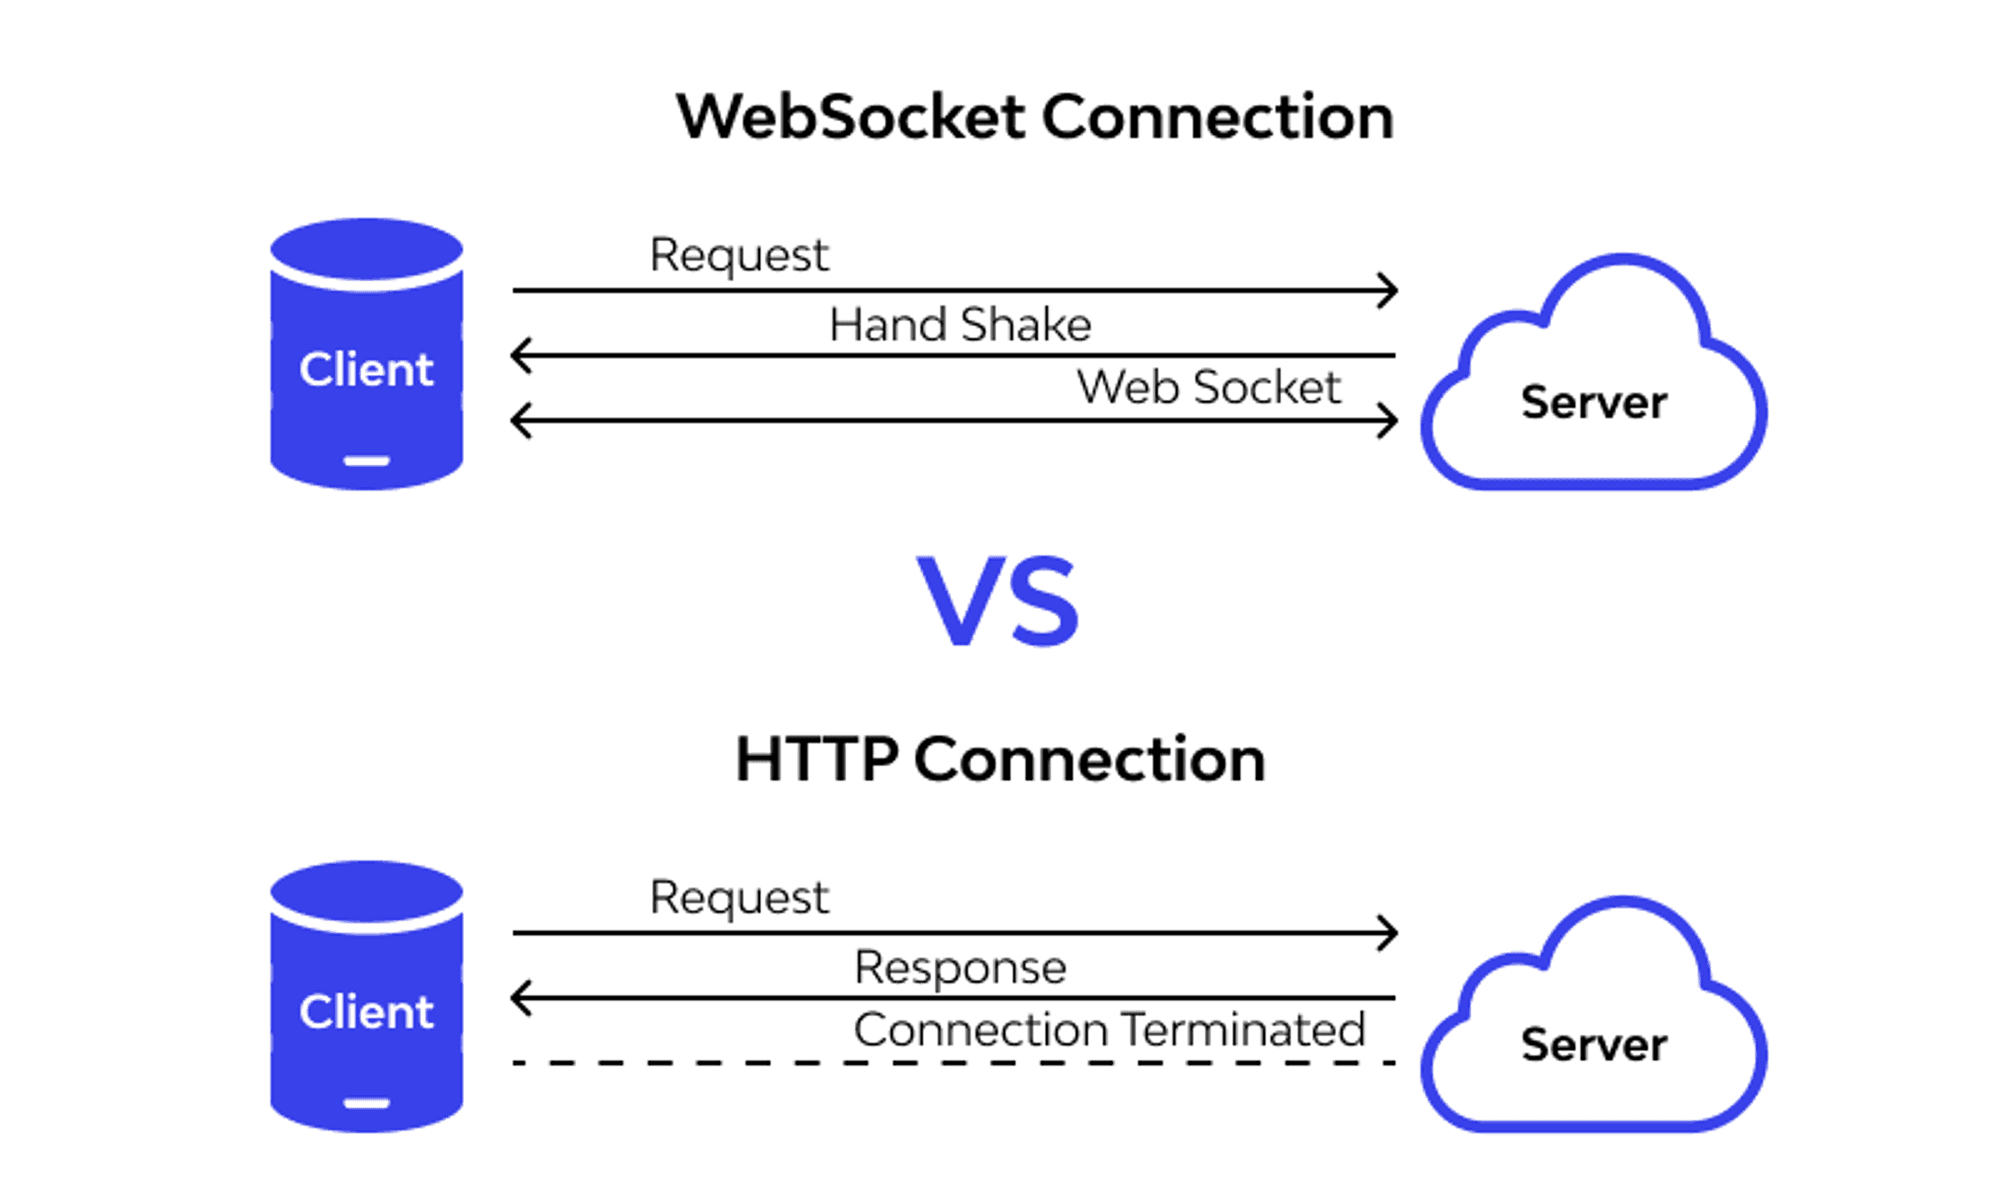
WebSocket is a protocol that allows two-way communication between server and client.
Why STOMP over Web Sockets?
- The WebSocket protocol is a low-level protocol. It defines how a stream of bytes is transformed into frames. A frame may contain a text or a binary message.
- The message lacks information on how to route or process it, making it difficult to implement more complex applications without writing additional code.
- The WebSocket specification allows the use of sub-protocols that operate on a higher application level. One of them, supported by the Spring Framework, is STOMP(simple text-based messaging protocol).
- STOMP, clients, and brokers developed in different languages can send and receive messages to and from each other. It defines a handful of frame types that are mapped onto WebSockets frames CONNECT, SUBSCRIBE, UNSUBSCRIBE, and SEND.
What is Spring Boot?
Spring is a Java framework built to create an enterprise-ready application. But multiple configurations are needed for it to function, so developers find it challenging to focus on their actual work. Spring Boot solves this issue.
Since Spring Boot is built on top of Spring, it offers all the features and benefits of Spring. It reduces code length and provides developers with the easiest way to build an application.
- The backend follows Model-View-Controller (MVC) structure and is based on monolithic architecture where all the project functionalities exist in a single codebase.
- The APIs developed in the backend are RESTful APIs.
- The database used is H2 Database which is an in-memory database.
- For securing our APIs from malicious users, we used spring security and JWT.
Packages Used in the Project
To get started, we need to add the following packages in our pubspec file:
Setting up the Project
1. Frontend
Integrate the Stomp Client
We’ll need to add the Flutter package for the web socket for real-time communication in both projects. You can find it on pub.dev or run the following command in the terminal:
dart pub add stomp_dart_client
Setting up Stomp Client
Create a new folder states with a file stomp_client_state.dart in it for both the user and driver app.
Add the following code to build the socket connection:
- User App
- Driver App
2. Backend
Now let’s setup the backend of this project.
First of all, create a Spring Boot project using Spring Initializr
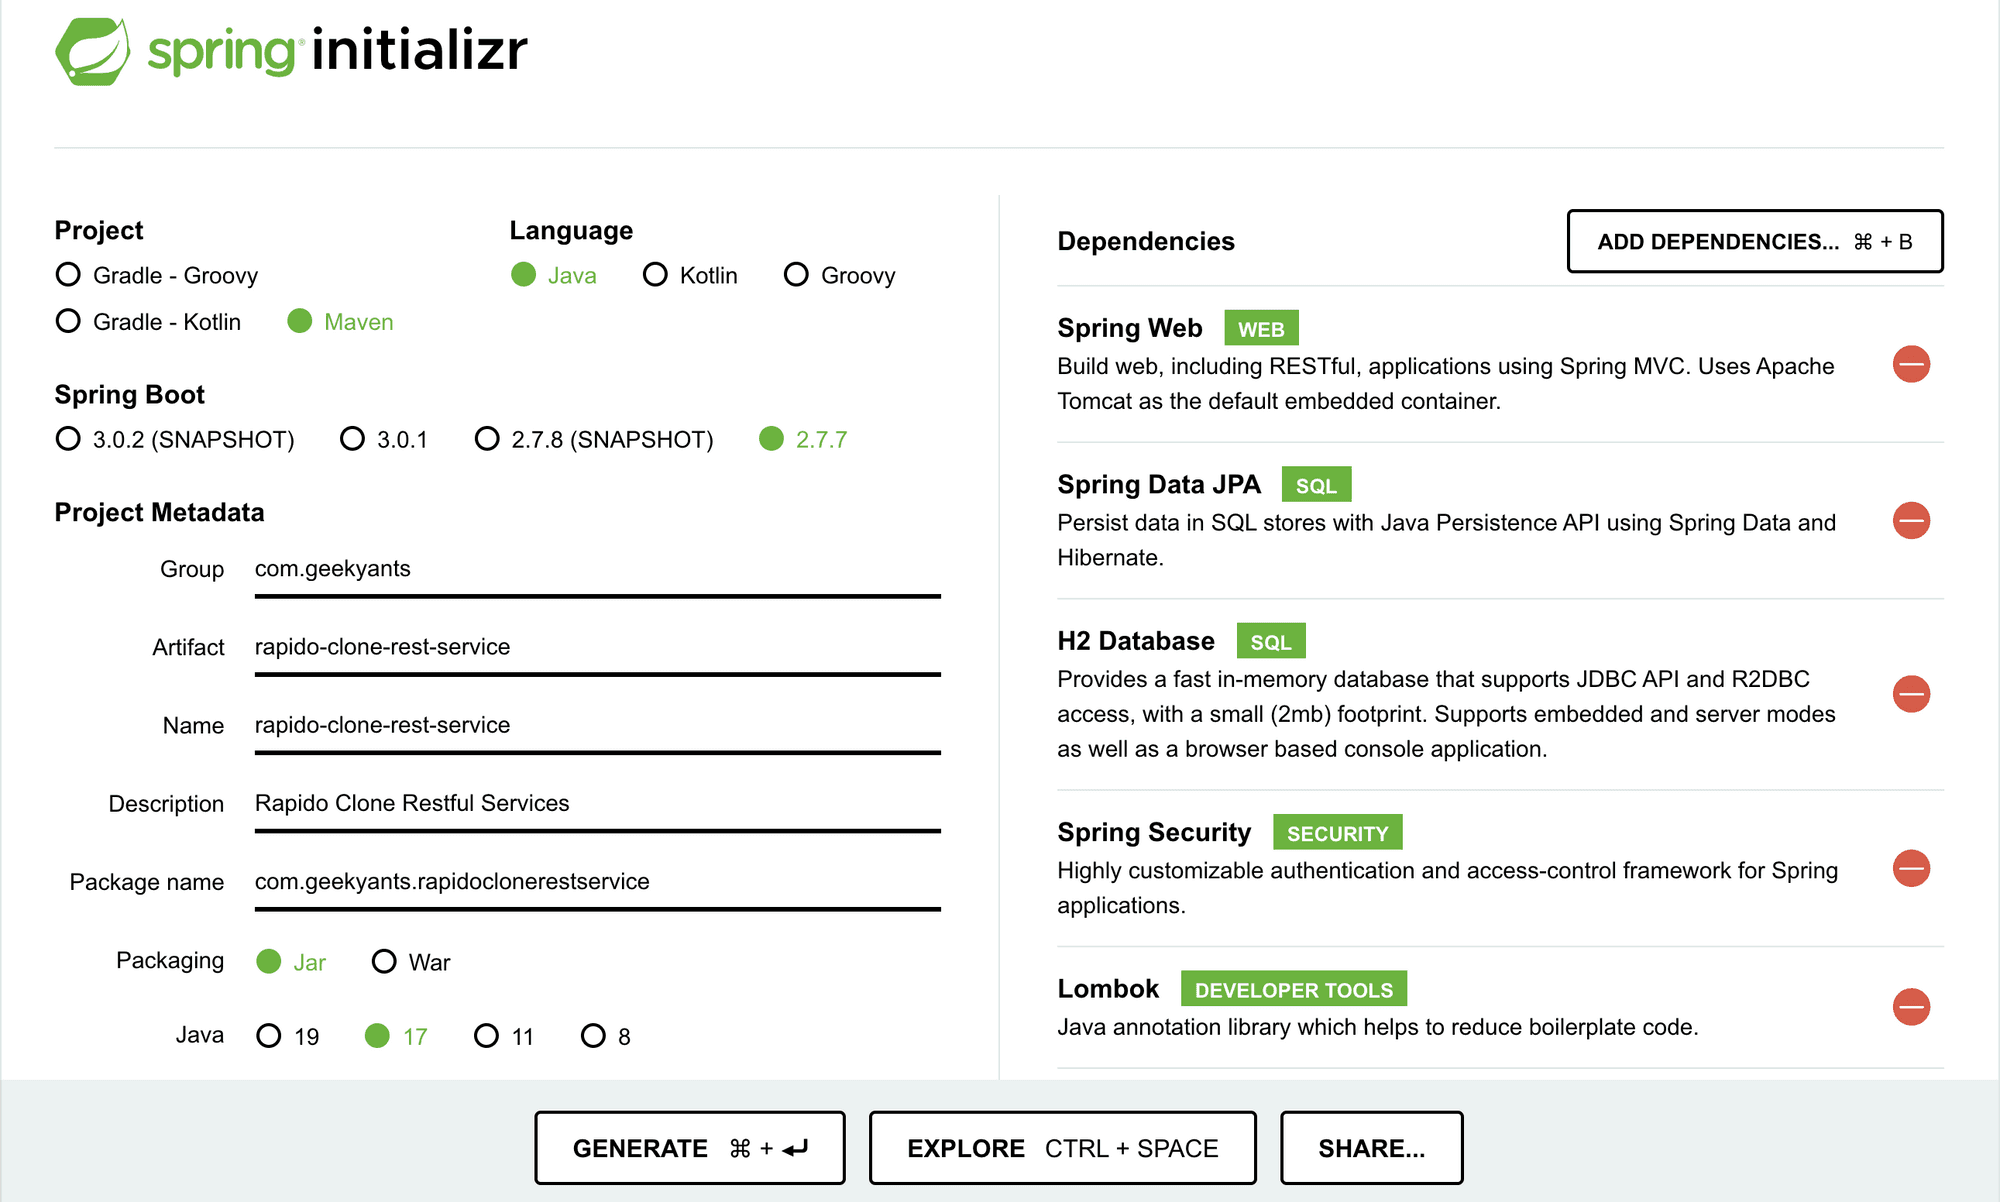
As shown in the image, the build automation tool we are using is maven which is widely used in the spring boot community, Spring Boot version 2.7.3 and Java version 18 are used in the project.
We have added a few dependencies like Spring Web, Spring Data JPA etc. are the required dependencies in the project.
User Registration
Login with Phone Number
Using Twilio integrated at the backend, phone number are authenticated using OTP generated by Twilio which is verified at the backend and a JWT token is generated which allows users to login to the Ridde Application.
Twilio has been integrated in the backend using it’s SDK
With account creation at Twilio, we’ll be provided with accountSid, authToken and trialNumber which are store in application.properties file with their respective names and is used as shown in below snippet:
application.properties
Twilio Model
Twilio Configuration
OTP Generation Code
OTP Verification Code
- Google Sign-in
Add the following line of code in the login_screen.dart file.
To verify the generated id token with the backend, add the following line of code in auth_state.dart file.
With Firebase authentication, an id-token is generated from the front end for that particular gmail account, which is verified at the backend, for which a JWT token is generated if the id-token is genuine.
For verifying the id-token, we need Google API Client Library; add this maven dependency in your pom.xml.
Add the following line of code to your Controller Layer.
Service Implementation Layer
This is the most important layer, as it contains the logic for verifying id-token.
You can refer to this for more understanding: Verify Google token ID
Implementing Web Socket on the server side with Spring Boot
Implementing the WebSocket server-side with Spring Boot is not a very complex task and includes only a couple of steps, which we will walk through individually.
Step 1: First, we must add the maven dependencies required for web sockets.
Step 2: Then, we can configure Spring to enable WebSocket and STOMP messaging.
The method configureMessageBroker does two things:
- Creates the in-memory message broker with one or more destinations for message transfers.
- Defines the prefix app that is used to filter destinations handled by methods annotated with @MessageMapping, which you will implement in a controller. The controller, after processing the message, will send it to the broker.
Going back to the snippet above, you must have noticed a call to the method withSockJS(), it will let our WebSockets work even if an internet browser does not support the WebSocket protocol.
Step 3: Implement a controller that will handle user requests
Instead of the annotation @SendTo, you can also use SimpMessagingTemplate which you can @Autowire inside your controller.
Setting up Firebase Cloud Messaging
Firebase Cloud Messaging
Firebase Cloud Messaging, or FCM for short, is a cloud-based messaging service that provides the following capabilities
- Reliably send messages to mobile or web applications, referred to as “clients.”
- Send messages to all or specific clients using topic or subscription-based addressing
- Receive messages from clients in a server application
The different ways we can send notifications to our vast user base i.e publish notifications to a topic, publish notifications to specific clients, publish notifications to multiple topics.
In our project, we’ll be using FCM tokens for push notifications. Now that we have our Firebase project ready, it's time to code the server component that will send notifications.
Step 1: Include the Firebase-SDK
Step 2: Get the Service Account Private Key from FCM Console
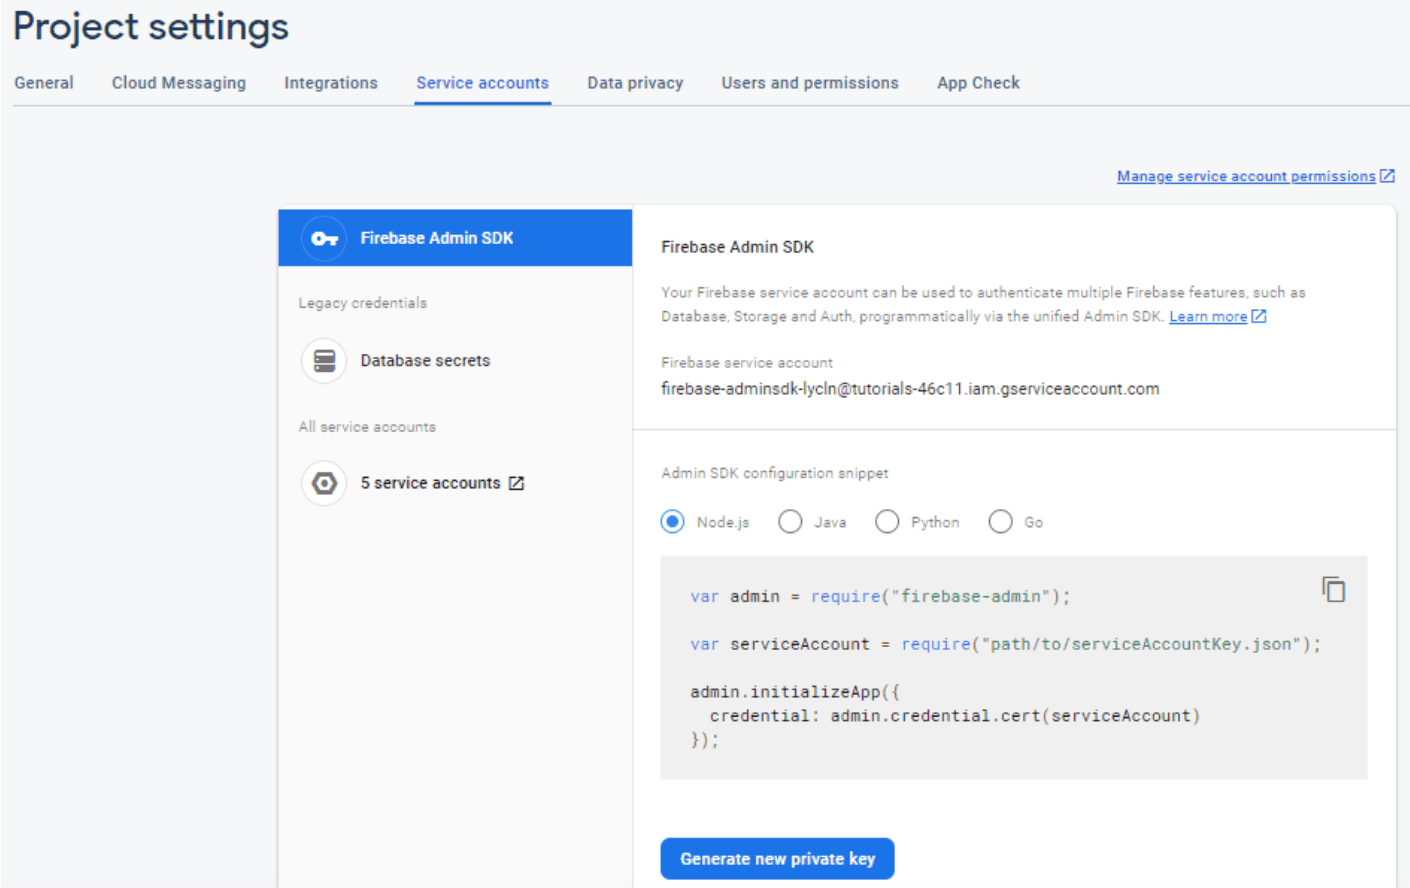
This will download a file as -firebase-adminsdk-.json. Save this file in src/java/resources/fcm folder.
In your application.properties file create key/value like app.firebase-configuration-file=fcm/rapidoclone-360406-firebase-adminsdk-yv3qw-9b136ae55a.json
Step 3: Initialize the Firebase application; for this we need a private key location so to access the location, we can use @Value annotation with key name. Create class FCMConfig.java
In the above code snippets, initialize() method starts up due to @PostConstruct annotation.
Step 4: Create Class FCMService with @Service annotation containing different types of methods.
Step 5: Create class PushNotificationService, which contains methods to send push notifications to topic subscriptions or FCM tokens.
Step 6: Create two files under the model layer PushNotificationRequest.java with columns title, message, topic, and token and PushNotificationResponse.java with columns status and message, and with the help of this configuration, we would be sending push notifications from the controller layer.
Now for displaying the notifications on the front end, the following line of code in home.dart file.
Ride Now and Package Delivery
Ride Now UI

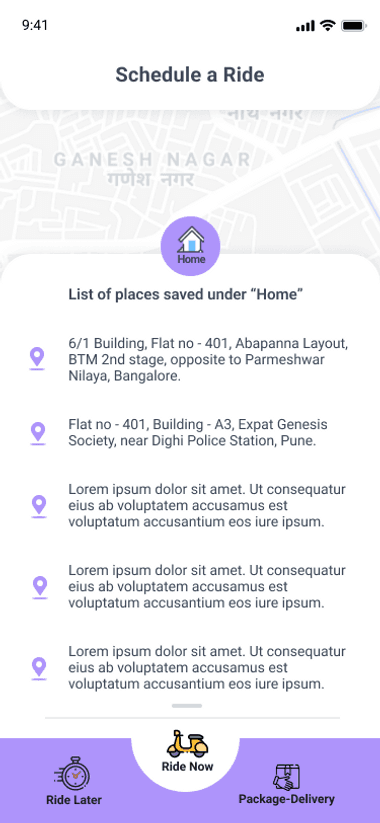
Package Delivery UI

So now as we have a basic understanding of Web Sockets and Firebase Cloud Messaging, let’s start building Ride Now and Package Delivery functionality for the backend first.
We’ll create a POST API for booking or cancelling a Ride Now and Package Delivery so let’s see what our API will look like.
Add the following code in our Controller Layer.
Service Implementation Layer
The service implementation layer consists of two methods :
sendNotificationToDrivers
sendNotificationToDriverssends push notifications to drivers within the range of 11 KM and notifies the nearest available driver for the requested trips by the users, if no driver is found within the range, then we simply respondNo driver found in your area, please try again in some time.checkTripStatus
checkTripStatuskeeps checking the trip status at an interval of 60 seconds till the driver accepts the trip else will notify the userAll drivers are busy right nowafter 5 minutes ofPendingstatus.
sendNotificationToDrivers
checkTripStatus
Below is an API that updates the status to Accepted when the driver confirms a trip and also notifies the user of the same.
Controller Layer
Web Socket for Ride Now [Backend]
Web Socket for Package Delivery
That was all for the backend part of Ride Now and Package Delivery functionality.
Now, let's understand the frontend part
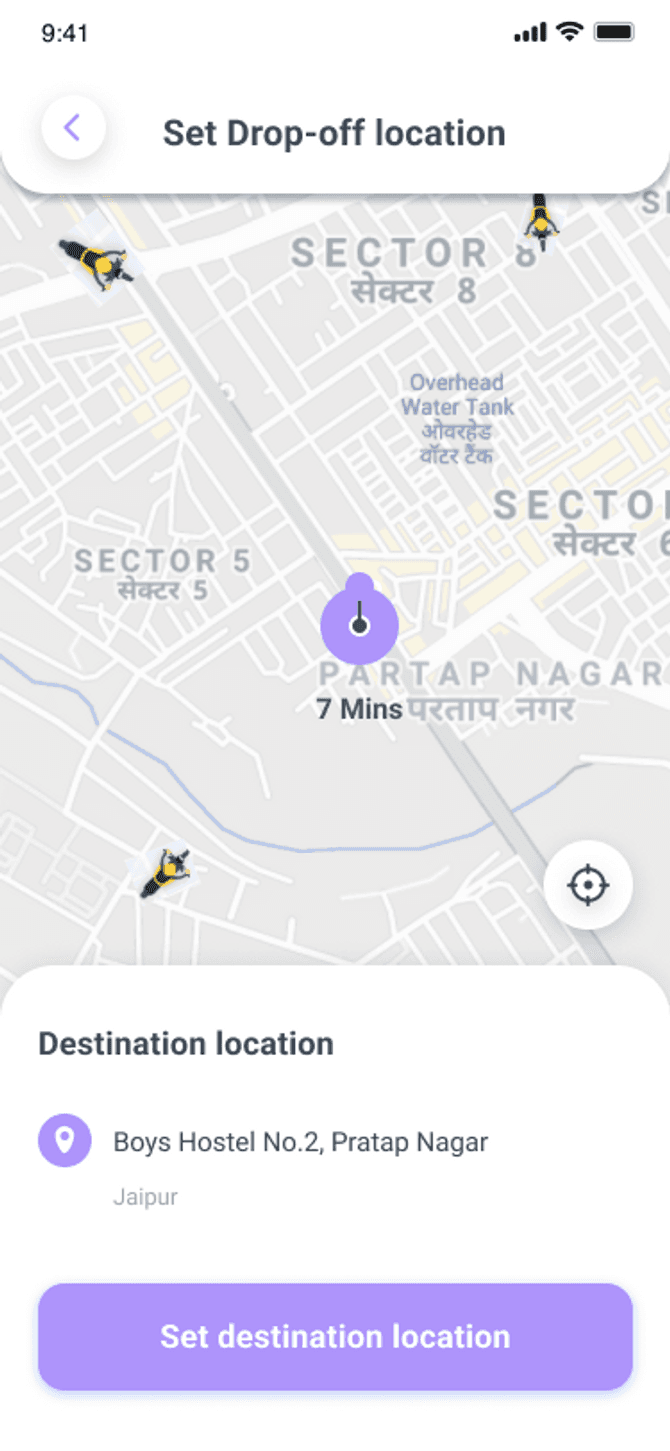
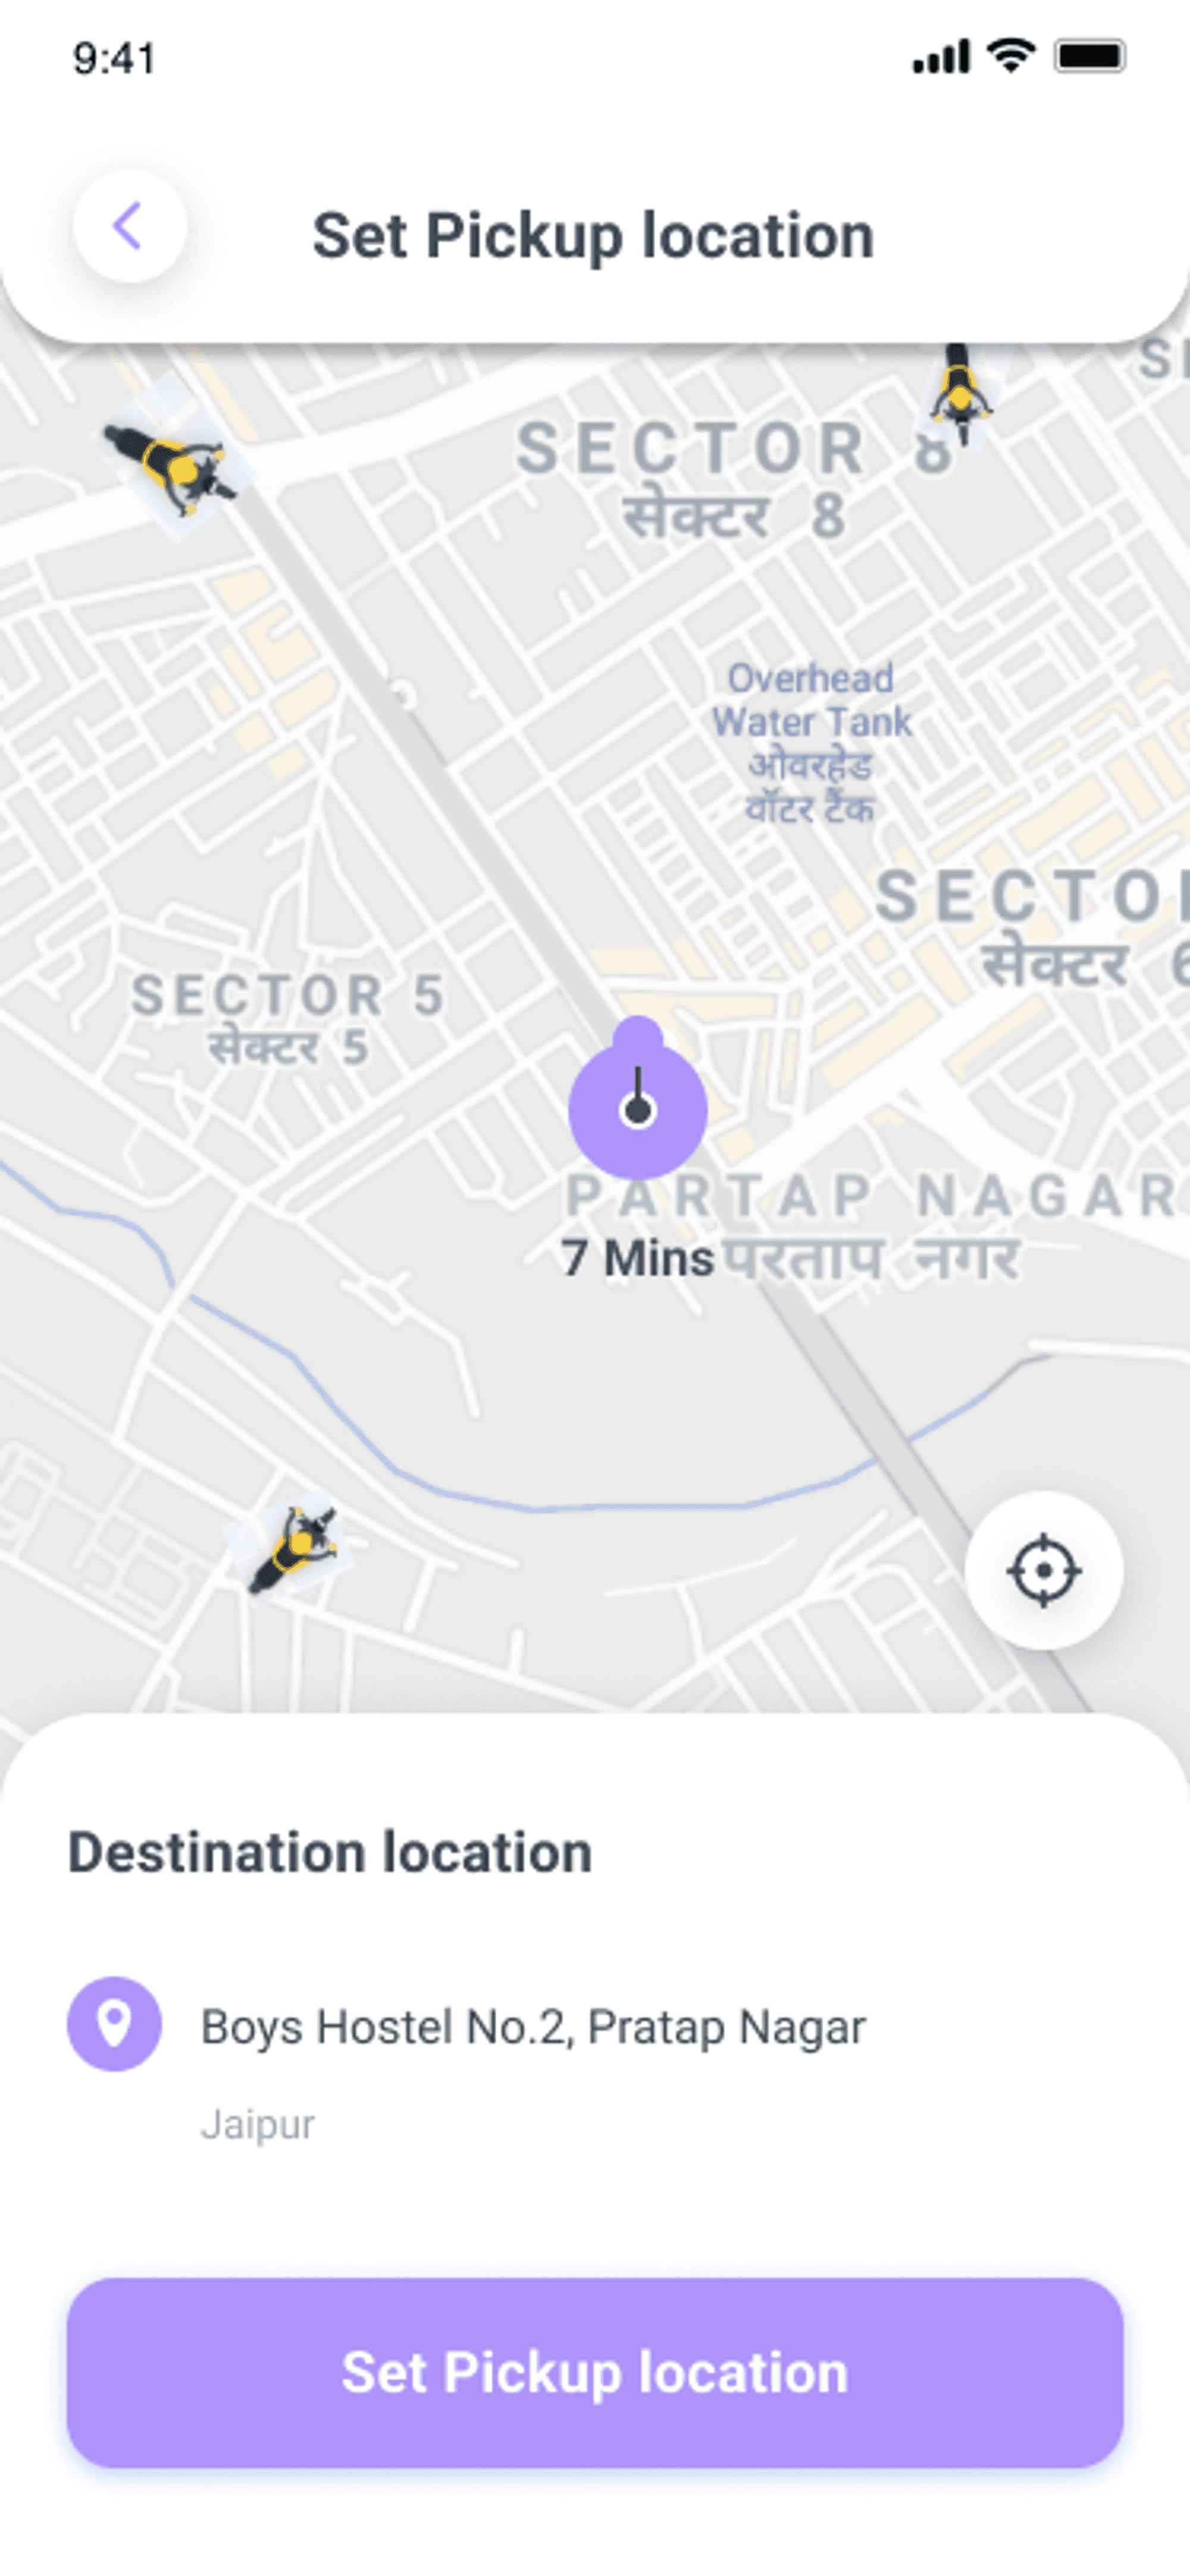
when the user selects the Ride Now tab a bottom sheet will appear where he/she can fill in the pickup and drop-off details.
Add the following line of code to get the source text field.
Similarly to get the drop off details add the following code.
Once the user selected the pickup and drop off location and clicks on the continue button the ride will be initiated from the user side.
Add the following lines of code in direction_state.dart file
Now to make a get request for directions add the following code in direction_repository.dart file
Add the following in the ride_now_screen.dart
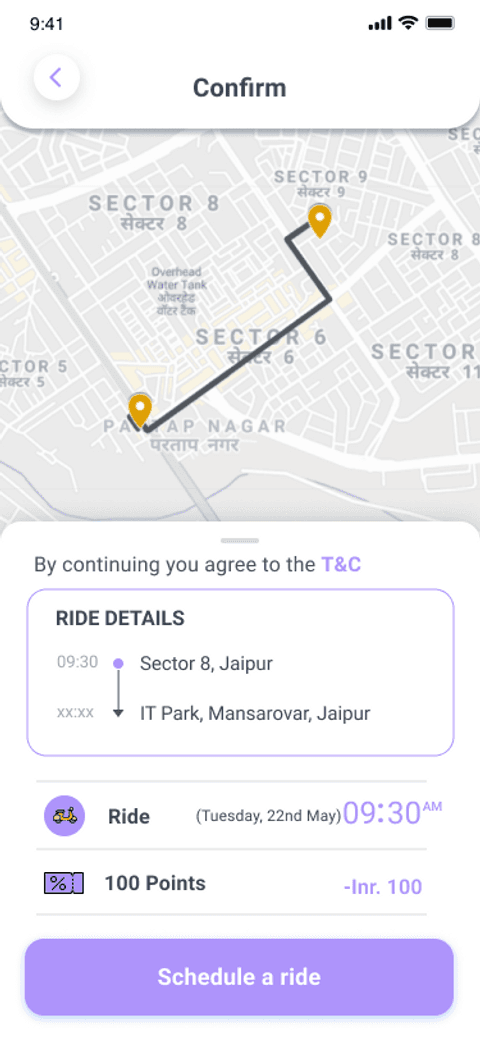
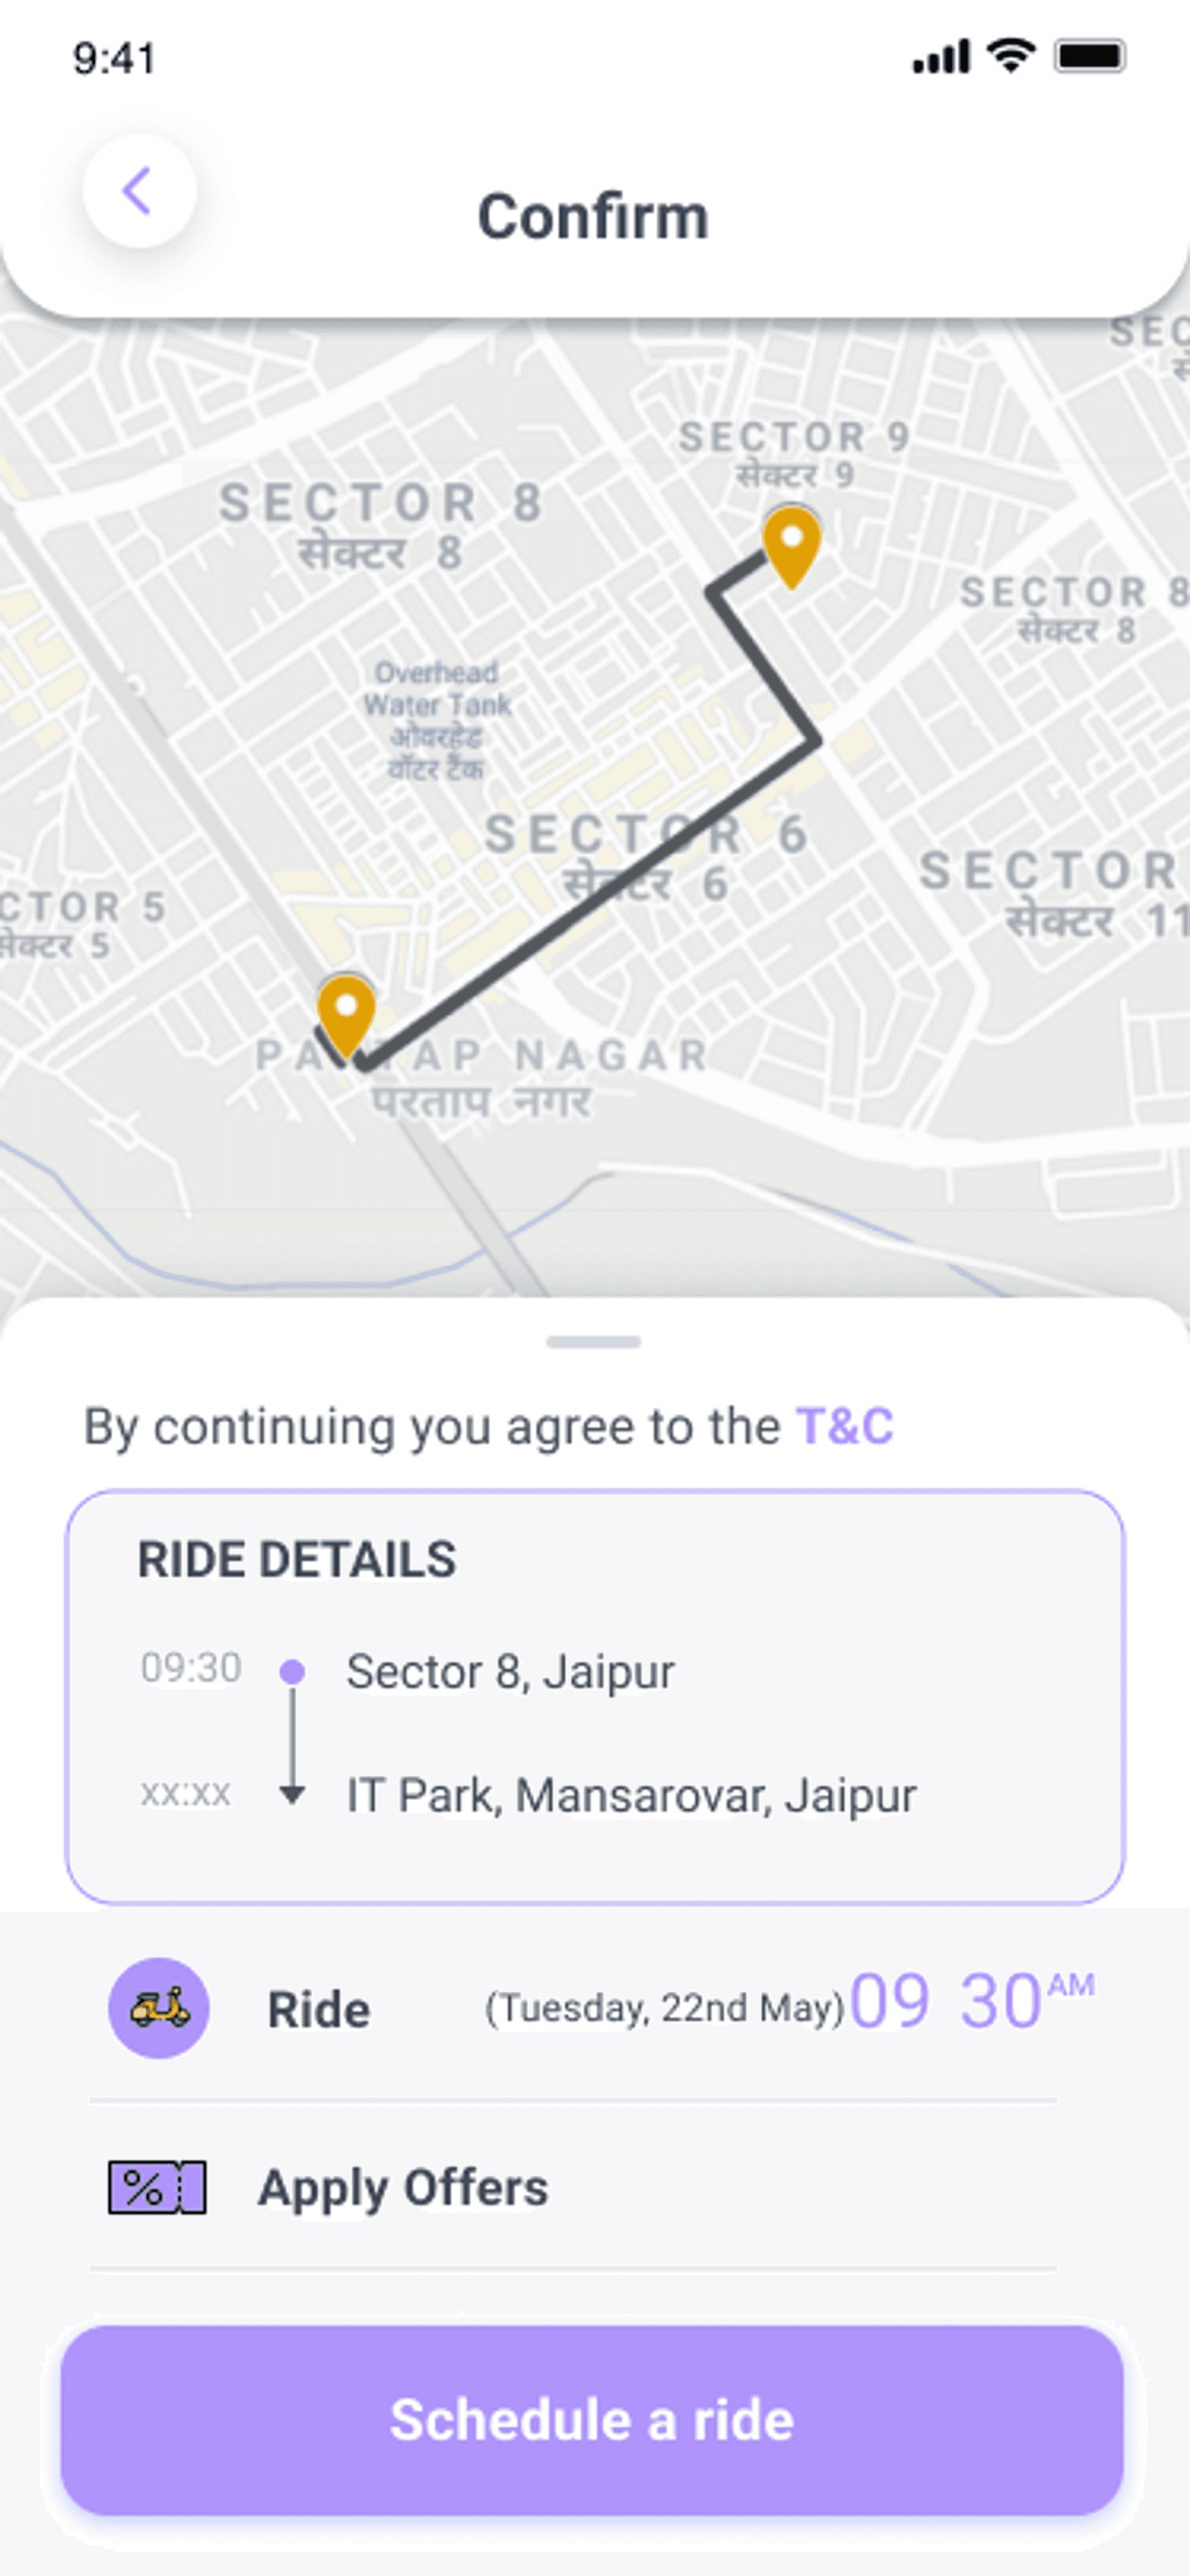
If the state is DirectionSuccessState a new bottom sheet will appear which will show ride details to the user.
When the user confirms the pickup and dropoff details and clicks on the book a ride button.
Here, we build the socket connection to send the ride request to the driver. We are using client.send method provided by the stomp client by sending the data to the destination URL.
When the user books a ride a firebase notification is sent to the nearby drivers with the ride details. The driver can then accept or reject the request. Add the following code in the driver app.
Once the driver accepts the request a ride accepted notification is sent to the user.
If the state is NotificationSuccessState the ride gets initiated from the driver's end as well and the socket connection is established.
The trip status is then set to kTripDriverToUserInProgress and the driver starts moving towards the user pickup location.
Add the following code to update the driver location as the driver moves towards the user pickup location.
When the state is DriverLocationUpdateState the marker of the driver location gets updated on Google Maps.
Below is the code for google_map_widget.dart
Once the driver reaches the user pickup location he can then start the trip ( from pickup to drop off location ) with trip status kTripPickupToDropInProgress.
Similarly, once the driver drops the user at the dropoff location the trip will be completed.
When the trip gets completed the user will get directed to the payment screen.
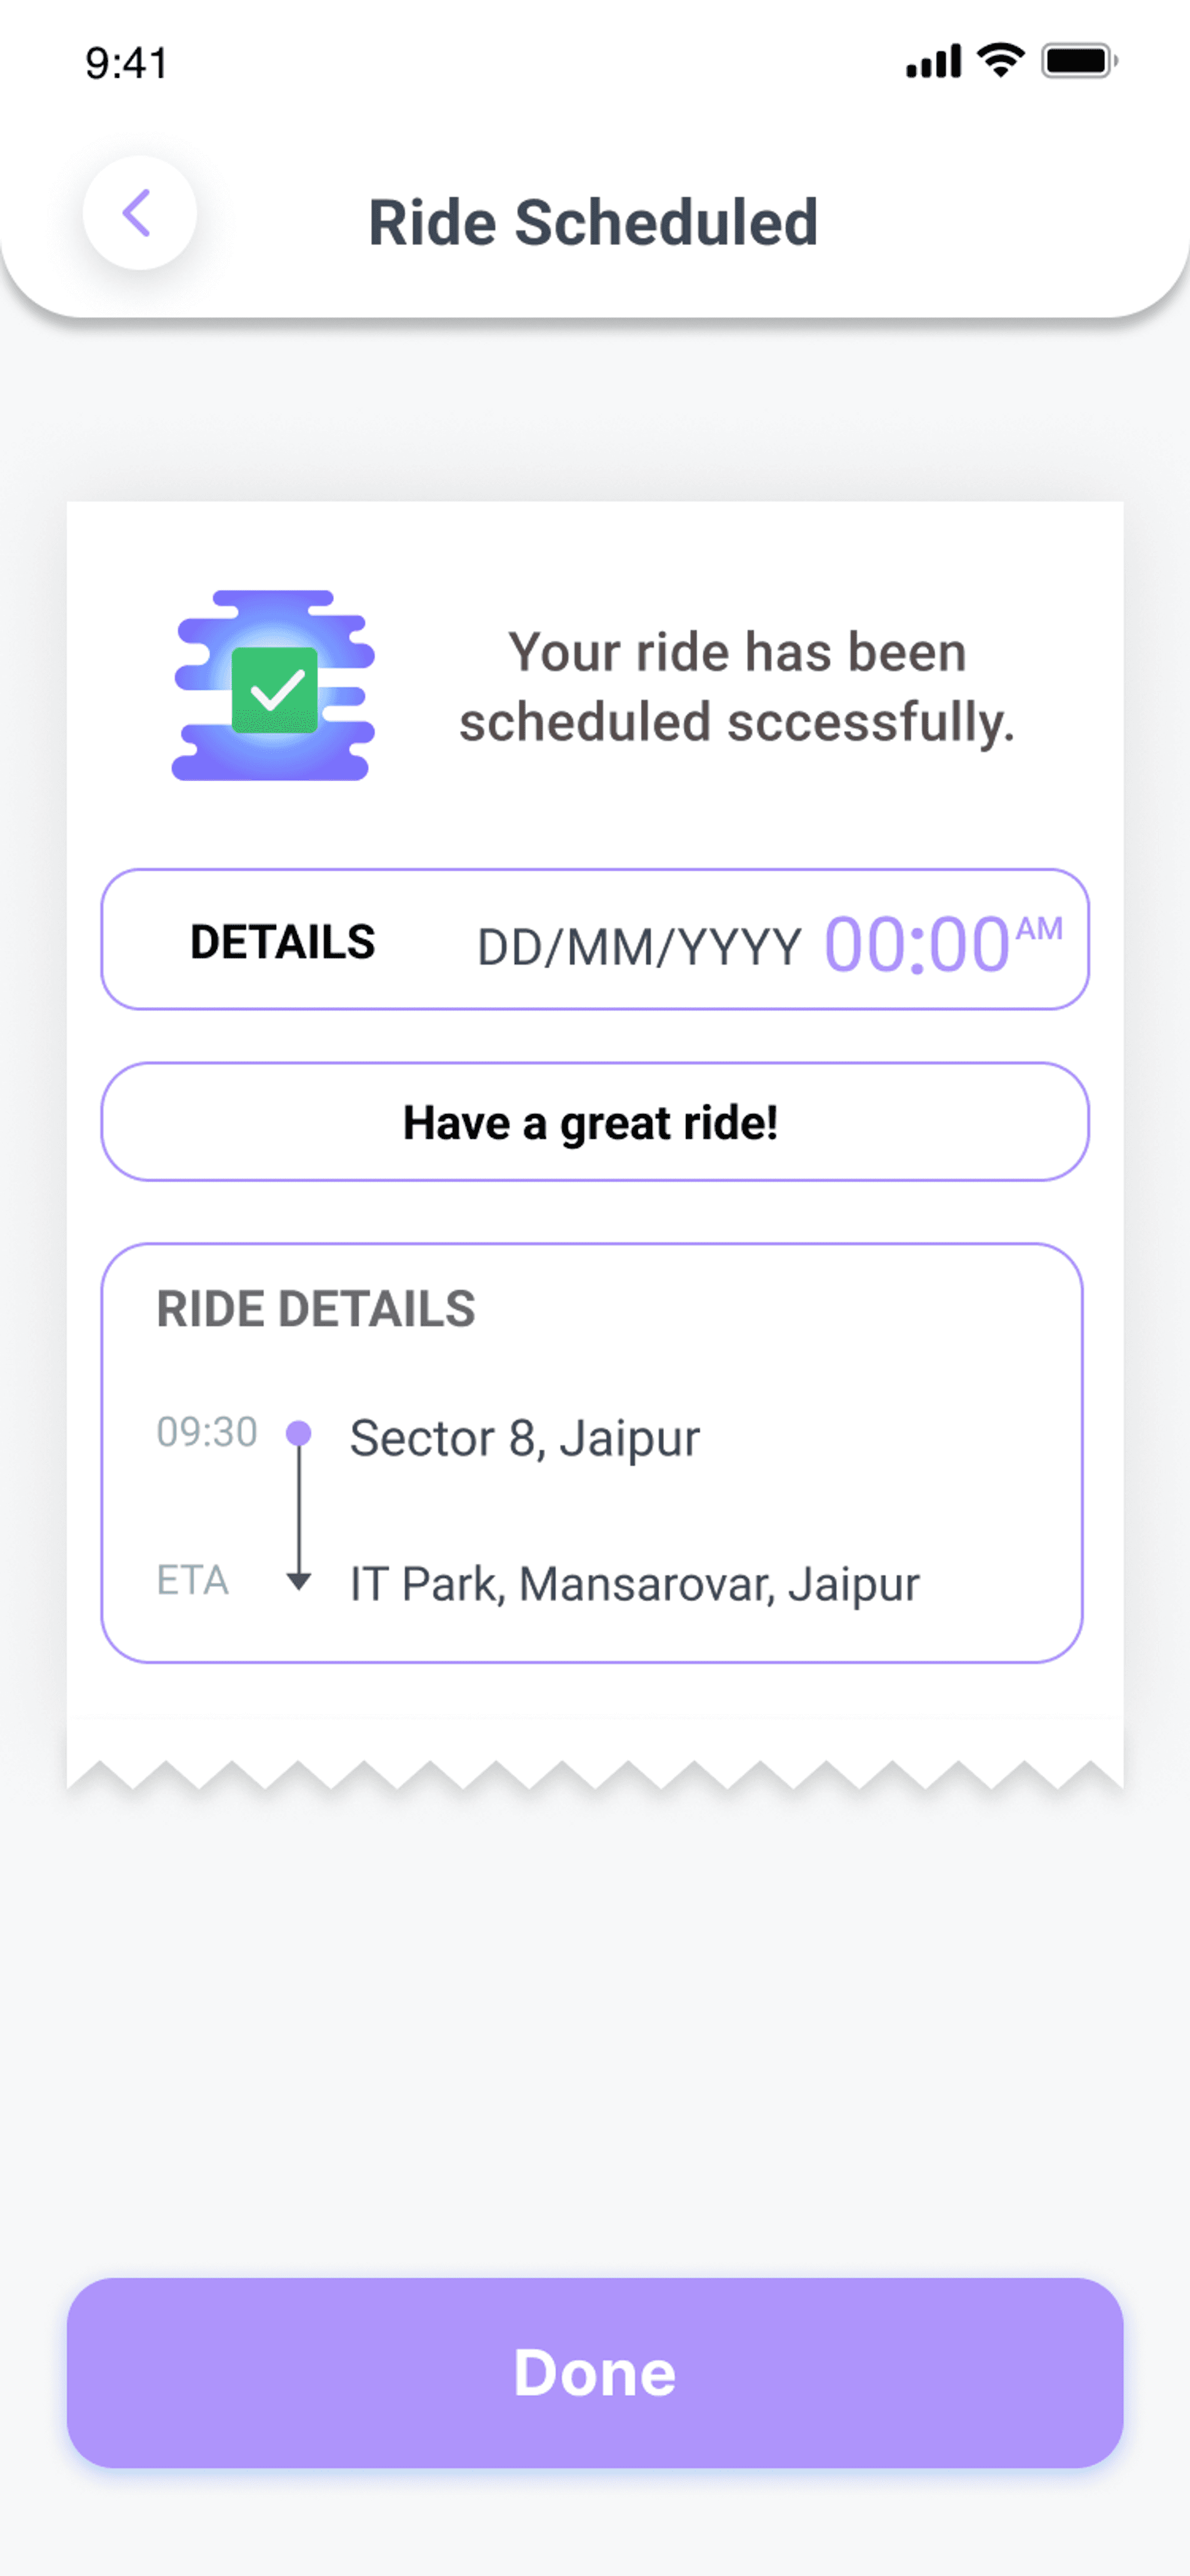
Ride Later
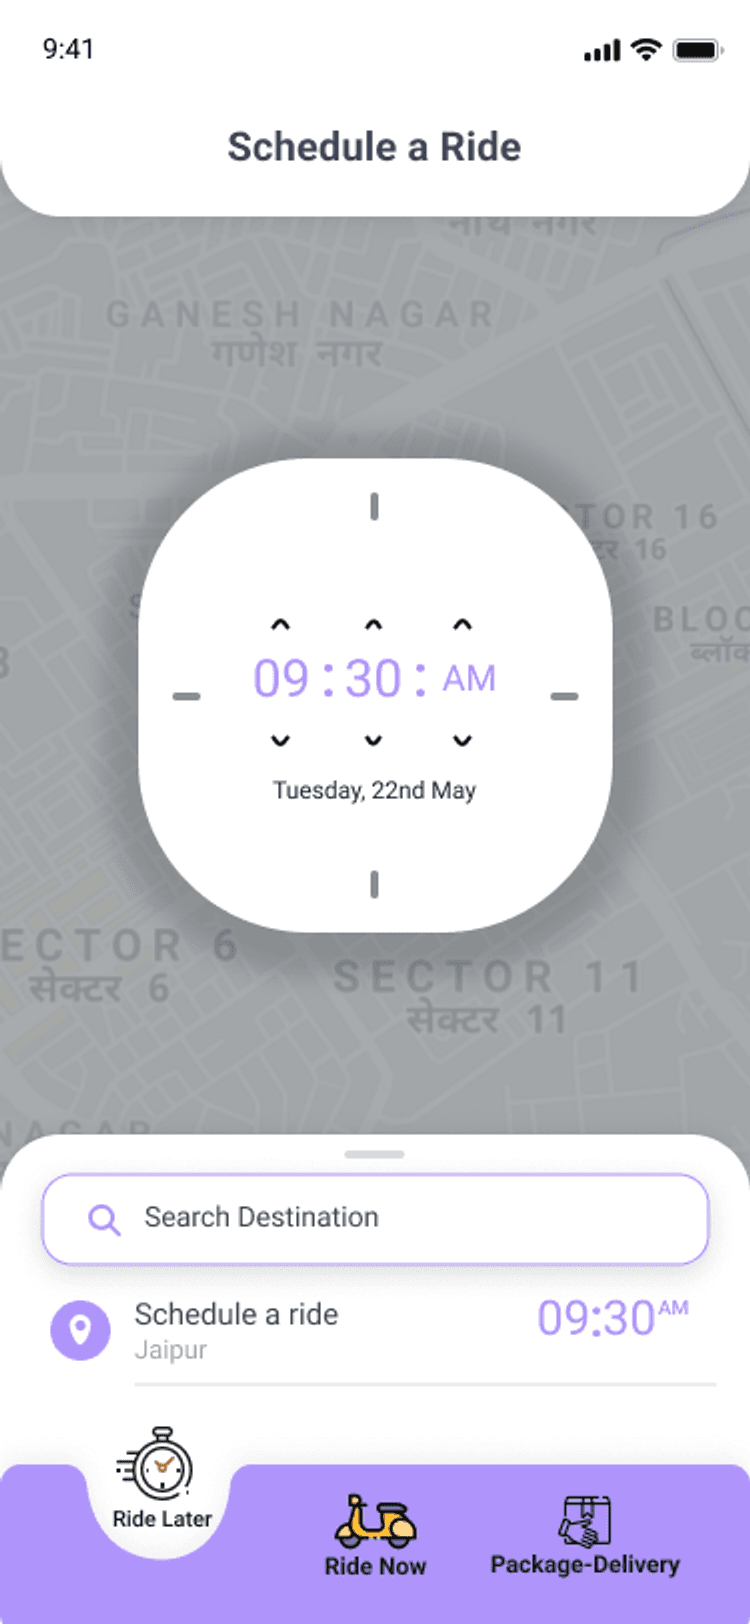
Moving onto the Ride Later APIs, which enable users to schedule a ride according to their preferred time and date.
As mentioned, user books a ride according to their preferred date and time, which on the driver’s end are visible with details of the trip if the scheduled trips are within their distance range, and they can either accept or reject the trip accordingly after which a Notification is sent to the user for the confirmation of the trip and Driver’s are notified a half hour before the scheduled time to go for the pickup.
Let’s start building this functionality
You can book a ride based on your preferred date and time by referring to the API below.
Controller Layer
Service Implementation Layer
To view nearby scheduled rides, we need an API that enables drivers to view them.
Controller Layer
Service Implementation Layer
Lastly, we need an API for the driver, which updates the trip status and sends a notification half hour before the scheduled trip.
Controller Layer
Service Implementation Layer
Repository Layer
Below is a query that retrieves nearby scheduled rides based on the driver's latitude and longitude.
Payment-Gateway
Razorpay payment gateway is integrated at the backend and frontend via its SDK which allows users to make an online payment after the trip.
Once the trip is completed the user is directed to the Razorpay payment screen.
Add the following code in razorpay_screen.dart
Now to create a new order for payment, follow the given code:
Add the following code in razorpay_payment_state.dart
Now let's understand the backend part of Razorpay payment
Payment to Ridde Company
For payment to the company, 2 APIs,
Order CreationandUpdate Orderare created which can be referred from Razorpay docs.[<https://razorpay.com/docs/payments/server-integration/java/payment-gateway/build-integration/>](<https://razorpay.com/docs/payments/server-integration/java/payment-gateway/build-integration/>)The Order Creation API requests for amount, currency and receipt to create an order and returns order details containing order_id, which is passed to the checkout page for payment completion.
The Update Order API requests for razorpay_order_id, razorpay_signature, razorpay_payment_id and payment_status to update the order status and verify the razorpay_signature.
- Payment withdrawal for drivers
- Drivers can withdraw their cumulative trip money by creating their
Fund Accountand process it throughPayout - While registering with the application, Driver’s
contact accountis created on the RazorpayX dashboard, having contact_id which is stored in the user model. - With the contact_id, the Fund Account creation API can be triggered along with details like
account_type,name,IFSC,account_number, which in response providesfund_account_idwhich is used for Payout API.
- Drivers can withdraw their cumulative trip money by creating their
Contact Account
Fund Account
Payout
Conclusion
Congratulations for making it till the end of the article.
To clone the project
- For the backend code, visit the link.
- Either download as zip file or clone it into your local computer.
- By using any of the IDE like IntelliJ IDEA, Eclipse or NetBeans etc you can simply run the project, or if maven is installed in your local system, then go to project folder and run command
mvn spring-boot:run
Future Updates
- Performance improvement
- Reward point system
- One on One Chats
Cheers! Now you have got proficiency in the topics of Web Sockets and Firebase Cloud Messaging, which are core aspects for building our Ridde Application.
My overall experience working with this application was really great as it opened new avenues of experimentation.
I would recommend you guys check it out and build your own apps! Thank you 😃
Dive deep into our research and insights. In our articles and blogs, we explore topics on design, how it relates to development, and impact of various trends to businesses.


