What is the next thing you do after developing your iOS app? You need to publish it to the App Store.
The App Store is a digital distribution platform, developed and maintained by Apple Inc., for mobile apps on its iOS operating system. The store allows users to browse and download apps developed with Apple's iOS software development kit.
The software available on the App Store is officially approved by the store operator. For instance, Apple inspects all software on the macOS and iOS App Stores, and Google inspects all software on the Play Store. The code of each app is reviewed to make sure it contains no malware or viruses, and conforms to other guidelines for all user's devices. The software is then digitally signed by the store operator to prevent it from being altered without the operator's knowledge and approval.
Prerequisites for App Store Submission —
- All of your app’s screens must work that means no blank screens and no broken navigations.
- Your app must have an icon.
So let’s talk about App Publishing:
1. Assemble information needed for an app store listing : —
Before starting the submission it’s better to collect all of the information that is required to publish.
Version Information —
- App Previews and Screenshots : Screenshots must be in the JPG or PNG format, and in the RGB color space. App previews must be in the M4V, MP4, or MOV format and can’t exceed 500 MB. For further details about screenshots size and dimension please follow Apple Official Docs.
- Keywords : Include one or more keywords that describe your app.
- Support URL : A URL with support information for your app.
- Marketing URL : A URL with marketing information about your app.
- Promotional Text : Promotional text lets you inform your App Store visitors of any current app features without requiring an updated submission.
- Description : A description of your app, detailing features and functionality.
General App Information —
- App Store Icon : This icon will be used on the App Store.
- Version : The version number of the app you are adding.
- Rating : App's age rating.
- Copyright : The name of the person or entity that owns the exclusive rights to your app, preceded by the year the rights were obtained.
- Trade Representative Contact Information : You can provide additional information that will be displayed with your app.
App Review Information —
- Sign-In Information : This is a user name and password that is used to sign in to your app, to review all of its features.
- Contact Information : The person in your organisation who should be contacted if the App Review team has any questions or needs additional information.
- Notes : Additional information about your app.

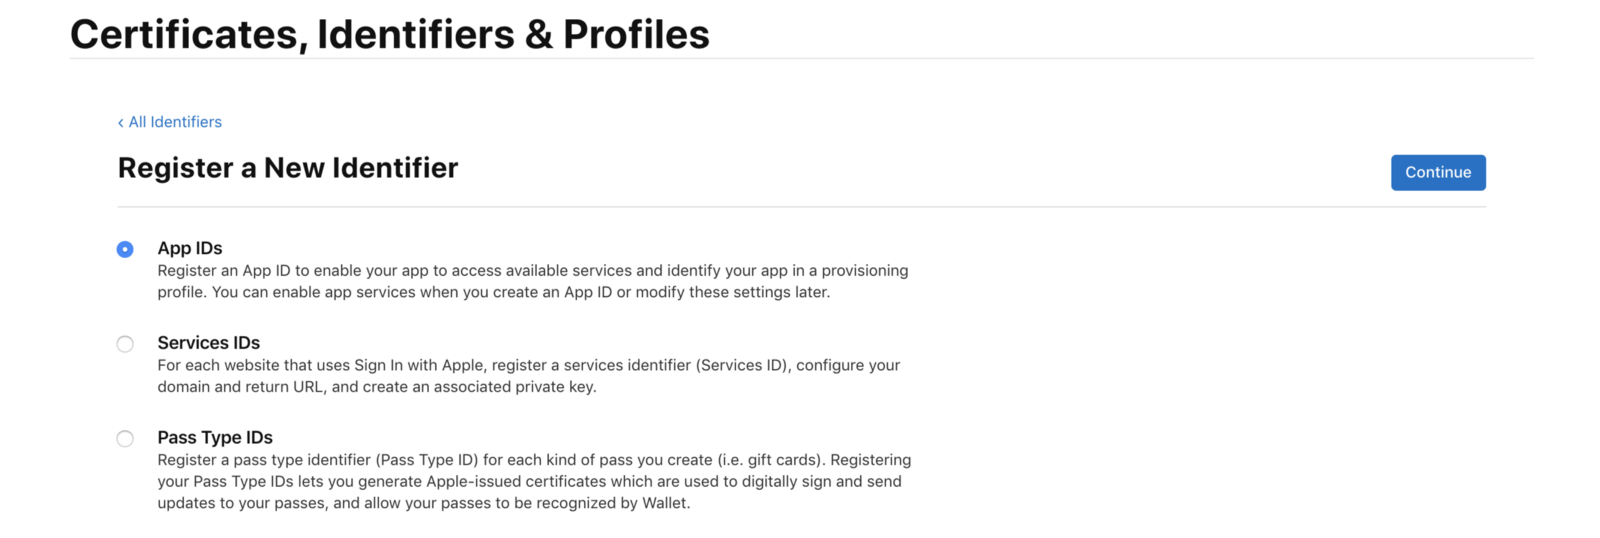
2. Create a Bundle Identifier : —
A bundle ID or bundle identifier uniquely identifies an application in Apple's ecosystem.
- In your browser, navigate to Apple’s Developer Portal.
- Click Identifiers.
- Click the “+” in the top right of the screen.
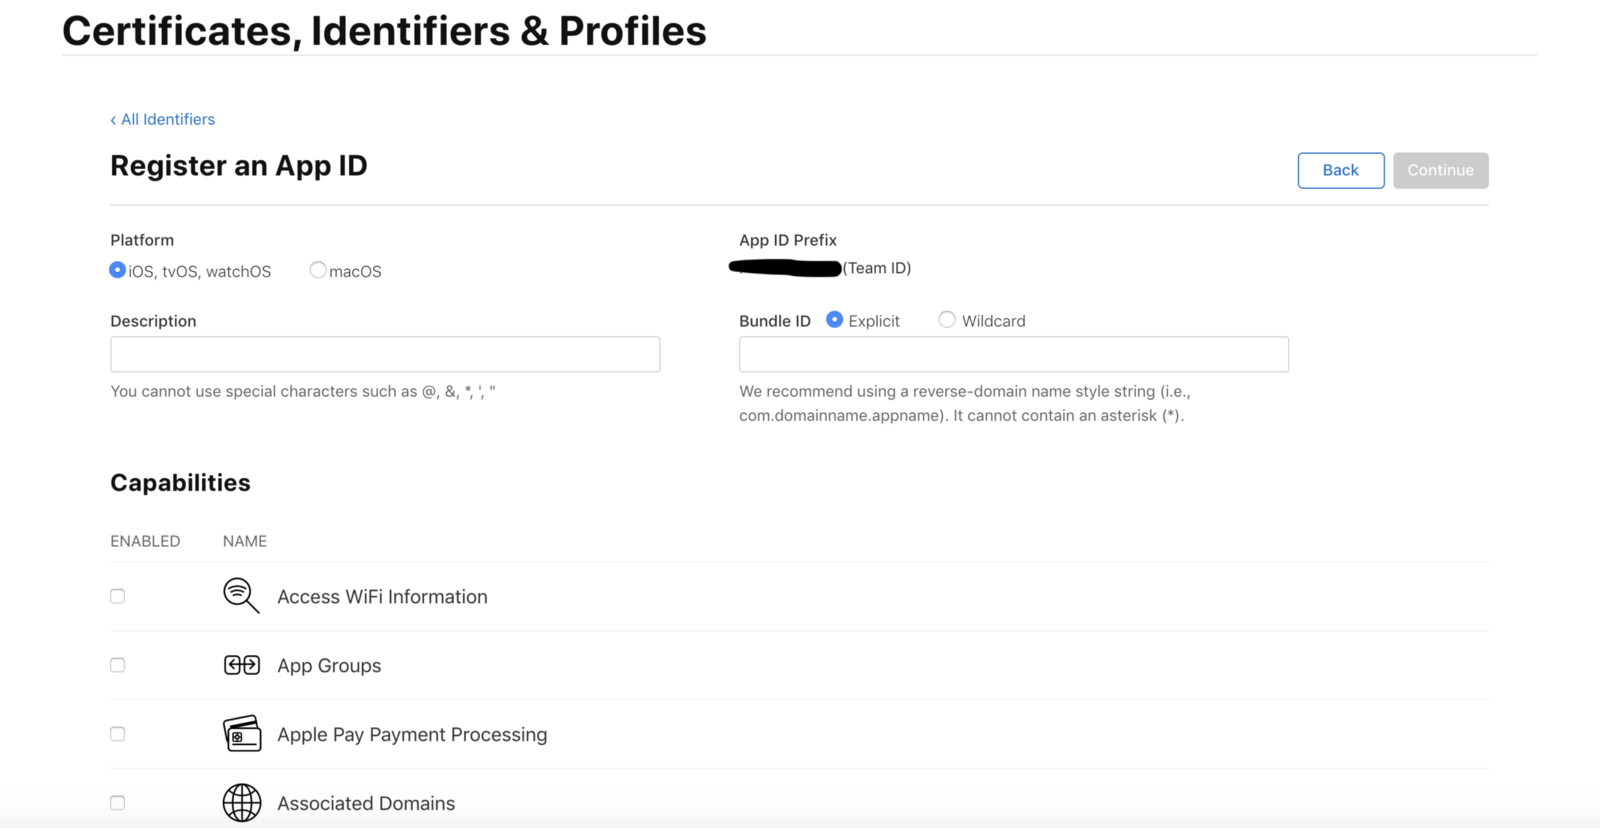
- Name the App ID the same as your app.
- Make sure the Bundle ID follows the standard naming convention: com.yourcompanyname.yourappname
- Check any App Services the app needs, click Continue.
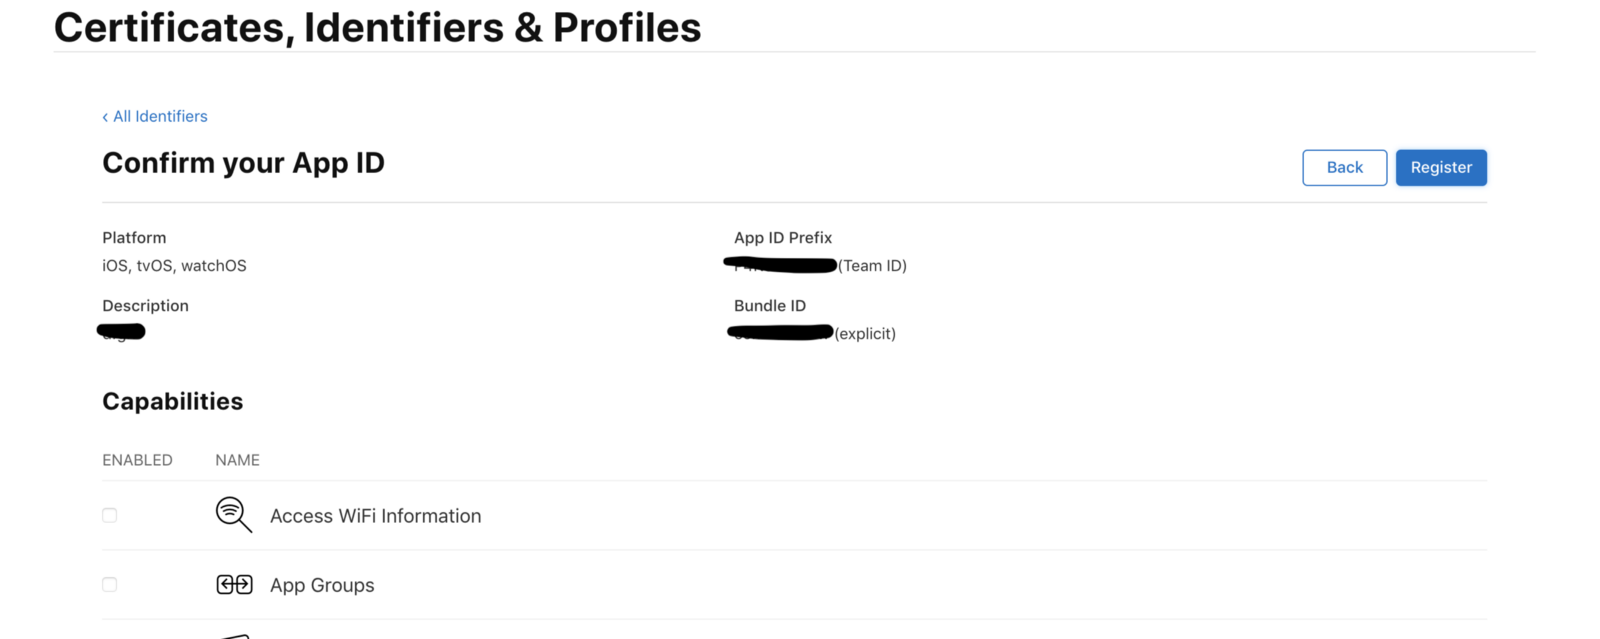
- Verify the services are correct, then click Register.
3. Create a Certificate Signing Request : —
Certificate Signing Requests are used to link your computer to your Apple developer account.
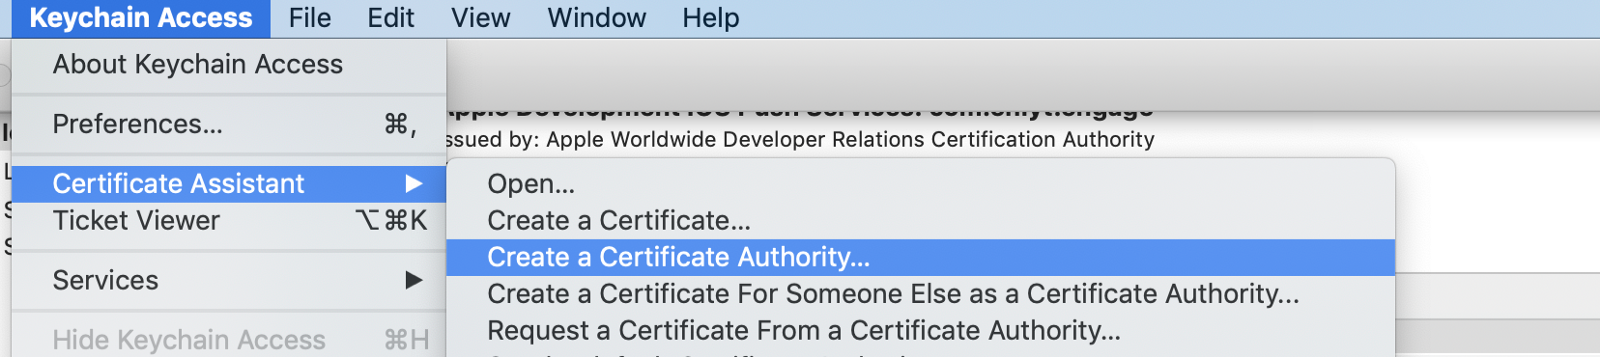
- Open a program called KeyChain Access.
- In the top left menu, click Certificate Assistant.
- Click Request a Certificate From a Certificate Authority
User email : Enter your email address
Common Name : We recommend using the name of the app
CA email is not actually required
- Check Saved to Disk, click Continue.
- Save the Certificate Signing Request for later.
4. Create an App Store Distribution Certificate : —
Code Signing Certificates are used to link iOS apps to your Apple developer account.
- In your browser, navigate to Apple’s Developer Portal.
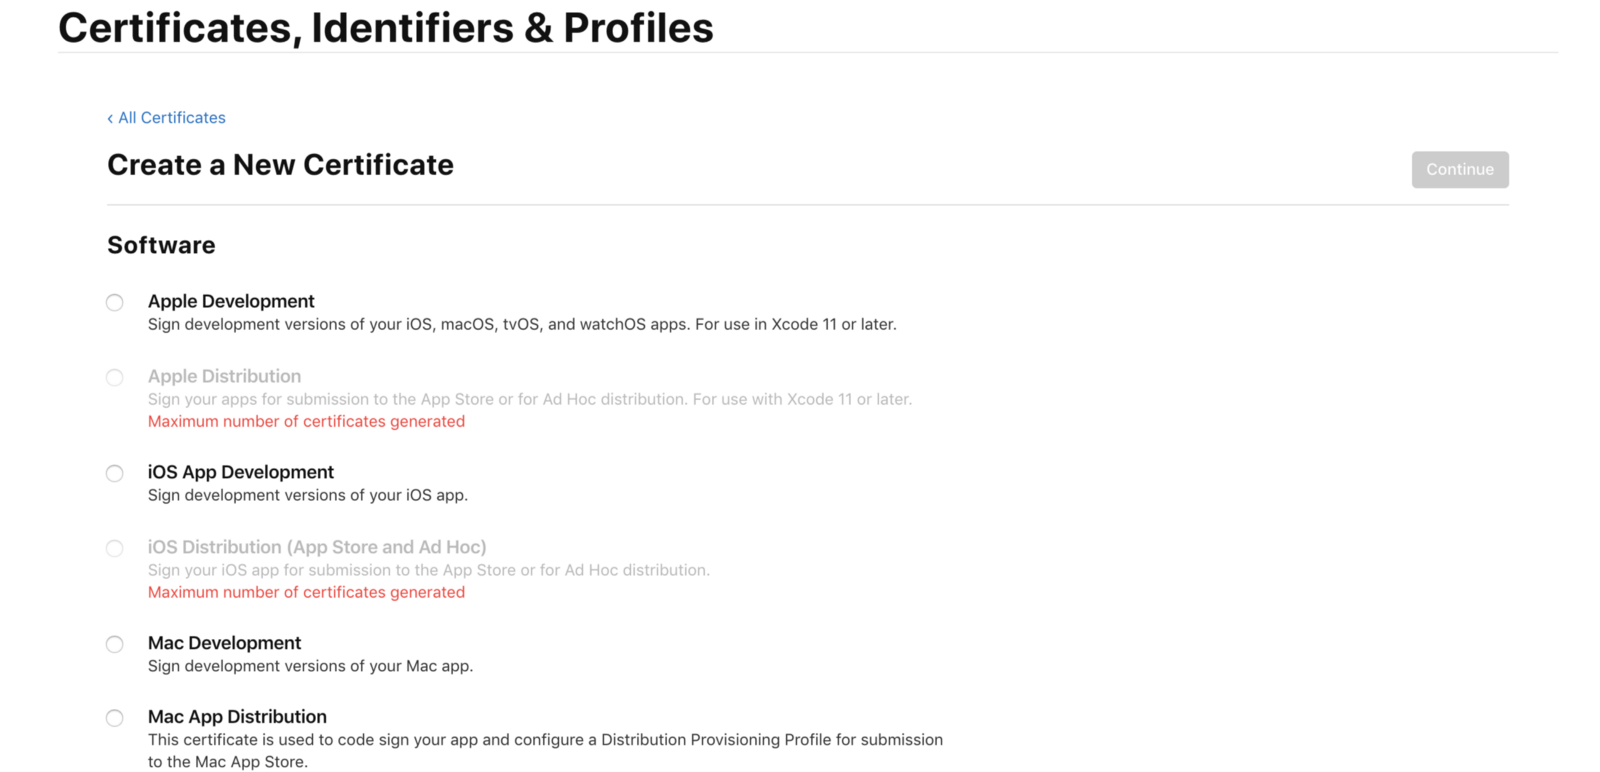
- Click Certificates.
- Click the “+” in the top right of the screen.
- Click the “iOS Distribution (App Store and Ad Hoc)” under Software.
- Click Continue.
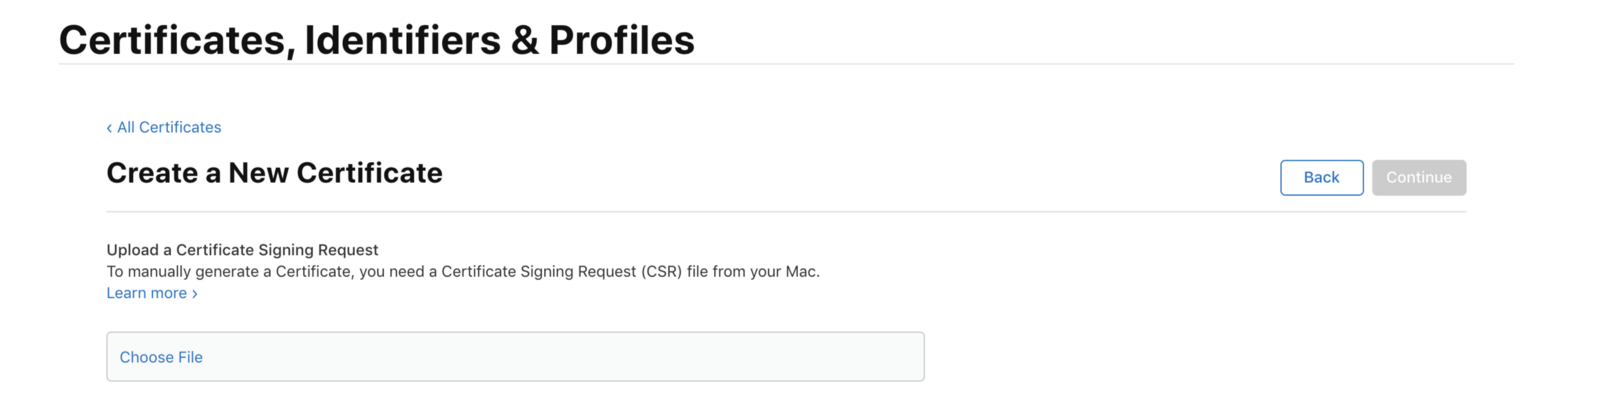
- Upload the Certificate Signing Request created earlier.
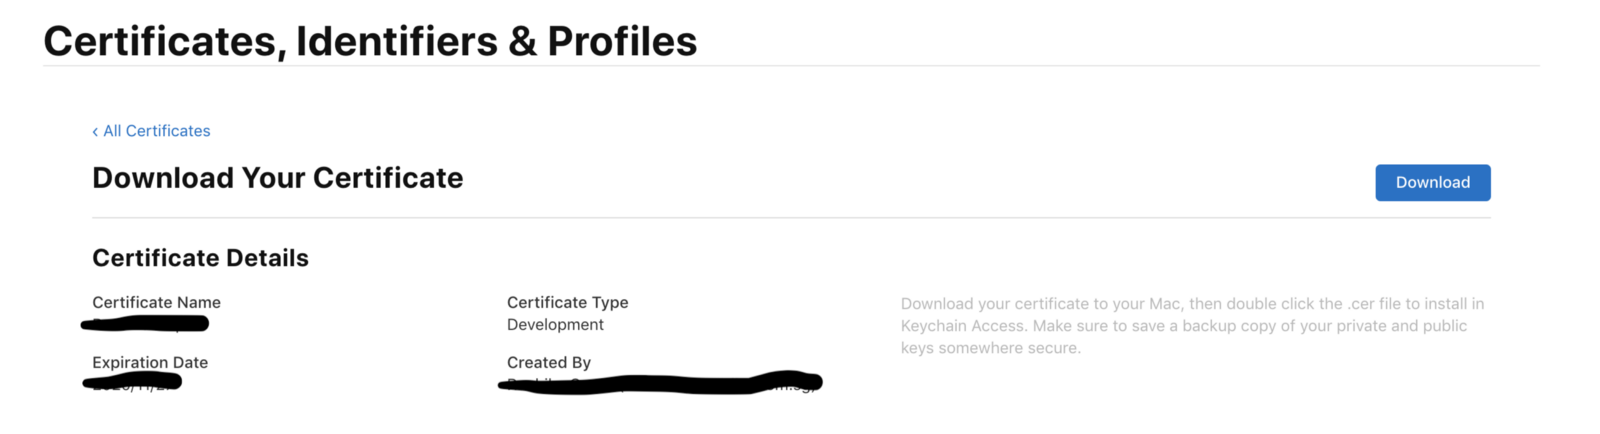
- Download the Certificate.
- Install the certificate on your computer by double-clicking.
- Keep this file somewhere safe.
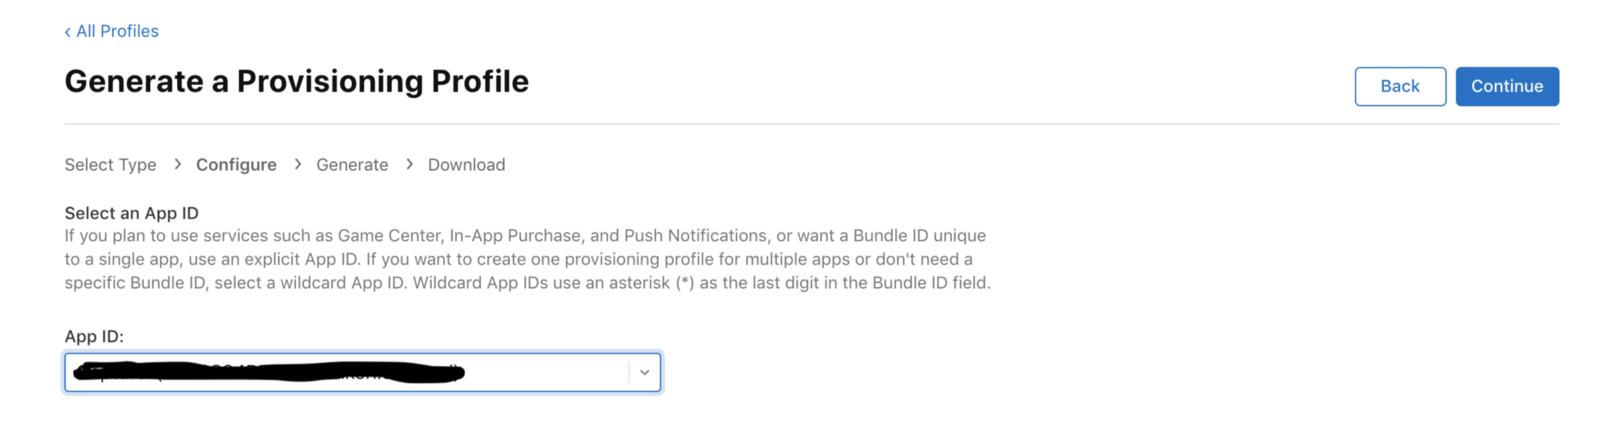
5. Create a Distribution Provisioning Profile : —
Provisioning Profiles are packaged with iOS apps so user’s devices can install them.
A Distribution Provisioning Profile is a combination of your App ID and Distribution Certificates. It authorises your app to use particular services (like Push Notifications) and ensures that your app is submitted by you. This is why Distribution Certificates are tied to a specific Mac.
An App Store Distribution Provisioning Profile lets you post your apps in the Apple App Store.
- Navigate to Apple’s Developer Portal.
- Log in.
- Click Provisioning Profiles.
- Click the “+” in the top right of the screen.
- Click the App Store Distribution option, click Continue.
- Select the Bundle ID created earlier, click Continue.
- Select the Certificate created earlier, click Continue.
- Make sure the Profile Name follows the standard naming convention: App Name App Store Distribution.
- Click Generate.
- Download it.
- Install the provision profile on your computer by double-clicking.
- Keep this file somewhere safe.

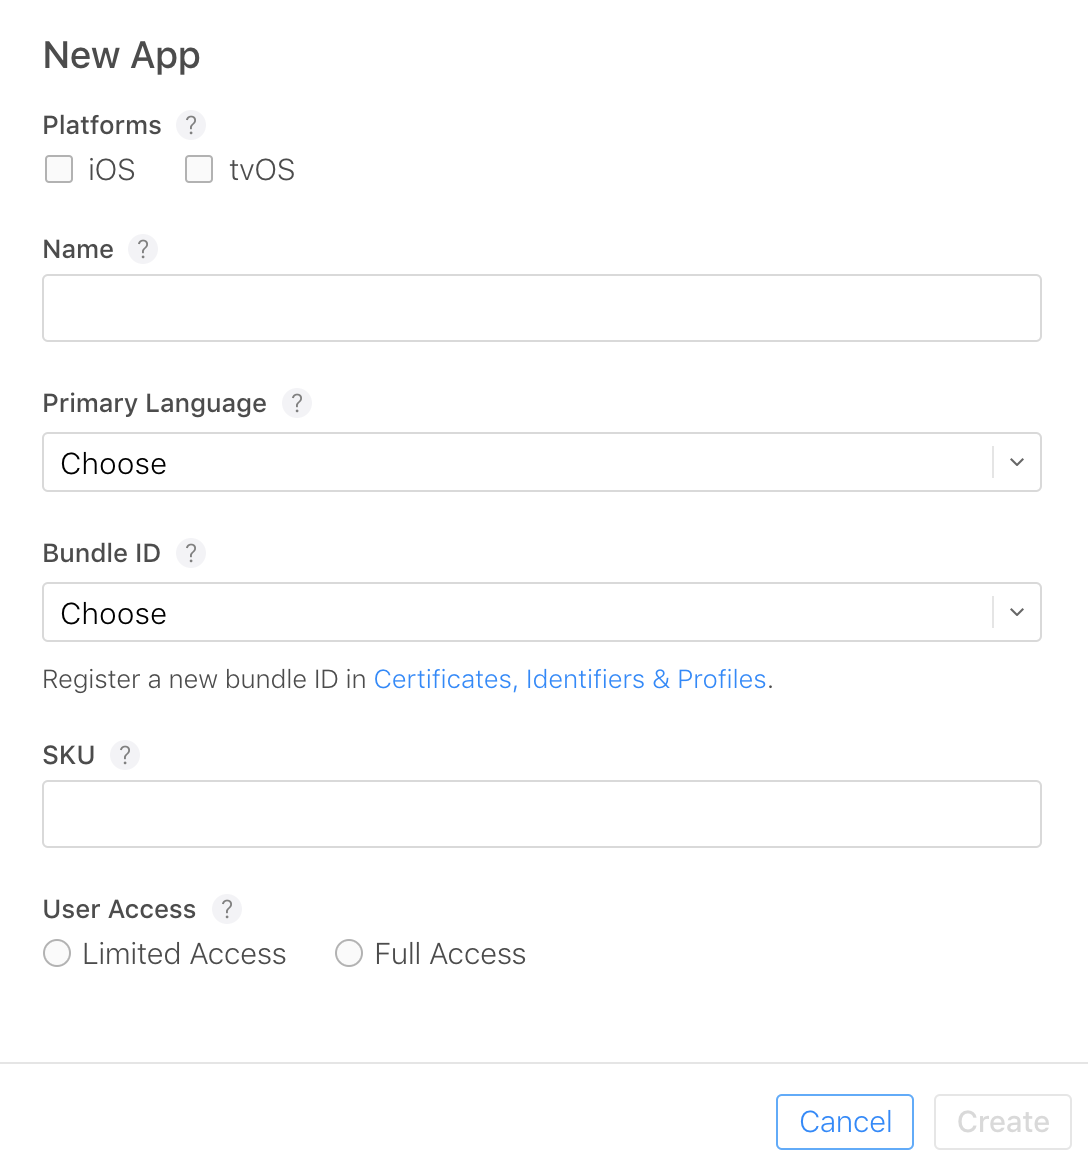
6. Create App Store Listing : —
Reserve a slot in the App Store for your app for users to see.
- Start in your browser, navigate to iTunes Connect.
- Log in.
- Click My Apps.
- Click the “+” in the top left of the screen.
- Click “New iOS App”.
- Bundle ID: choose the one created on Developer Portal.
- SKU is a unique ID for your app that is not visible on the App Store. For convenience, make the SKU match the Bundle ID created earlier.
- Click Create to create the first version listing.
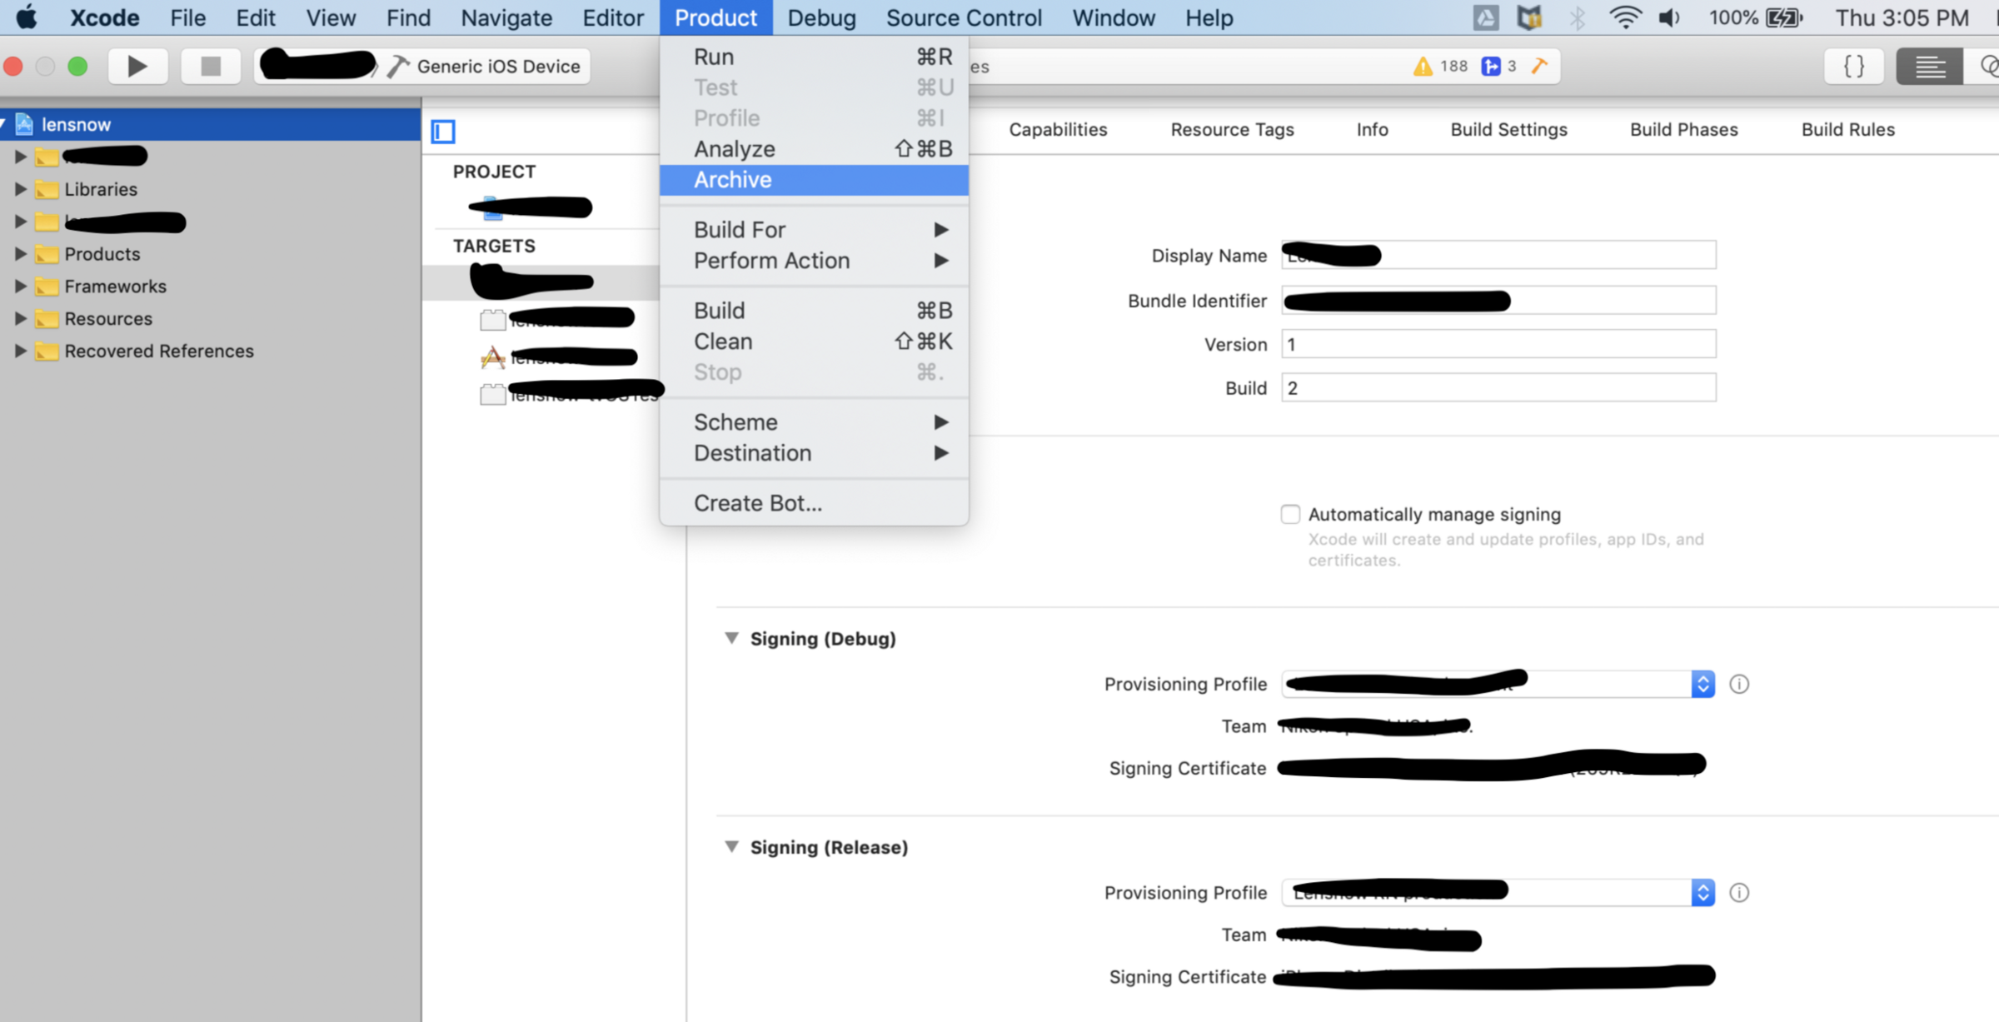
 7. Make the release build : —
Package the actual binary that users will be uploading to the store.
- Open the project's workspace in Xcode.
- Update the version and build no. in General Tab.
- Open Build Settings.
- Make sure All is selected in the settings.
- Go to Signing & Capabilities Tab.
- You can add special capabilities to a target to enable services provided by Apple such as Apple Push Notification service, CloudKit,In-App Purchase etc.
- Use the provisioning profile created earlier.
- Xcode automatically links signing certificates created in apple developer portal.
- Test the app in a real device with the development Certificates.
Note: Add your device ID at developer portal, download & use development certificates accordingly.
If the app runs well and behaves as expected, then you can archive & publish it to Test Flight.
- In the top menu, select Generic iOS Device as the build destination if no actual device is connected.
- Go to Menu Bar> Project > Archive.
- Validate your App first and then click on Distribute App.
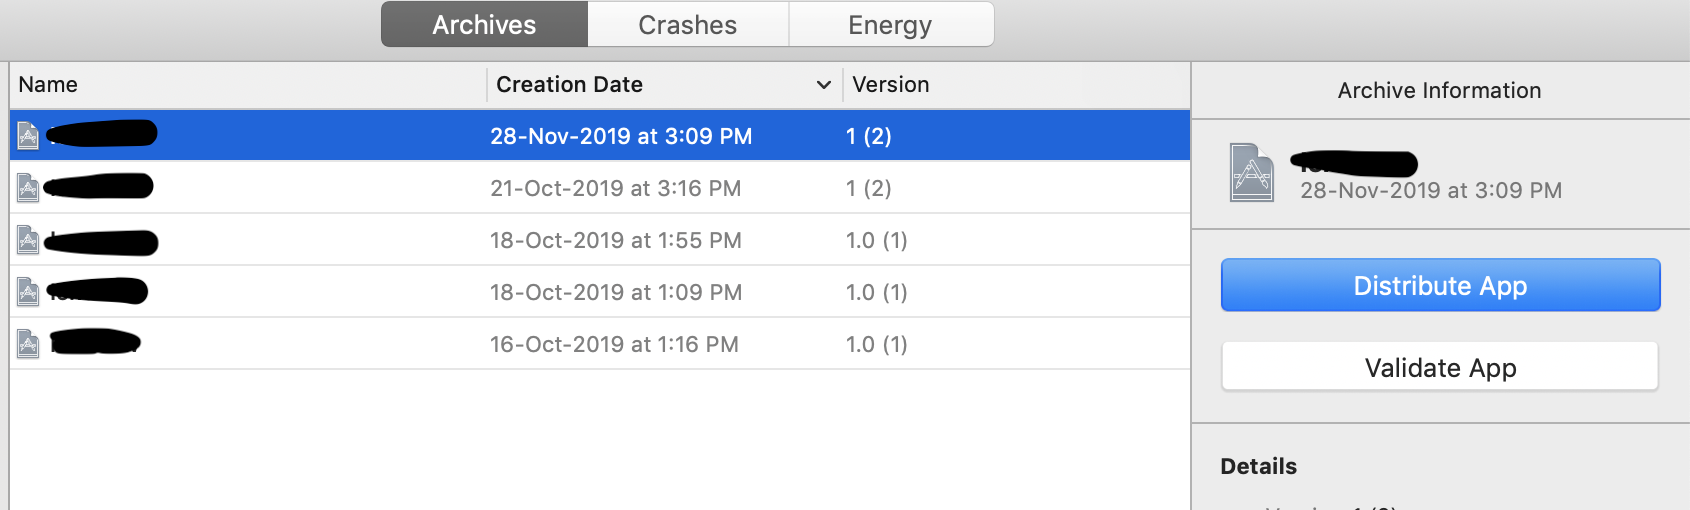
- Follow the instructions to upload it.
- Sign in with your Apple Developer account.
- Submit to App Store.
- Build will be uploaded to TestFlight.

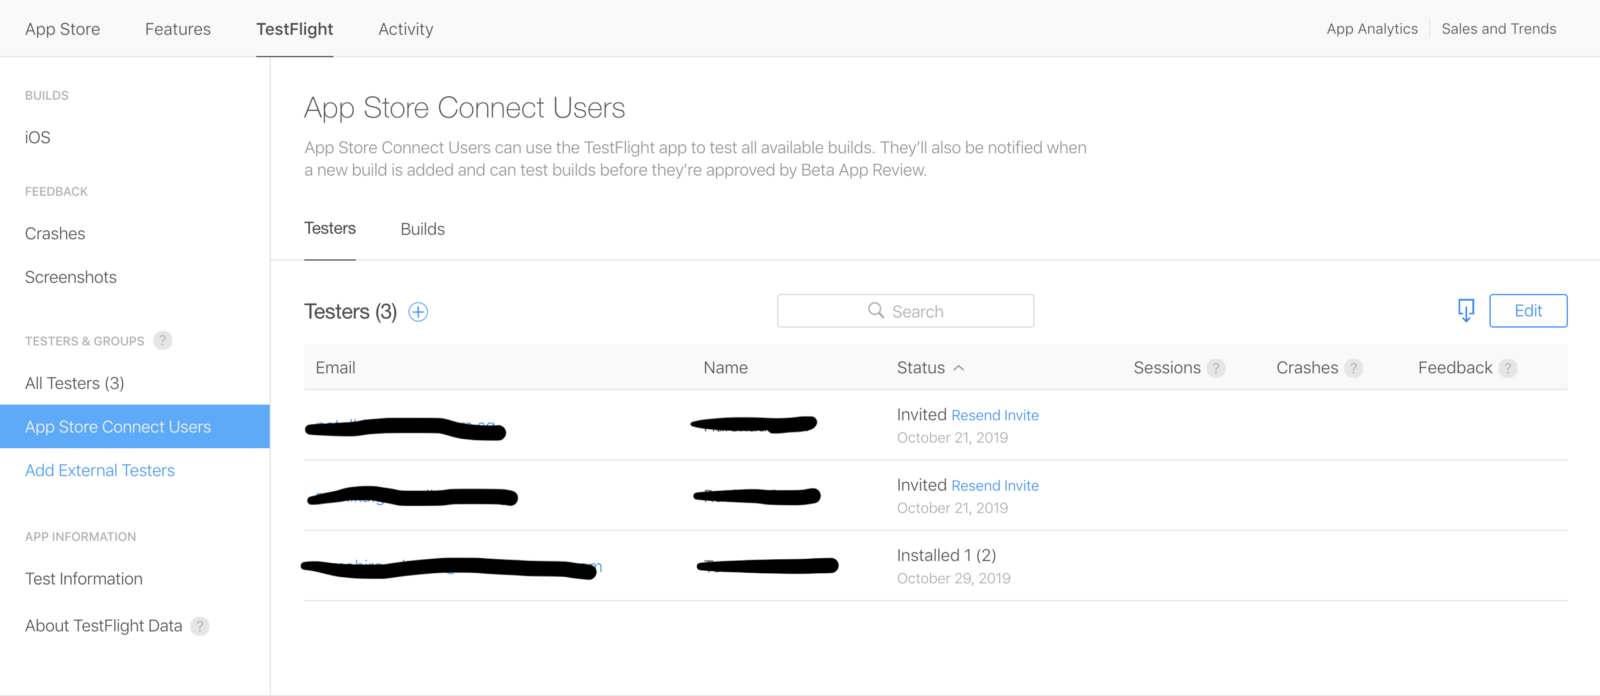
- Add internal testers to your app. To be eligible to become an internal tester, a user must be part of your iTunes Connect team with the Admin, Legal, or Technical role.
- Wait for the confirmation.
8. Fill In Version Information : —
Users will decide whether or not to install your app based on your store listing.
- Enter all of the information assembled in step 1.
- Select the build you wish to tie to the version (Note: This usually appears 10–15 minutes after sending from Xcode)
- Fill in pricing information.
- Click Save.
- Fit any errors based on the messages that appear and save changes.
9. Submit Version for Review : —
Every app that is submitted to the store has to be reviewed by the Apple team before release.
- Select the release type :
Manual release — After the app is accepted, a Release button will appear.
Automatic release — As soon as the app is accepted, it will be released.
- Wait for approval. This process usually takes at most 2 days and longer which depends on your app. On average 50% apps are reviewed in 24 hours and over 90% apps are reviewed in 48 hours..
- If your app was not approved, review the notes in the Resolution Center and make any necessary changes to the app or version information then resubmit.

10. Release : —
Enjoy the final step.
- If you select Manual release, click Release your app when ready.
- Wait for the green “Ready for Sale” version status (This might take from 1 hour to 1 day after release)
- Search for your app on the App Store.
- Celebrate!
If you go through the pain of having your app rejected, you can communicate with Apple and resolve issues in the Resolution Center. A communication from Apple contains information about app rejection, including how the app is out of compliance with App Store Review Guidelines.
These salient steps should help you through app store submission and publishing without issues. The best advice would be to fully read and understand Apple's Developer Guidelines. You can include attachments in your replies, such as screenshots and supporting documents. If your app has been rejected because of a metadata issue, you can resolve the issue and resubmit the same build.
Thank you for reading.!