Table of Contents
Unleashing the Power of Shaders on Flutter Web
Author

Date
Book a call
Shaders and Antennae
Anyone from the 1990s will know what an antenna does. When we do not have a signal on the floor, we get on the roof and adjust it a bit. If the antenna is not pointing in the correct direction, we see some animations on the screen — usually black and white pixels.
Check out the code-snippet below.
Everything you see on the screen was built and is running on Flutter Web. The animations are made using shaders. By moving the cursor pointer, I can replicate the signal/non-signal animation just like in the 1990s, when moving the antenna would give certain pixels. All of the animations on the screen are built using custom shaders.
Defining Shaders
If you are a Flutter developer, you may be familiar with custom painters. When creating an image using custom painters, you may draw circles, triangles, and lines. Once you have completed the commands, the complete instructions are executed sequentially by the custom painter or your machine. Although the process happens quickly, we cannot see the machine executing each action one after the other.
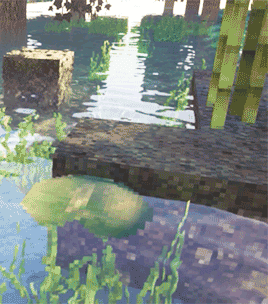
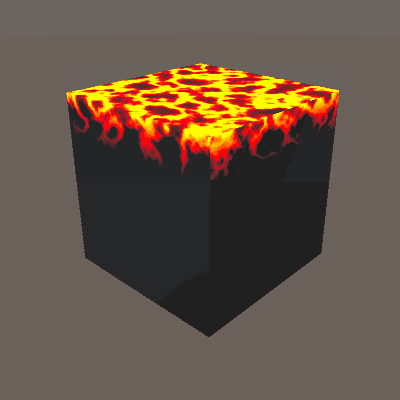
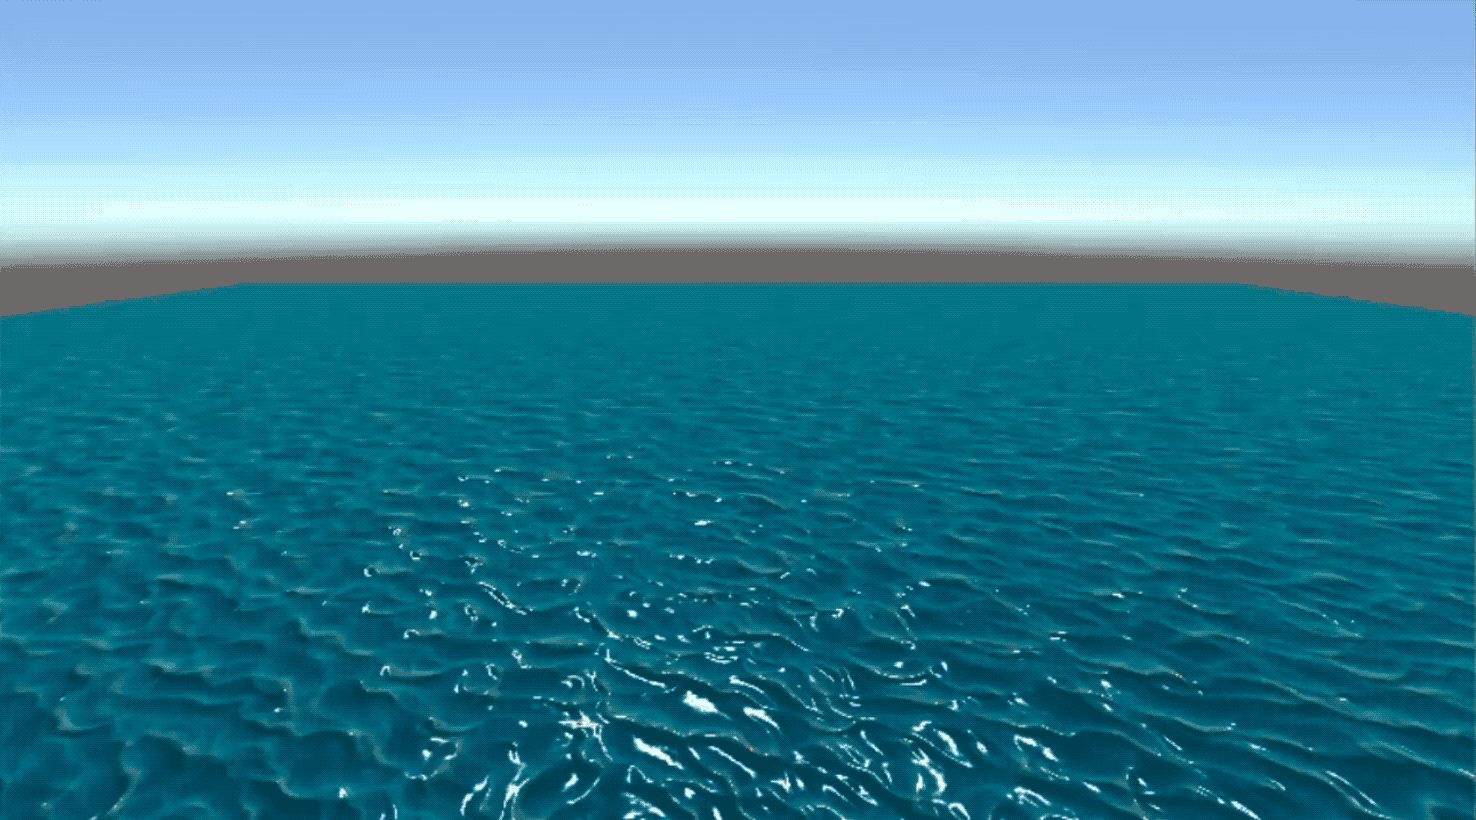
Shears are also instructions, but they are executed all at once. They handle every pixel on the screen in one go. This is known as parallel processing. With parallel processing, you can create powerful animations using shaders, such as water effects, fire effects, and even a 3D cube.
The Power of Parallel Processing
Shaders are fast due to parallel processing. To better understand this, consider the example of a pipe and the processes it handles.
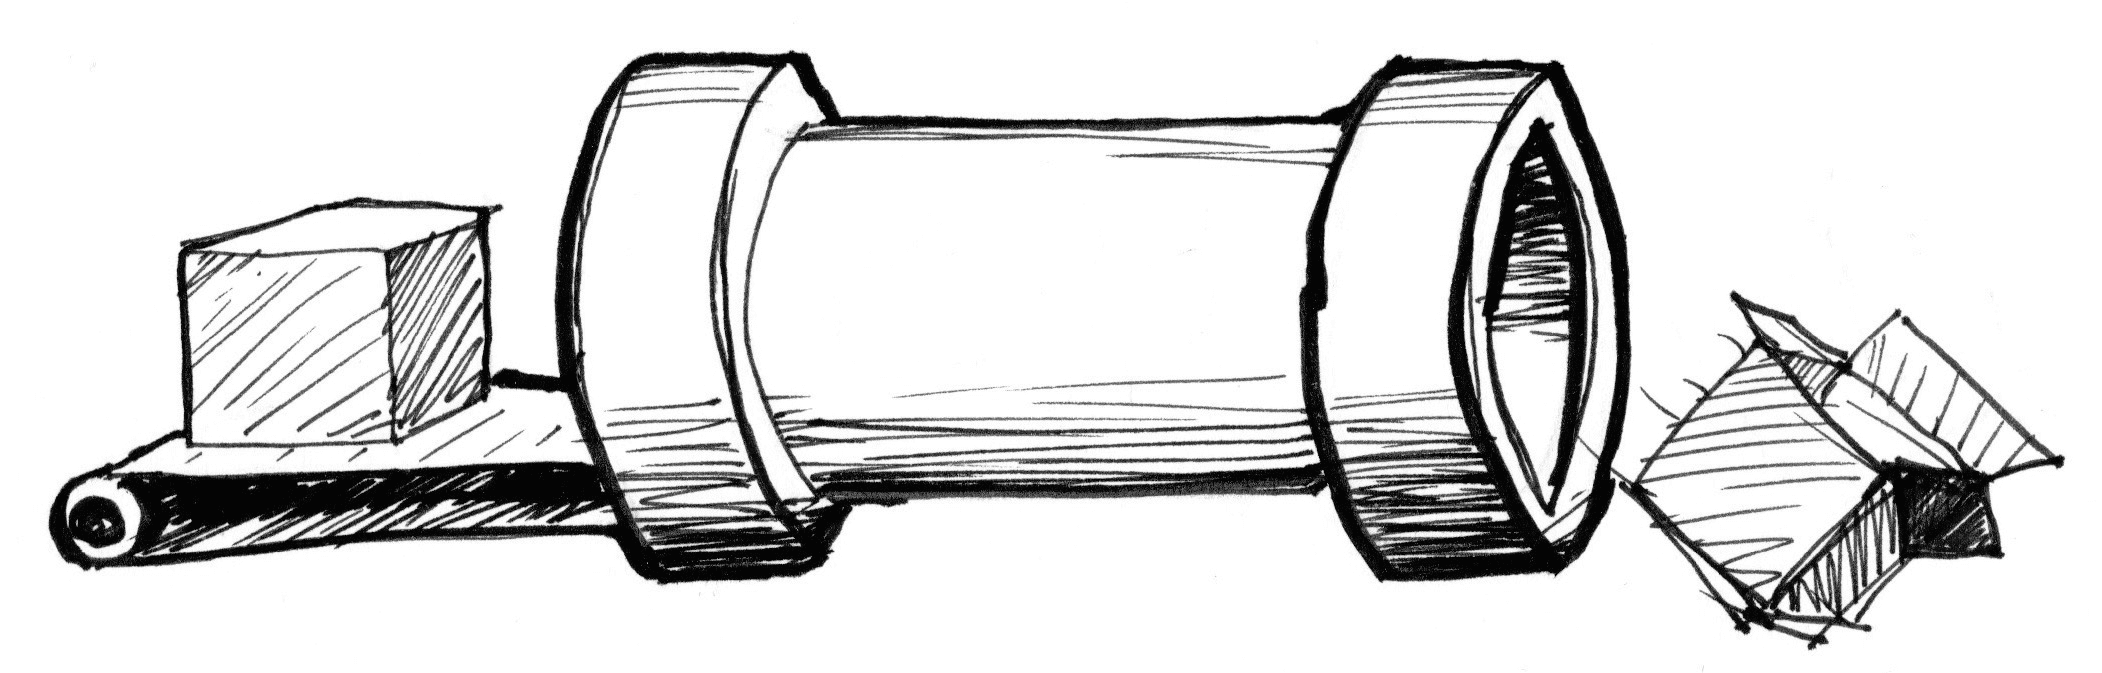
In the diagram, the pipe represents the CPU taking one task, executing it, and completing it. This workflow is suitable for small tasks. However, for heavy-duty tasks like video games, this concept is not applicable.
Why? Because whatever tasks the games are executing, those are being executed on your GPUs, not your CPUs. Video games and other graphic applications require heavy processing power because they must handle and render every pixel while mimicking a 3D feel. And when you have huge pixels, the CPU cannot handle it.
For example, let's say a screen has 800x600 pixels, which equals to 480,000 pixels. This means there are 14 million instructions. At that point, the CPU will be overwhelmed as it is a basic pipe. This is why graphics-heavy games or any highly demanding graphical software often experience lag.
Parallel processing in GPUs solves the problem that the CPUs face. Imagine multiple pipes and channels, 800x600 tiny pixels receiving 30 waves. This is 480 pixels a second and can be handled smoothly.
This distributes those processing units into different pipes, which can be executed very smoothly. So instead of passing from one pipe, the GPU is designed so that task distribution happens, and commands are executed in parallel.
Another superpower of GPU is the special math functions accelerated via hardware. All mathematical calculations are integrated into the hardware chip, unlike in programming, where the mathematical functions need to be written, converted into assembly language, and then taken to the microprocessor. This makes the workings extremely fast as it removes all the extra steps and directly interacts with the hardware.
OpenGL Shading Language (GLSL)
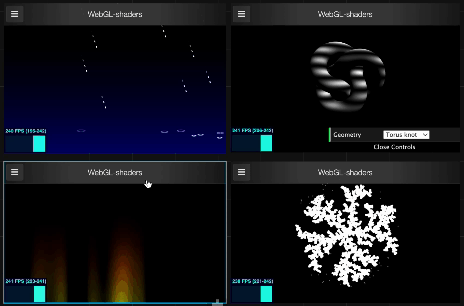
GLSL can be a difficult language to understand. For example, printing a "Hello World" message in GLSL involves creating a colored screen using four vectors (RGB and opacity), and changing the values of the respective vectors to control the parameters. However, do not let this basic difficulty discourage you. GLSL is a powerful language that allows you to create wonderful shapes and effects. Check out the rain effect, 3D shapes, and other details that can be achieved with GLSL.
Bringing Everything Together — Shaders in Flutter
Using shaders in Flutter is similar to using assets. First, create a "shaders" folder and place all the shader files inside it. Pay attention to the file extensions used; you can use either a fragment shader or a GLSL file. However, in Flutter, there is no differentiation between a vertex shader and a fragment shader. You can use fragment shaders directly and place all the vertex shaders logic into the fragment shaders themselves.
To load shaders at runtime, use FragmentProgram.fromAsset. This class is part of the DART UI library and allows you to pull in all the fragment shaders from a set constructor or name constructor.
To load the shaders into your Flutter app, you can write an async method. Once the shaders are loaded, they are contained in a program where the program variables hold the complete shaders.
An interesting feature is the ability to control pixel values using the cursor pointer. This means that values from the cursor can be passed to the shaders, allowing the Flutter app to update the output accordingly. Check out the GLSL file in the image.
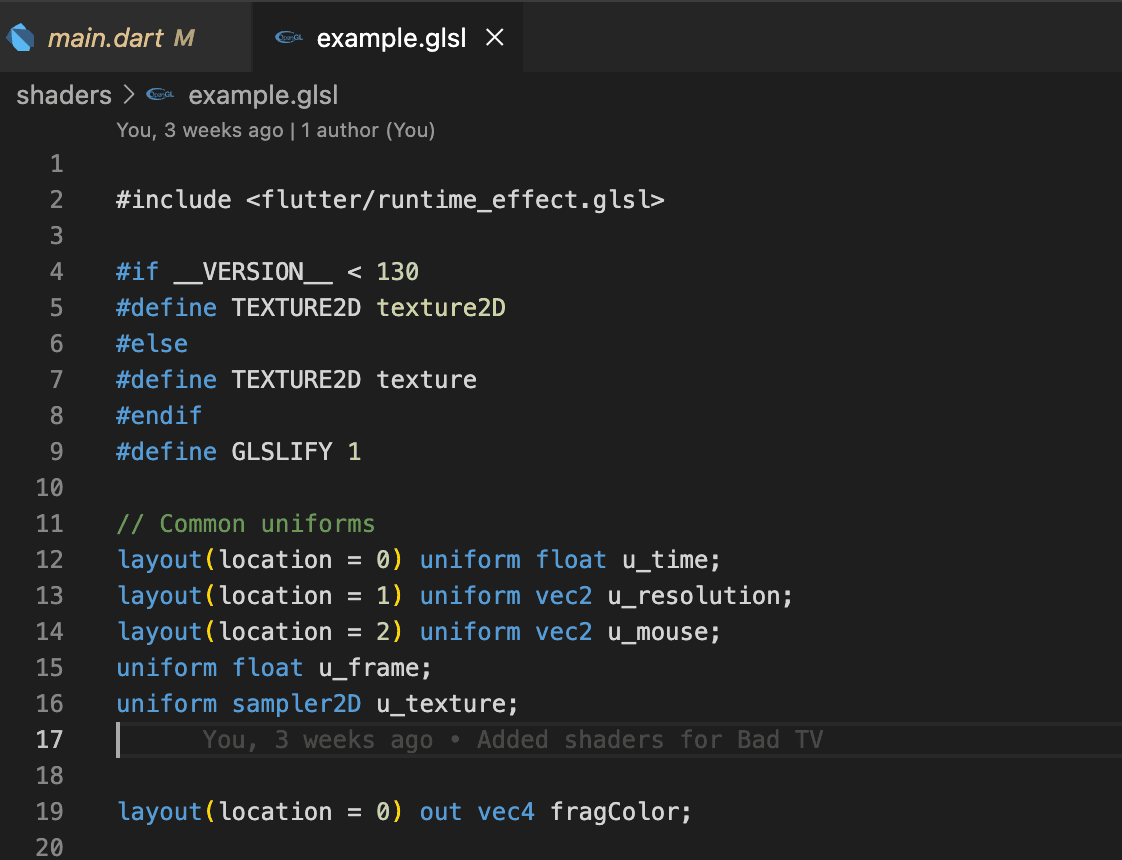
I used an Animation Controller to play the animation continuously throughout the lifetime of my Flutter app. This means I pass a value from zero to one and store it in the "U time" variable. For the uniforms, which declare variables that will receive output from another file, I specify the location as zero in my layout.
To pass this location value of zero, I use the "load asset" method. Please refer to the decoded image.
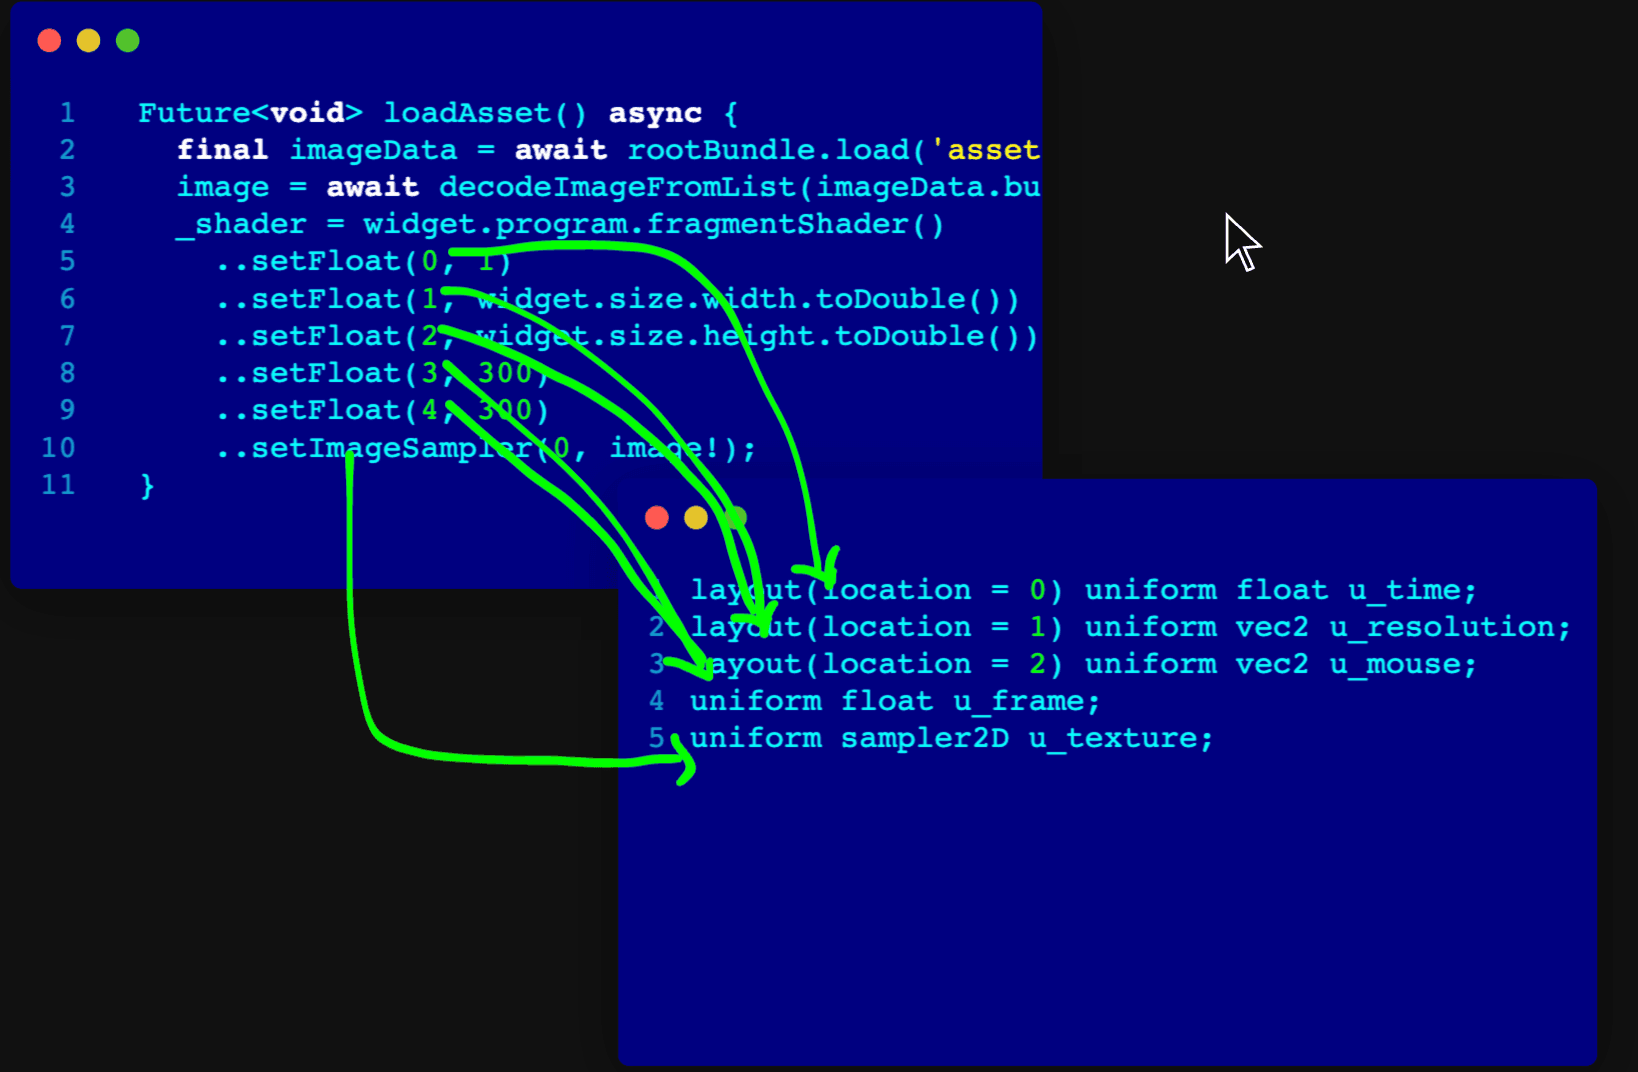
To keep the animation running, I can pass the animation value at the zeroth location. This passes the required value. Here's what's happening:
I pass one value directly to u_time, so when the shaders are initialized, the u_time value will be one. For the vec2, I pass X and Y values. On the x-axis, I use the width value, and the height value is on the y-axis. Then we have another vec2, which is my mouse.
I want to update my shaders with my mouse values as well, so I pass values for three coordinates: XYZ. Initially, I pass 300x300 to get the fuzzy animation.
The next notable step is setting the image sampler. This loads the image, which is the container image that we again pass into a sampler 2D texture.
In this code snippet, the value "zero" is being used to differentiate between the float and vector parts. However, the sampler 2D value is different and also accepts zero. This is how you can pass values from your Flutter application to the GLSL.
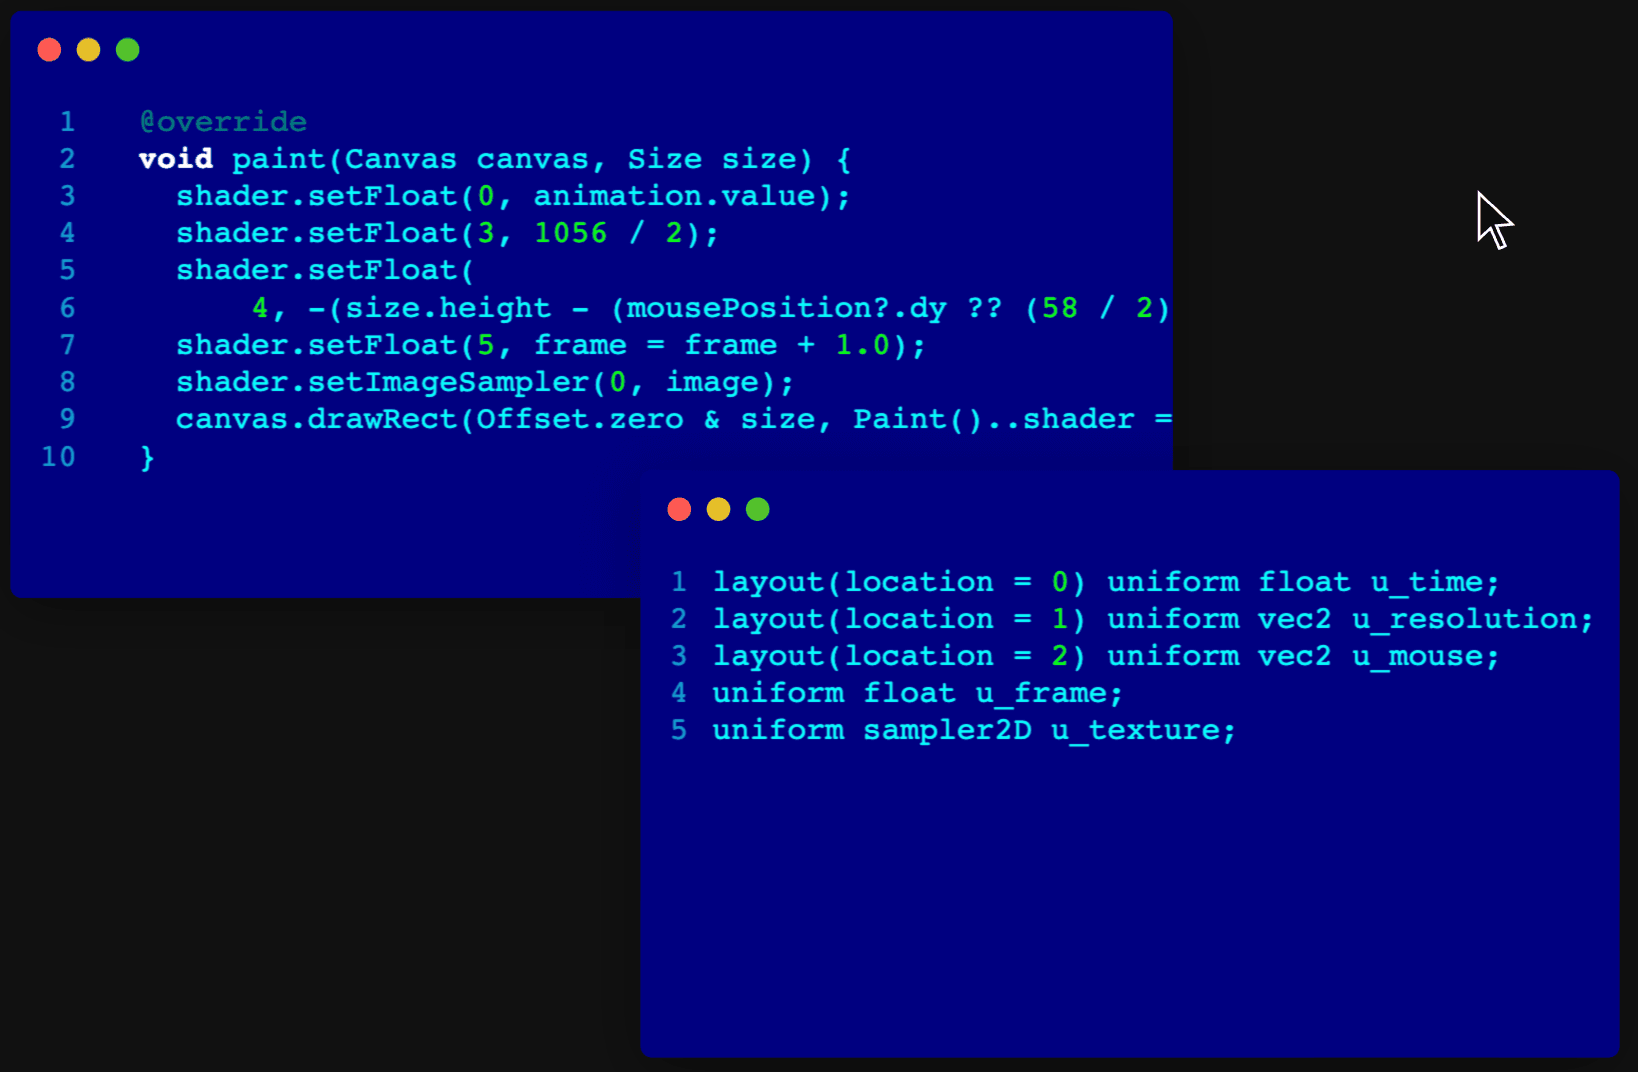
To update the shader values, you can use a custom painter in the Paint method. In the example code, the u_time value is passed as the animation value. This ensures that the animation continues to run smoothly, as the value changes from zero to one.
The complete shaders with all the necessary values are passed to the painter's paint method, resulting in the complete animation effect on the shaders.
Standard Portable Intermediate Representation
SPIR is an industry standard for byte-encoded shaders. A transpiler has been written to convert SPIR into the language of a particular version of a Flutter engine. In our case, the transpiler takes a GLSL file and converts it into something that the KIA engine can understand.
Using SPIR helps to standardize our code, which would be beneficial if we change to another graphics engine like Impeller in the future. Having a standard code will make all our lives easier, regardless of any changes made to the engine.
For a guided walkthrough of the examples mentioned in the talk, please check out the full presentation on our GeekyAnts YouTube channel. Click the link below to watch the video.
Dive deep into our research and insights. In our articles and blogs, we explore topics on design, how it relates to development, and impact of various trends to businesses.


