Aug 9, 2023
How Adobe Illustrator Scripts Can Boost Developer Productivity
Unleash design automation with Adobe Illustrator scripting! Learn how to streamline workflows, create shapes, and boost productivity for developers.
Author


Book a call
Table of Contents
Imagine a world where developers unleash their creativity without being bogged down by repetitive design tasks. Well, it's not just a distant dream—it's a reality!
The days of manual design tweaks and repetitive actions. Say hello to a future where developers harness the power of code to automate design processes seamlessly, liberating their time and supercharging their productivity.
Join us as we dive into the captivating wonders of Adobe Illustrator scripting from a developer's perspective. Discover how this remarkable feature opens up new dimensions of efficiency and creativity in UI/UX projects. No more tedious adjustments; just a realm of boundless possibilities awaits!
Note: The article also includes a code example that will showcase the magic of Illustrator scripting, as it effortlessly brings automation to your design workflow!
Automating Designs with Adobe Illustrator Scripting: A Developer's Code Example
As a developer, you can leverage Adobe Illustrator's scripting functionality to unlock the application's full potential through code.
Let's explore a code example demonstrating how developers can automate designs using Adobe Illustrator scripting.
Creating a new document:
To create a new document, you can use the
add()method provided by thedocumentsobject. This method creates a blank document and returns a reference to it.For example,
var doc = app.documents.add();creates a new document and assigns it to the variabledoc.Creating a dialog window:
You can use the
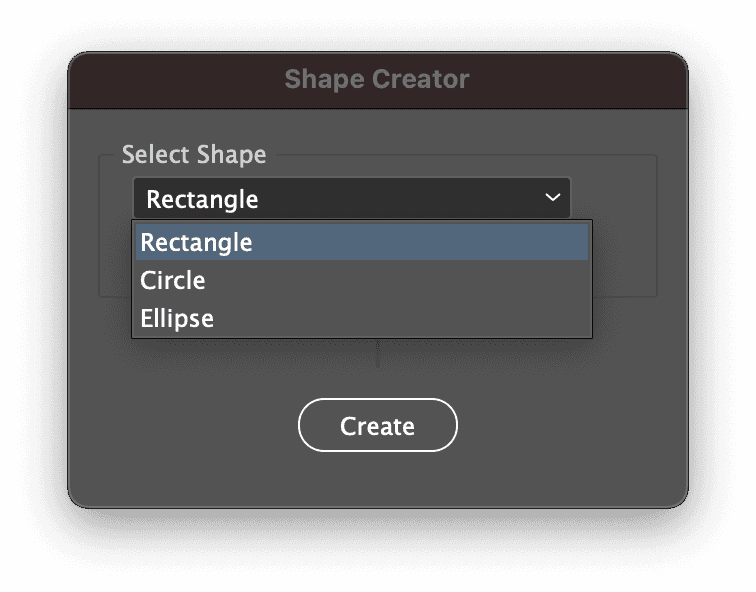
Windowconstructor provided by ExtendScript to create a dialog window. The constructor takes two parameters: the type of window (in this case, "dialog") and the title of the window ("Shape Creator").For example,
var dialog = new Window("dialog", "Shape Creator");creates a new dialog window with the title "Shape Creator" and assigns it to the variabledialog.To customize the appearance of the dialog window, you can set properties on the
dialogobject. For instance, to stack the elements vertically, you can set theorientationproperty to "column".Additionally, you can set the
preferredSizeproperty to specify the width and height of the dialog window. In this case, the width is set to 300 pixels and the height to 200 pixels.To create a new document, you can use the
add()method provided by thedocumentsobject. This method creates a blank document and returns a reference to it.var doc = app.documents.add();creates a new document and assigns it to the variabledoc.
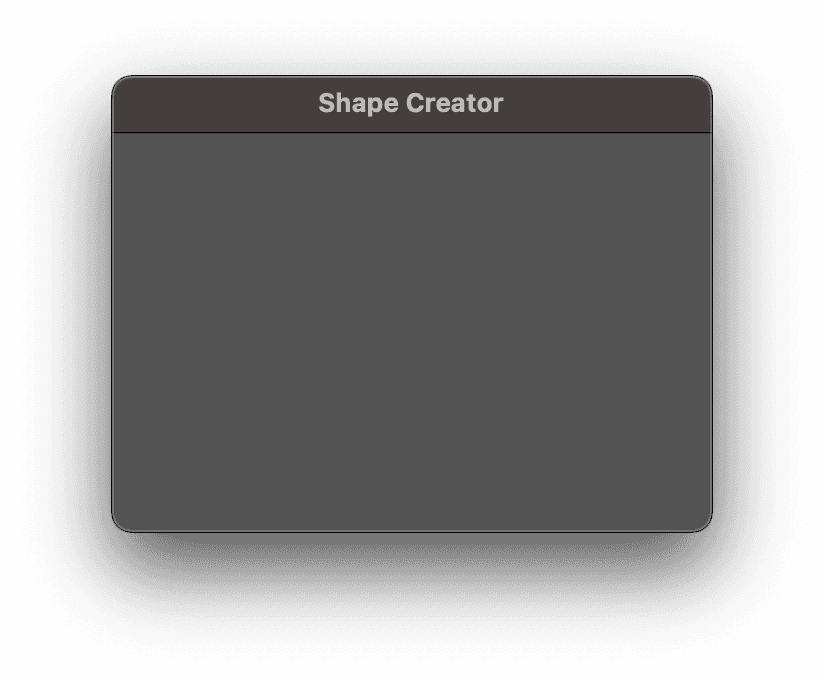
- Adding a panel for shape selection:
To add a panel within the dialog window that provides options for selecting a shape, use the add method of the dialog object to create a new panel as follows:
- The first parameter passed to the
addmethod specifies the type of element to be added. In this case, a panel is added to the dialog window. - The second parameter specifies the dimensions of the element. Here, "undefined" is used to indicate that no dimensions are specified for the panel.
- The last parameter is the title of the element. In this case, "Select Shape" is used as the title.
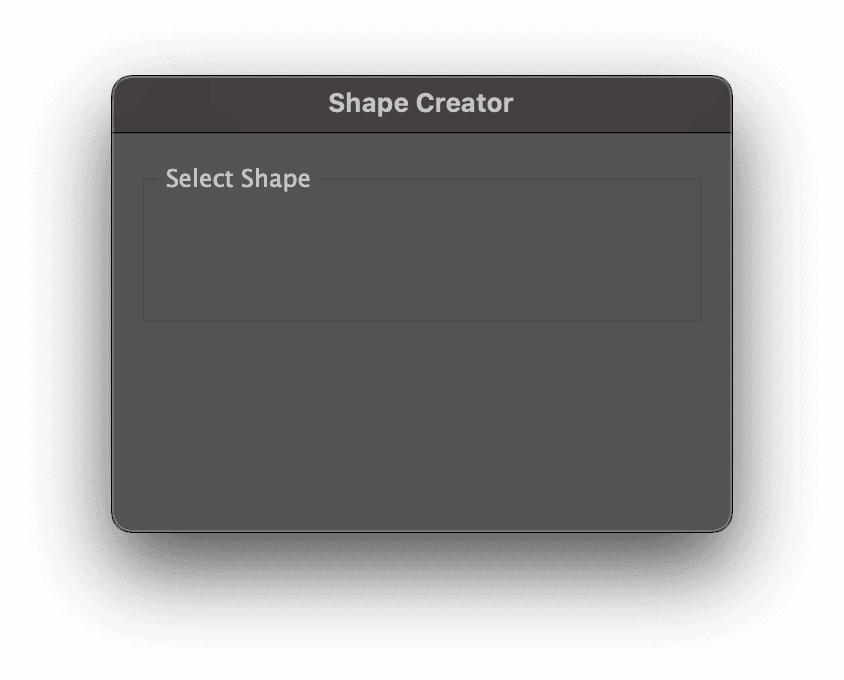
Adding a dropdown for shape selection:
To add a dropdown, we use the
add()method with the element type"dropdownlist", specifying its dimensions and the available options for different shapes.The
addmethod takes multiple parameters:- The first parameter specifies the type of UI element to add, which in this case is a "dropdownlist" for our shape selection.
- The second parameter defines the position and size of the dropdown using an array of values [left, top, width, height].
- The third parameter is an array of options that will be displayed in the dropdown, representing the available shapes: "Rectangle", "Circle", and "Ellipse".
To set a default value for the dropdown, we set the "selection" property to 0, so that the first option becomes the default value for the dropdown.
Adding a "Create" button:
To add a button element, we use the
addmethod on thedialogobject. Theaddmethod has three parameters:- The first parameter specifies the type of UI element, which in this case is "button".
- The second parameter is
undefinedbecause we do not need to specify the position and size of the button. - The third parameter is the label text for the button, which is "Create" in this example.
After adding the button, we use the
alignmentproperty to control its position within the dialog window. Here, we set thealignmentproperty to "center" to horizontally center the button within its container.
The
createButton.onClickfunction is a callback function that executes when the user clicks the create button in the dialog window. It contains the logic for creating shapes based on the selected shape from the dropdown and adding text within those shapes.- Retrieving the selected shape:
var selectedShape = shapeDropdown.selection.text;retrieves the text of the selected shape from the dropdown.
- Setting the fill color:
- A new
RGBColorobject,fillColor, is created to define the fill color for the shape. - The
red,green, andblueproperties of thefillColorobject are set to specify the RGB values for the color.
- A new
- Calculating the center point of the document:
- The center point of the document is calculated using the
doc.widthanddoc.heightproperties. - The
centerXvariable represents the x-coordinate of the center, andcenterYrepresents the y-coordinate of the center.
- The center point of the document is calculated using the
- Creating the selected shape:
- Depending on the selected shape, the corresponding shape is created at the center of the page with the specified fill color.
- For example, if the selected shape is "Rectangle", a rectangle is created using the
doc.pathItems.rectangle()function, with its position and dimensions based on the center point. - Similarly, for "Circle" and "Ellipse", the
doc.pathItems.ellipse()function is used to create the respective shapes.
- Adding text within the shape:
- After creating the shape, a text frame is added using
doc.textFrames.add(). - The
contentsproperty of the text frame is set to the name of the shape. - The
topandleftproperties of the text frame are calculated to position it in the center of the shape by considering the shape's dimensions.
- After creating the shape, a text frame is added using
- Closing the dialog box:
- After creating the shape and adding text,
dialog.close()is called to close the dialog box and allow the user to see the created shape on the document.
- After creating the shape and adding text,
The
createButton.onClickfunction encapsulates the logic to create shapes and add text based on the selected shape. It provides a seamless way to handle the creation process when the user clicks the create button in the dialog window.- Retrieving the selected shape:
Showing the dialog box:
By calling
[dialog.show](<http://dialog.show/>)(), we can display the dialog box and allow the user to interact with its contents. The dialog box will remain visible until the user closes it by clicking a button or performing any other specified action.This step is crucial to ensure that our dialog is visible and accessible to the user, providing them with a clear interface to interact with the functionality we have implemented.
Utilizing Adobe Illustrator scripting, developers can automate various design tasks such as creating shapes, applying colors, manipulating text, and exporting final designs. This automation eliminates manual repetition, reduces the chance of errors, and significantly speeds up the design process.
Conclusion
Adobe Illustrator scripting gives developers a powerful toolset to automate design tasks and streamline workflows. By leveraging JavaScript within Illustrator, developers can create custom scripts that generate designs, apply transformations, and export assets with precision and efficiency.
The code example presented in this article showcases how developers can harness the potential of Adobe Illustrator scripting to automate designs and optimize workflows
Subscribe to Our Newsletter
Subscribe to RSS
Press & Media Hub RSS FeedRelated Articles.
More from the engineering frontline.
Dive deep into our research and insights on design, development, and the impact of various trends to businesses.

Jul 10, 2026
Self-Healing AI Agents: The Future of Enterprise Automation Needs Governance, Observability, and Product Engineering

Jul 10, 2026
How We Built the Missing Bridge from Code to Figma

Jul 10, 2026