Oct 27, 2022
Build a Customized AR Filter With Me
Here's a step-by-step guide to creating an AR Filter with your brand's flavor.
Author


Book a call
▶️ The Inception
Augmented Reality filters have gained a lot of popularity in recent years because of their usefulness for artistic purposes and branding. Customized AR filters can help you build the tone of your product, brand or organization; it will provide you with a sense of affinity.
"Metaverse is the future" you may have heard this line often, and with the top IT firms promoting metaverse, it's hard to miss. So, what is Metaverse, and why is it trending? Metaverse is the term written and used by Neal Stephenson extensively in his book Snow Crash, and it refers to an immersive virtual environment projected from the user's head. From using digital currency to playing VR games to using AR filters, it's all part of the metaverse.
In recent years, the interest in Augmented Reality and Augmented Reality games has skyrocketed. A few years back, an AR game called Pokemon Go was released, which has almost one billion+ downloads and is still one of the highest-grossing games worldwide. But, why is this game so popular? The answer is augmented Reality (AR). Augmented Reality is a technology that projects computer-generated images onto real-world surroundings. Augmented Reality can be combined a camera input and positional data from your surroundings to show live news, weather information, text messages and a lot more over the top of the of the physical world.
🛠️ The Process
Augmented reality (AR) has existed for a while now and is constantly changing how people perceive reality. AR filters allow you to change various aspects of your surroundings, for example, by superimposing virtual objects onto multiple surfaces, such as a book page, a door or even your physical self. If you use platforms like Facebook, Instagram or Snapchat, you may have seen or used it at some point in your life.
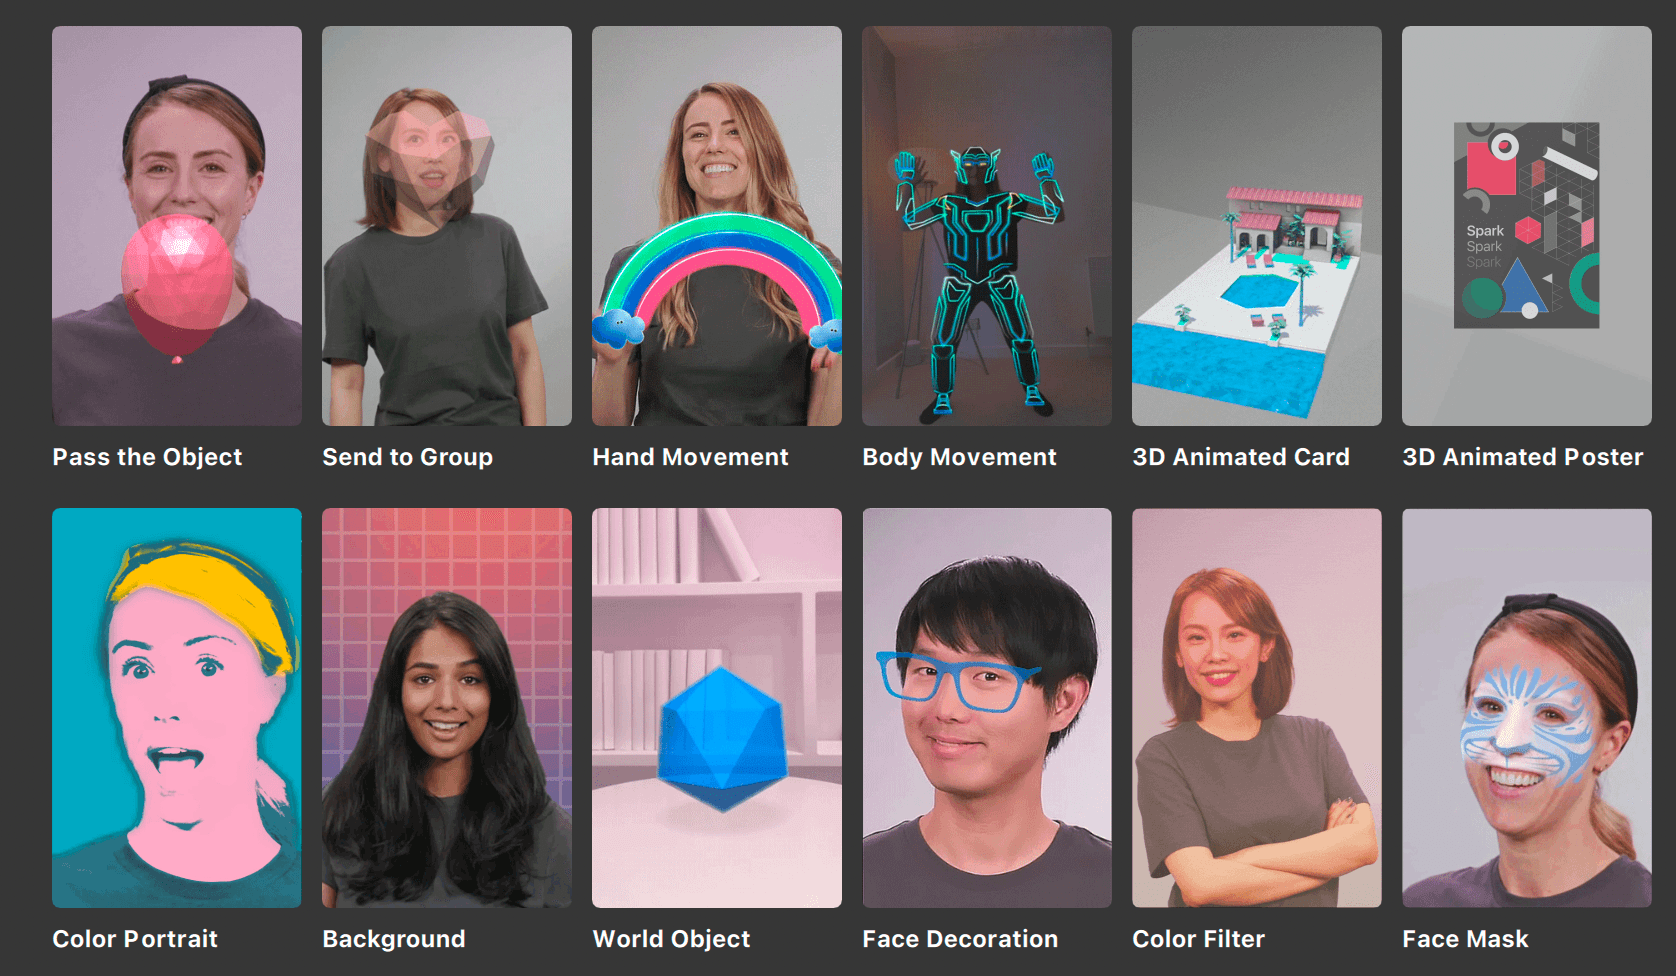
AR filters are the more vivid way to experience videos, live streams, and photos in Augmented Reality. More like it gives us an alternate reality.
🎭 Making of an AR Filter
To make an Augmented Reality Filter, you don’t need to know how to code; it is far from coding. It would help if you only had an idea of how you want your AR filter to look and work and a little bit understanding of how to use AR studios.
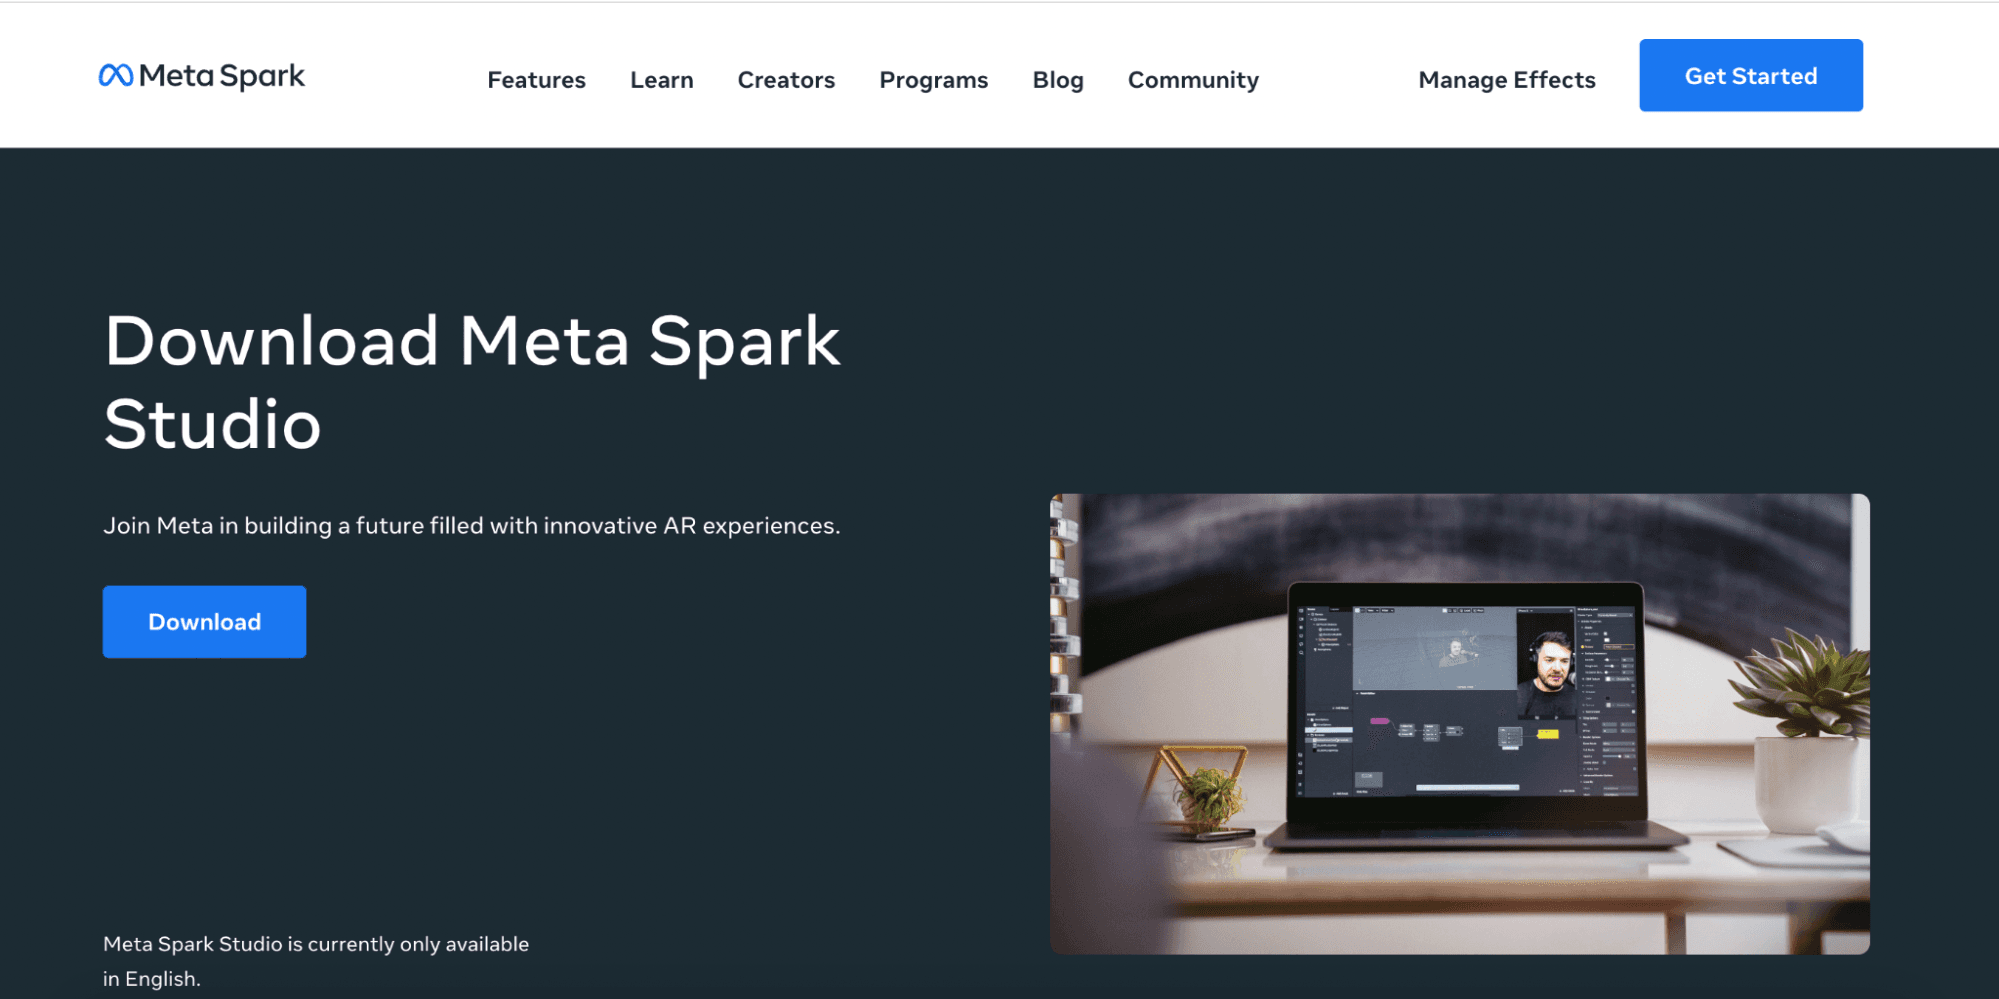
If you are making a Snapchat filter, you can use Snap AR(Lens Studio); similarly, if you are making a Meta Filter ( filter for Instagram or Facebook), you can use Spark AR. For this particular project, I used Spark AR.
You can download Spark AR by simply searching ‘download SPARK AR’ on any browser or you can use this link: https://sparkar.facebook.com/ar-studio/download/
Once downloaded, you can open it on your computer/laptop. You will see this interface.
- Here, you can see on SideBar “create new,” by which you can start a new project.
- By clicking on ‘Learn’, you can access tutorials provided by Spark AR, although there are thousands of tutorials on YouTube from which you can learn.
- And By clicking on ‘Recent Projects’, you can access your in-completed/completed projects.
- Similarly, with ‘Open’, you can open any Spark AR project file on your device.
Many templates are also available you can use to add particular functionality to your filter. These templates have pre-build features, you can replace existing components and add extra components, or you can start from scratch by clicking on ‘Blank Project’.
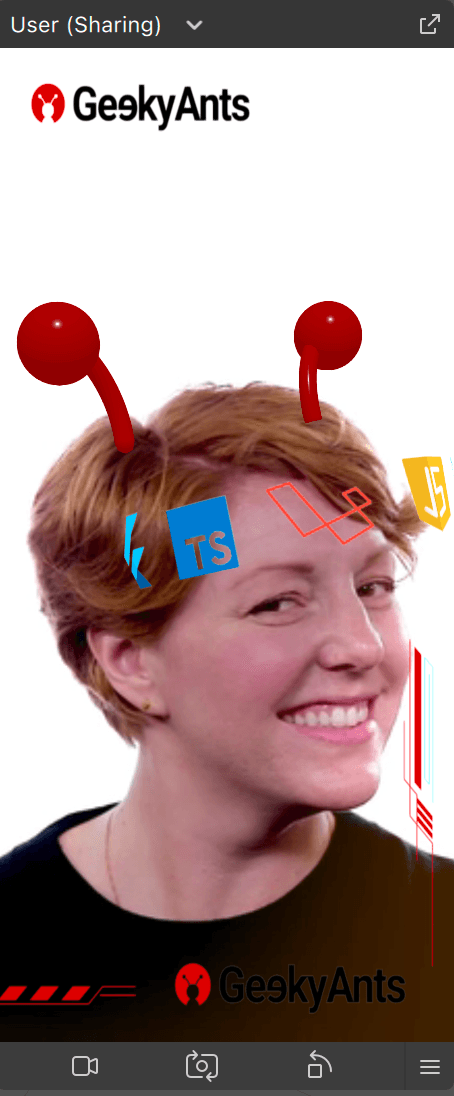
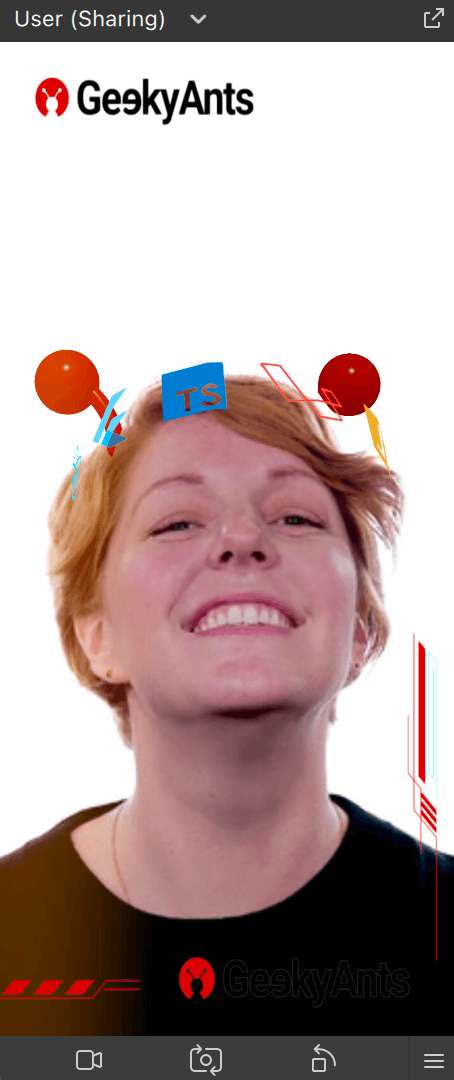
I needed a head component on my filter, so I used it from an available template called ‘Head Decoration’.
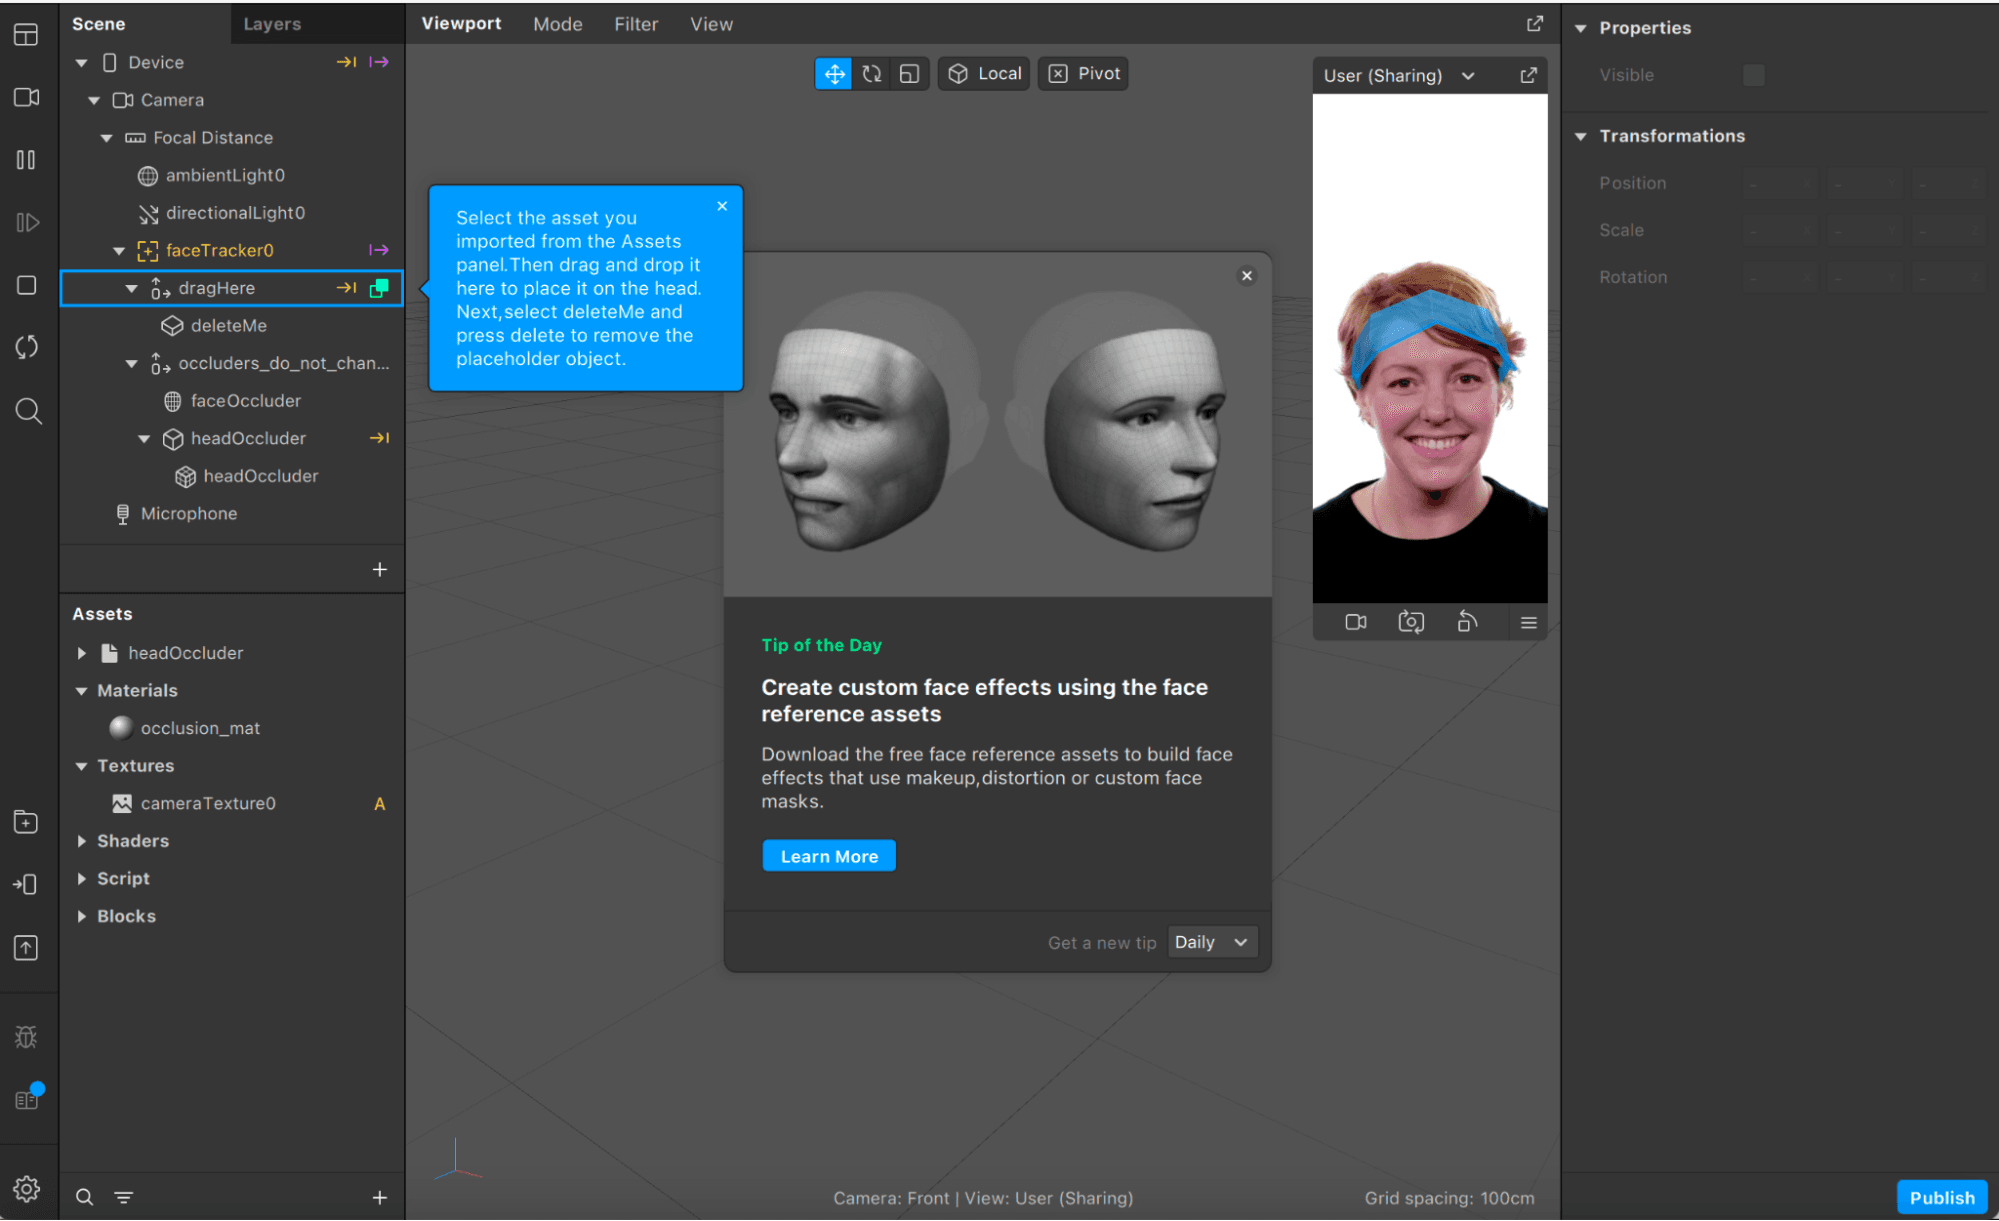
When you click on ‘Head Decoration’, you can see a boilerplate interface.
- In the “dragHere” section, you can drag and add your custom 3D or 2D objects. I needed two ant-horns for mine, so I used a 3D object-making software, ‘vectary’. With which, I made one red-coloured horn, downloaded it on my device and dragged it under ‘dragHere’ section and deleted its ‘deleteMe’ node.
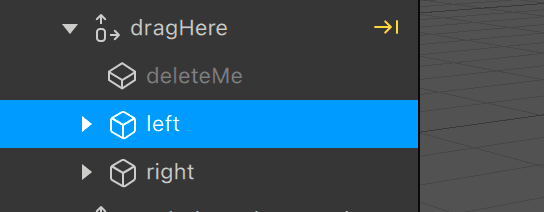
I duplicated the object and then flipped it using the right-side panel. And thus now I have two red coloured horns, will which move according to my face. This is because we placed them under faceTracker object available in SparkAR.
You can change the dimensions of your objects using the side panel or using viewport.
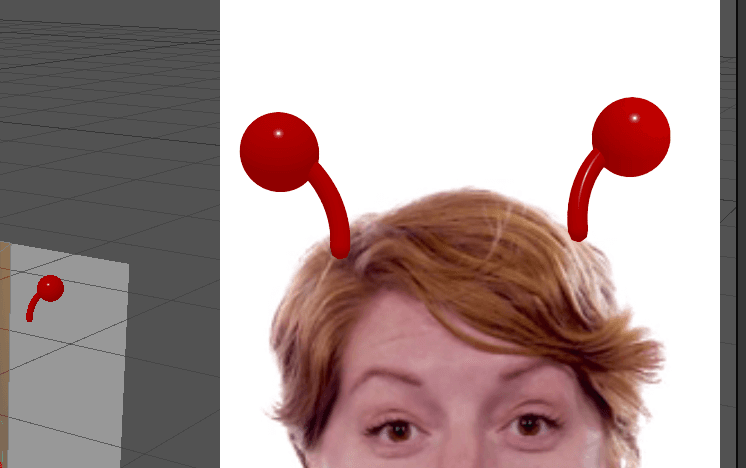
This will look like this now.
- Next, I wanted to add some rotating objects around my head. I used ‘Canva’ to make a .png file with the components I tried to rotate, and then I removed the background of that png file, imported it into my project, and created material for the same from the asset panel.
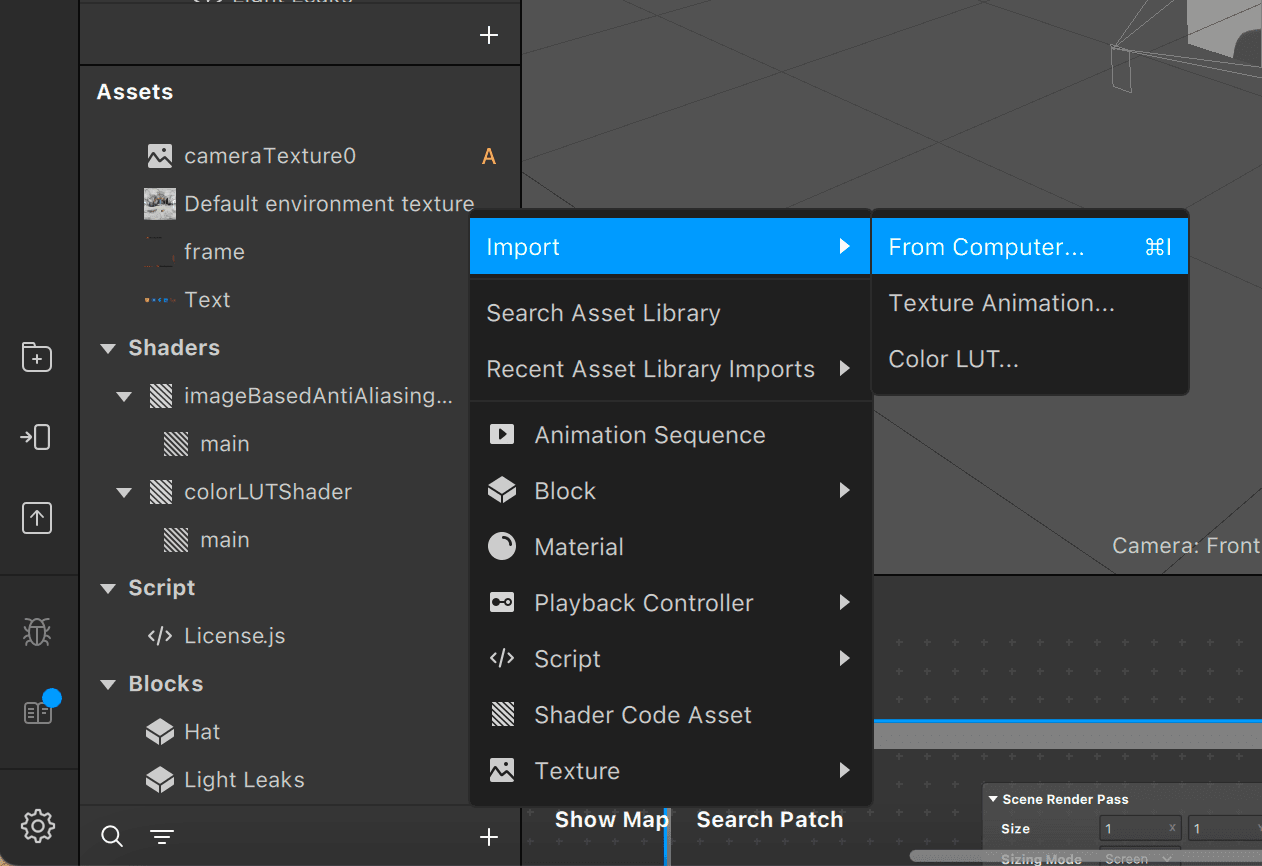
You can use the ‘+’ sign to import from your device to your project.
After that, I added a cylindrical 3D object using the asset library of Spark AR.
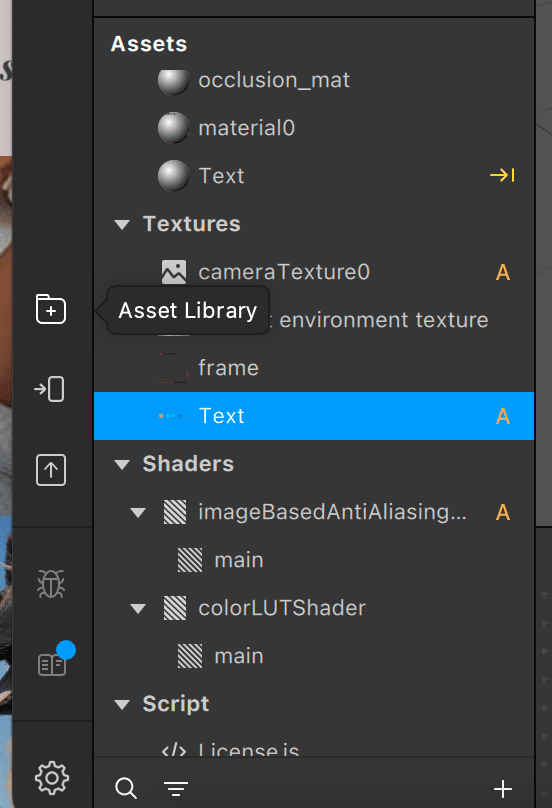
I dragged that cylindrical object inside my face tracker node and opened its child node, which is also a ‘cylinder’ and then set the material to the png file name. Here in my case, it is ‘Text’.
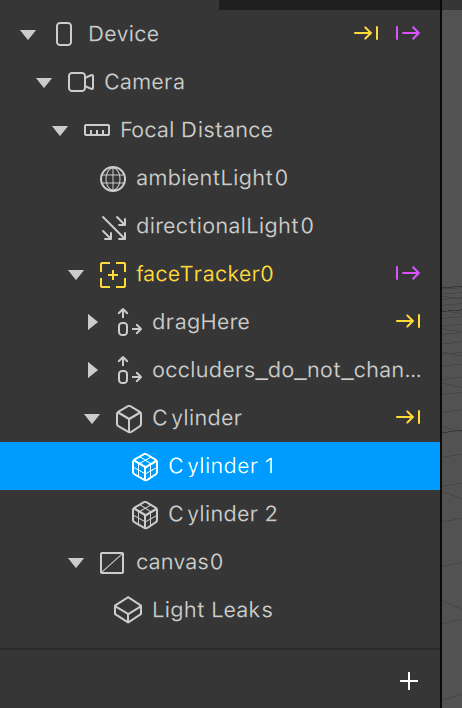
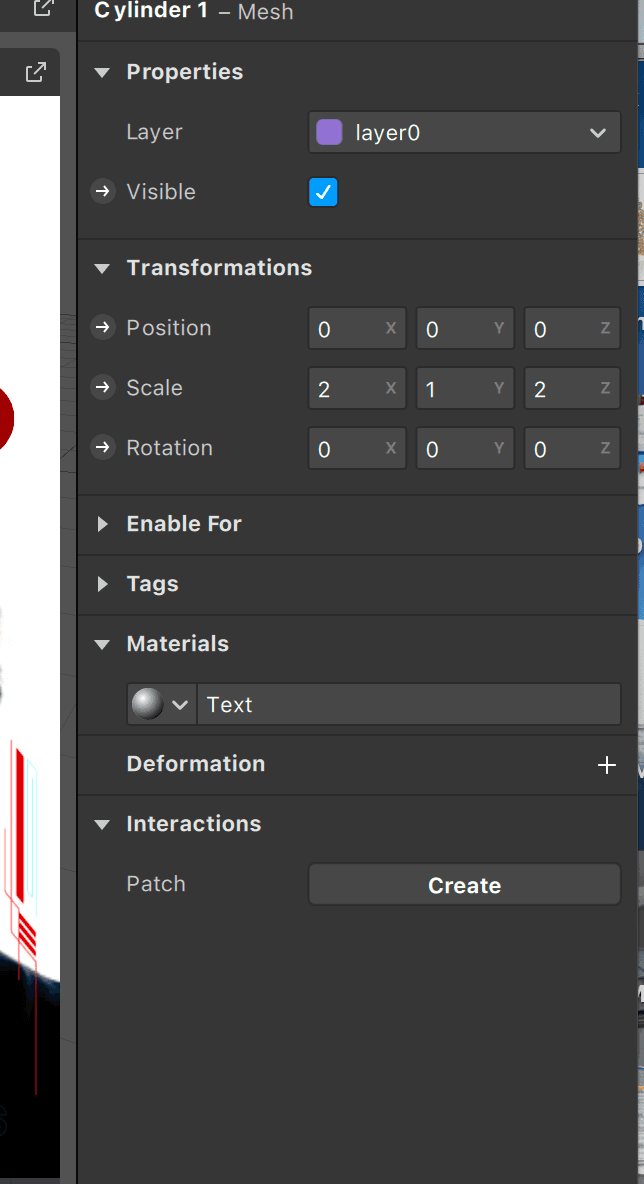
I duplicated the cylinder child object and renamed them as Cylinder 1 and Cylinder 2, so I can have two cylinders (one for front view, one for back view). I had to add 2D Transform Pack and a Texture transform pack in the patch editor so that I could use the png file as a 2D object that will rotate around our head.
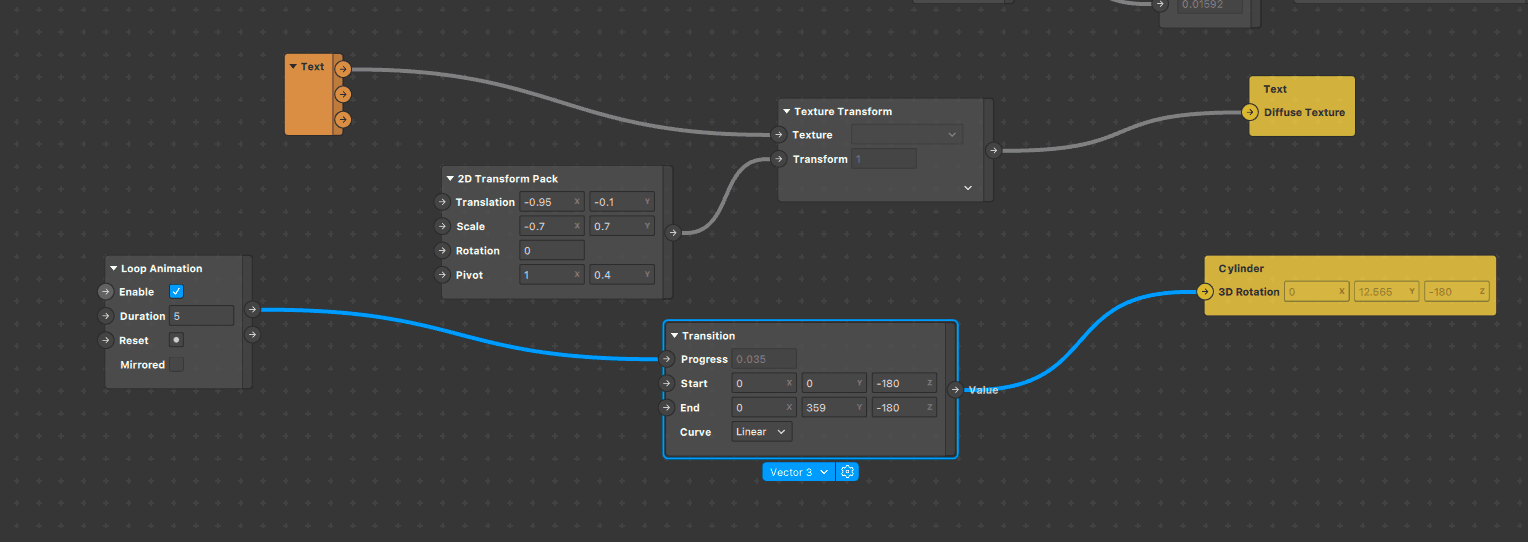
The changes are made in the patch field and the right panel has to achieve the cylindrical object's exact scaling, rotation and dimension so that it can revolve around your head. You can also set up the speed by using the duration field of the loop animation patch.
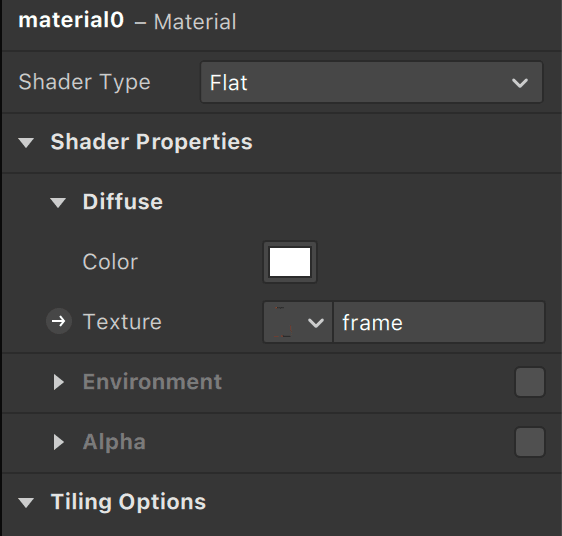
- I added another png file with the transparent removed in the texture asset present in the asset panel to add a frame to our project. Here, I used the GeekyAnts logo at both top and the bottom. I set the material texture as our Frame file; by creating a material and setting it, and later, I can display it in my project.
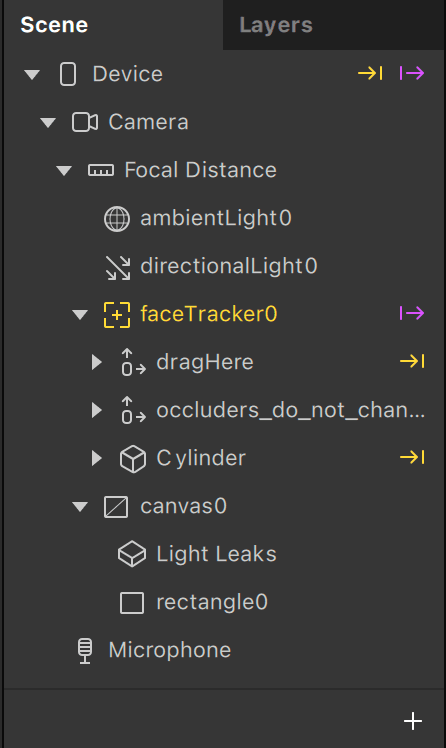
Now for lighting, I gave it a light leaks filter effect; I used a LUT file asset available on the Internet for the type of light leak effect I wanted on my project. I imported it from the computer; it was available on the block asset on the bottom left side panel. Now I dragged it to the scene panel above, and you can see it under the canvas section.

And there you have it. Your custom AR Filter.
You can publish it on Instagram or Facebook by clicking on the ‘Publish’ button available at the bottom right of the interface.
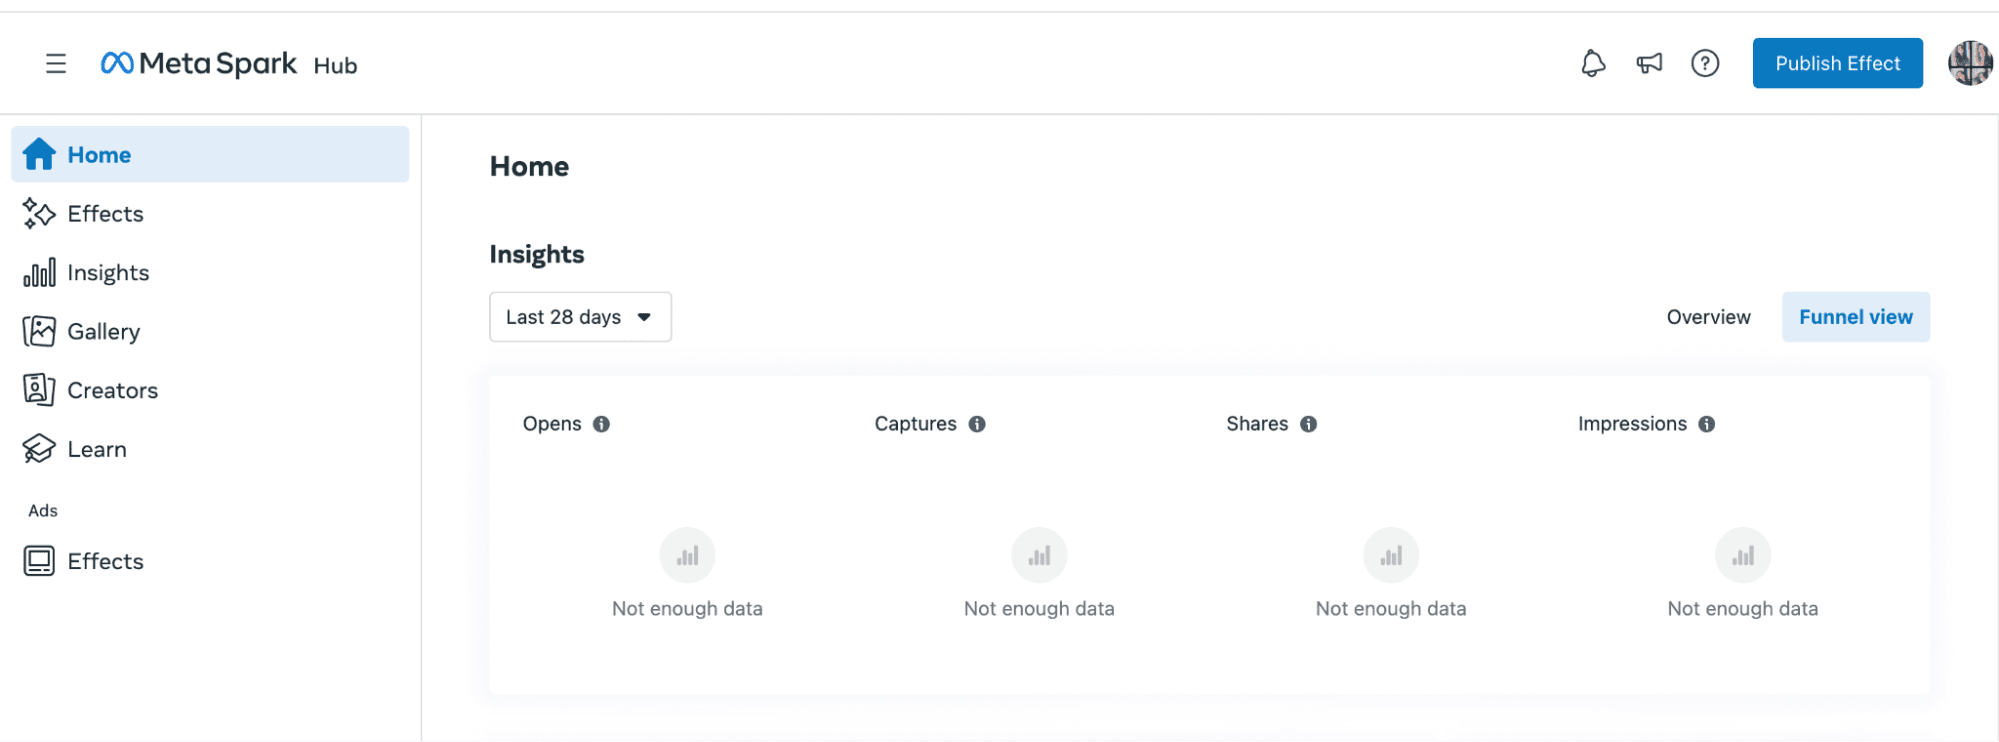
You can also see the analytics of your filter on the Meta SparkHUB dashboard.
And, Voila, Here’s The Final Result!
Try It On!
I think trying out and exploring new technology is essential because it can help you learn new things and improve your skills. It can also be fun to experiment with new technology and see what it can do.
Spark AR provides a wide range of options for filter creation, so take some time to explore all the possibilities. With a bit of creativity, you can create a filter that's truly unique and engaging. When creating an AR filter, you must consider the overall look and feel you want to achieve. How do you want your filter to look? Will it be a quiz filter, photo enhancing filter, something fun, or more on the branding side? What colours and patterns will you use? How will your filter interact with users?
Overall, making this custom augumented filter was a very interactive experience and a fun exercise.
Want to know more? Let’s talk.
Subscribe to Our Newsletter
Subscribe to RSS
Press & Media Hub RSS FeedRelated Articles.
More from the engineering frontline.
Dive deep into our research and insights on design, development, and the impact of various trends to businesses.

Jul 10, 2026
Self-Healing AI Agents: The Future of Enterprise Automation Needs Governance, Observability, and Product Engineering

Jul 10, 2026
How We Built the Missing Bridge from Code to Figma

Jul 10, 2026