
Creating multiple mobile applications that share the same set of features can quickly become a maintenance nightmare if not managed properly. Developing, testing, and deploying each app individually leads to redundant manual effort and increased complexity. However, leveraging a single React Native code base to generate multiple applications can streamline the entire process.
Problem Statement
- Complex Maintenance: Managing multiple React Native instances for each app becomes cumbersome.
- Redundant Efforts: Each app's development, testing, and deployment efforts are duplicated.
Solution: Single RN code base and create multiple apps out of it
By maintaining a single React Native code base, you can create multiple iOS and Android builds for different applications. This approach reduces redundancy and simplifies maintenance.
Steps to Achieve This Solution
To manage multiple React Native applications from a single code base, you'll need to set up product flavors for Android and schemes for iOS. This setup allows you to build and deploy different app versions with unique configurations.
In mobile development, a “flavor” of a product refers to a variation of a specific application that is built using the same source code but with different configurations or resources. If you want to learn more about product flavors, here’s the official documentation — View Documentation
Common Steps
1. Installing react-native-config - One way to implement flavors in a React Native app is to use the react-native-config package. This package allows you to define configuration variables that can be used at build time, such as an API endpoint URL or a feature flag. View Reference
// yarn
yarn add react-native-config

// npm
npm install react-native-config --save

// pods
cd ios && pod install
After installing the package, You must manually apply a plugin to your app from android/app/build.gradle:
apply plugin: "com.android.application"
apply from: project(':react-native-config').projectDir.getPath() + "/dotenv.gradle" // <- add this line
2. Next, you can define your configuration variables in a file called .env. This file should be located at the root of your project and should contain key-value pairs, with each pair on a new line. For example:
.env
ENV=development
API_URL=https://api.dev.com
To use these variables in your code, you can access them through the Config object:
import Config from 'react-native-config'
console.log(Config.API_URL)
To build different flavors of your app, you can create separate .env files for each flavor and specify which file to use at build time. For example, you might have a .env.prod file for your production build and a .env.dev file for your development build. To specify which file to use, you can write the script in package.json scripts environment variable to the build command:
 "android:devDebug": "ENVFILE=.env.dev && react-native run-android --variant=devDebug --appIdSuffix dev",
 "android:devRelease": "ENVFILE=.env.dev && cd android/ && gradlew assembleDevRelease",
 "android:prodDebug": "ENVFILE=.env.prod && react-native run-android --variant=prodDebug --appIdSuffix prod",
 "android:prodRelease": "ENVFILE=.env.prod && cd android/ && gradlew assembleProdRelease",
 "android:bundleRelease": "ENVFILE=.env.prod && cd android/ && gradlew bundleProdRelease"
This script will build the app using the configuration variables defined in each environment file.
Setting Up Product Flavors in Android
Now we need to define envConfigFiles in build.gradle associating builds with env files. To achieve this, add the below code before the apply from call, and be sure to leave the build cases in lowercase.
Step 1: Configure build.gradle
Open your android/app/build.gradle file.
Define product flavors within the android block.
Note: In the below example, instead of dev and prod flavors, we are using app1 and app2 configurations for two different applications.
// android/app/build.gradle

apply plugin: "com.android.application"

project.ext.envConfigFiles = [
    developmentrelease: ".env.app1Dev",
    developmentdebug: ".env.app2Dev",
    stagingrelease: ".env.app1Dev",
    stagingdebug: ".env.app2Dev"
]

apply from: project(':react-native-config').projectDir.getPath() + "/dotenv.gradle"

android {
    flavorDimensions "appType"
    productFlavors {
        app1 {
            applicationId "bundleId1"
            resValue "string", "build_config_package", "bundleId1"
            dimension "appType"
        }
        app2 {
            applicationId "bundleId2"
            resValue "string", "build_config_package", "bundleId2"
            dimension "appType"
        }
    }
}
Step 2: Create Resource Folders
Create separate resource folders for each flavor. For example:
src/app1/res/src/app2/res/
You can place flavor-specific resources, like strings, images, etc., in these folders. For example, you can have different strings.xml for each flavor:
src/app1/res/values/strings.xmlsrc/app2/res/values/strings.xml
Step 3: Build and Run Flavors
You can build and run specific flavors using Gradle commands:
./gradlew assembleApp1Release
./gradlew assembleApp2Release

OR

npm run android:devDebug // it will run the dev build variant in debug mode
npm run android:devRelease // it will release the app with dev build variant
Using Product Flavours, it will be very easy to manage multiple flavors of build variants with a single codebase. Here’s the summary of all of the above steps:
- Navigate to android/app/build.gradle and add ‘productFlavors’ for both apps.
- Add separate configurations based on the product flavors specified.
- Add ‘flavorDimensions’ as ‘appType’ to group the app variant in the same file.
- Configure ‘react-native-config’ to support productFlavors.
- Create .env.app1Dev and .env.app2Dev for dev environments and add env variables.
- Add scripts in package.json file to run separate apps along with ENVFILE variable initialised with .env.app1Dev / .env.app2Dev
Now moving on to iOS
Setting Up Schemes in iOS
Before we go any further, let’s first understand what an Xcode Scheme is. According to Apple’s documentation
An Xcode scheme defines a collection of targets to build, a configuration to use when building, and a collection of tests to execute.
When you create an Xcode project, it automatically generates one scheme by default that is named after the project name.
You can have as many schemes as you want, but only one can be active at a time. Schemes are accessible via the scheme selector in the toolbar.
By default, a new Xcode project will have two configurations: Debug and Release. As the names suggest, Debug configuration is for developers to debug the app during development; Release is for releasing your app to TestFlight or App Store.
Step 1: Create a New Scheme
- Open your project in Xcode.
- Go to
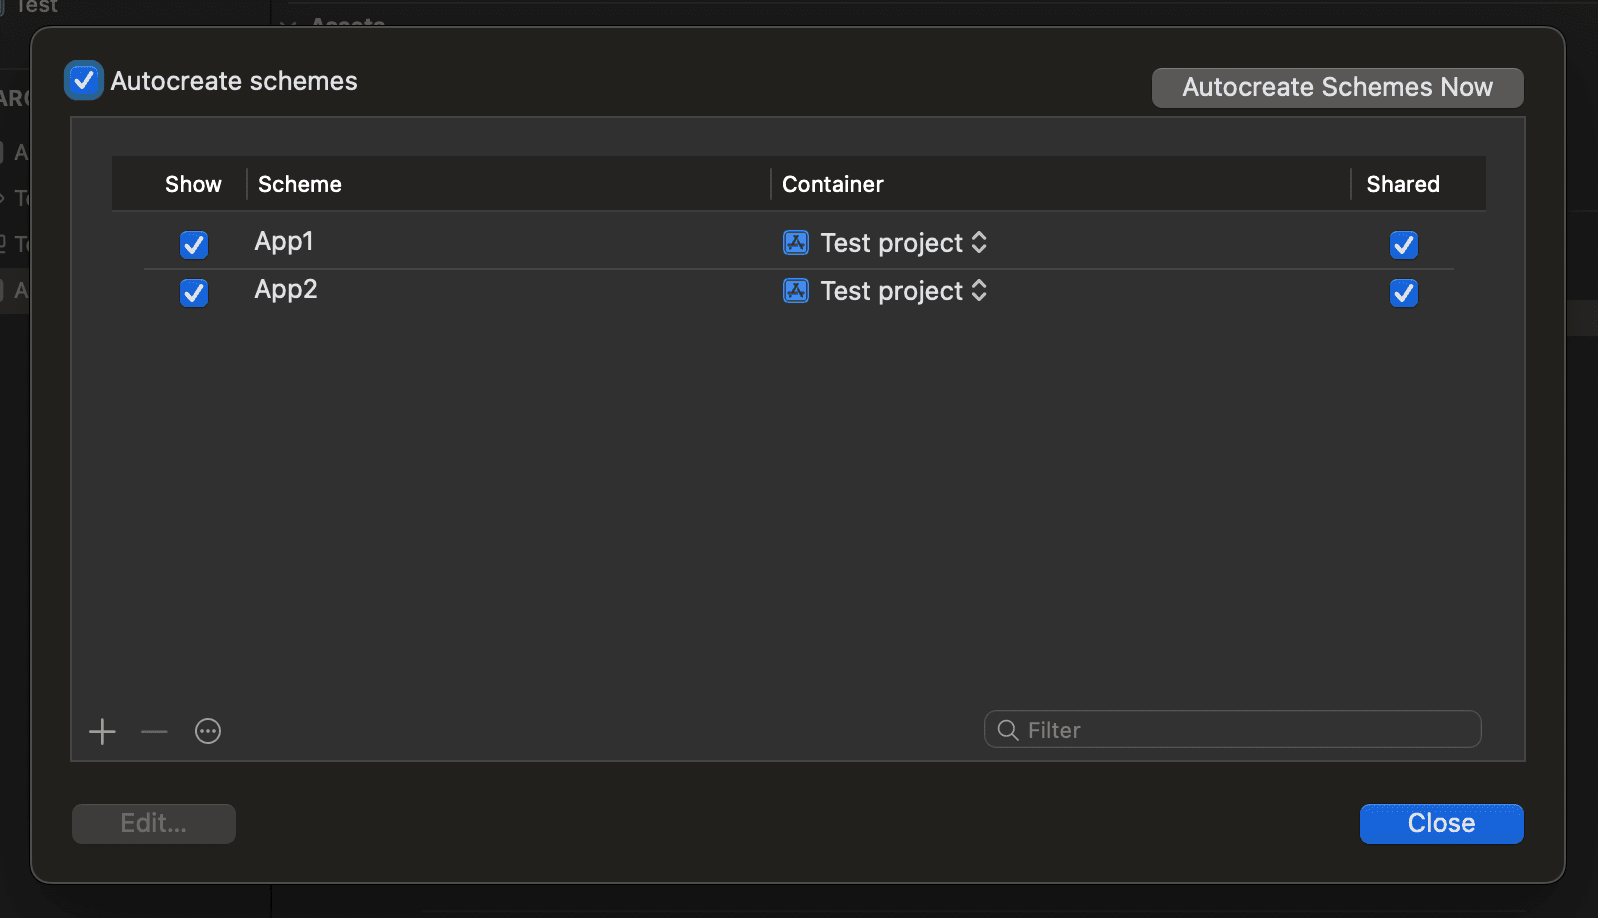
Product->Scheme->Manage Schemes. - Click the + button to add a new scheme.
Name the scheme appropriately, say App1.
Step 2: Duplicate and Configure Targets
- In the
Targetssection of the Xcode project, right-click your existing target and selectDuplicate. - Rename the duplicated target, for example,
App1. - Repeat the process to create another target, for example,
App2.
Step 3: Configure Build Settings
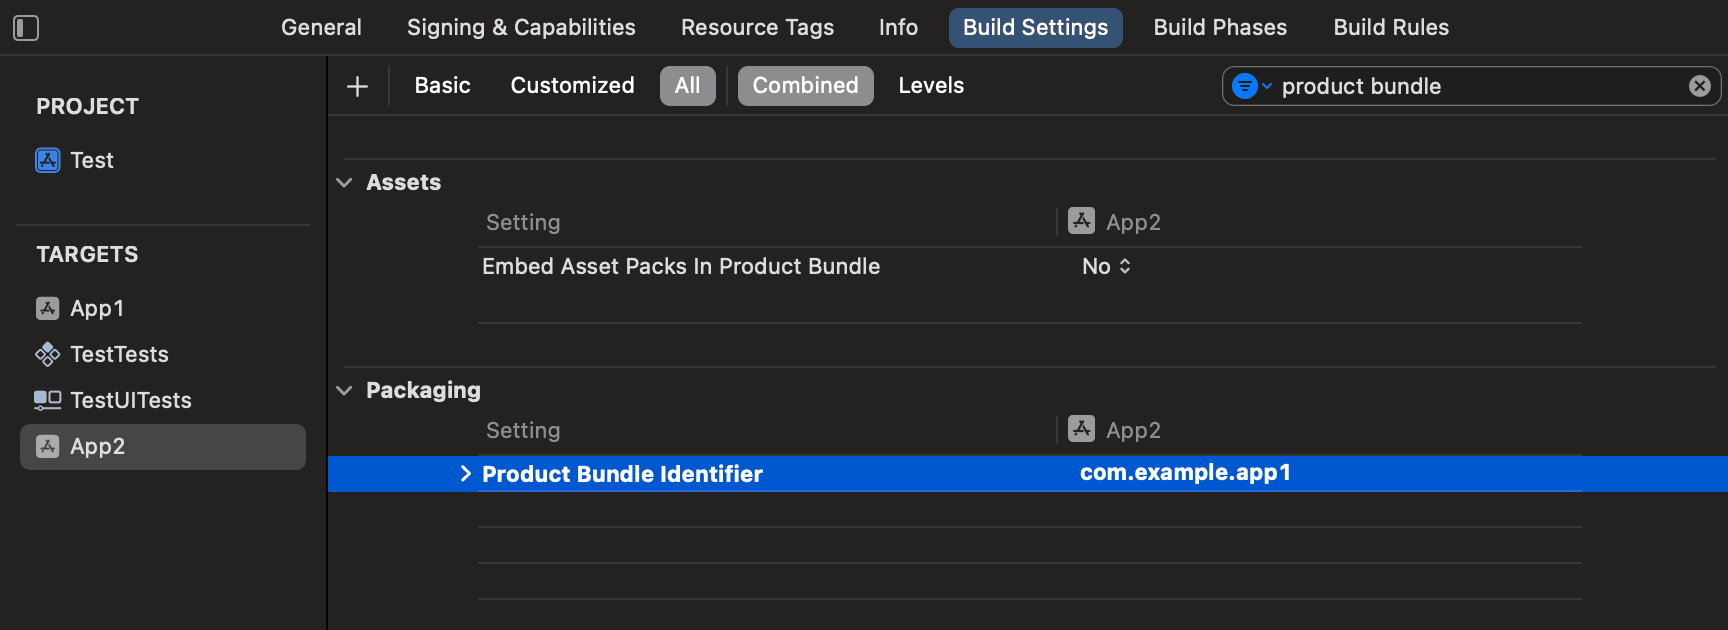
- Select your new target (
App1orApp2). - Go to the
Build Settingstab. - Modify the
Product Bundle Identifierto be unique, for example:com.example.app1com.example.app2
Step 4: Update Info.plist
- Create separate
Info.plistfiles for each target. - Update the scheme to point to the correct
Info.plist.
Step 5: Configure Schemes
- Go to
Product->Scheme->Edit Scheme. - Select the appropriate target for each scheme under the
BuildandRunsections.
Step 6: Build and Run Schemes
You can now select and run different schemes from Xcode by choosing the scheme you desire from the scheme selector.
To get more insights on Xcode schemes & how they work, you can refer to the official documentation here.
Pros of the solutions
- Reduced Redundancy: A single code base reduces duplicate development efforts.
- Simplified Maintenance: Easier to manage and update features across all apps.
- Consistent Quality: Centralised testing ensures uniform quality.
- Clear visual clues (app name, app icon) to indicate the environment you are currently in.
- Can load apps pointing to different environments side by side on a single device or simulator simultaneously, as they use different bundle identifiers.
- Can receive push notifications on all environments as they use different bundle identifiers.
- Can manage app versions and build numbers for different environments separately, and there’s no chance to release apps pointing to the wrong environments.
Cons and solution for each:
- Increased Build Complexity:
Solution: Automate build processes using CI/CD pipelines to manage different configurations smoothly.
- Larger Codebase:
Solution: Modularise the code to keep it clean and manageable. Use feature flags and lazy loading to optimize performance.
Potential Configuration Errors:
Solution: Implement thorough testing for each configuration to catch errors early.
Simplifying Deployment
Automate with CI/CD: To automate build and deployment processes, use CI/CD tools like App Center (retiring next year), Expo, Azure Pipelines GitHub Actions, or CircleCI.
You can refer to this guide to learn more about the best CI/CD tools available for React Native: View documentation
Create scripts to handle different configurations and environments.
Environment Variables: Use environment variables to manage different configurations for builds.
Simplifying maintenance:
Modular Code- Keep components, utilities, and services modular. This makes it easier to update and maintain code.
Feature Flags- Use feature flags to enable or disable features for different apps without code changes.
Centralized Documentation- Maintain comprehensive documentation for configurations, build processes, and deployment strategies.
Conclusion
Leveraging a single React Native codebase for multiple applications significantly reduces repetitive tasks, making maintenance easier and guaranteeing uniform quality across all your apps. Following the outlined steps and best practices, you can efficiently manage multiple apps and streamline your development, testing, and deployment processes. Happy coding!