

In a world where voice assistants are our daily companions and we can hardly remember the last time we typed out a full sentence, integrating speech-to-text functionality into your Flutter apps is not just cool — it is almost essential. Imagine chatting with your app as effortlessly as you do with your best friend. In this post, we are diving into the awesome world of speech-to-text in Flutter. Get ready to explore how you can make your app not just smarter, but also a lot more fun to use. Let us turn those spoken words into magic on your screen and discuss some of the coolest use cases that will blow your users' minds.
Why Speech-to-Text?
Speech-to-text technology allows users to interact with applications using their voice. This can be particularly useful in various scenarios:
- Hands-Free Interaction: Users can perform tasks without touching the screen.
- Accessibility: Improves accessibility for users with disabilities.
- Efficiency: Speeds up data entry and other interactions.
Step-by-Step Guide to Implementing Speech-to-Text in Flutter
Step 1: Setting Up Your Flutter Project
First, let us create a new Flutter project:

Next, add the speech_to_text dependency to your pubspec.yaml:

Run Flutter pub get to install the dependencies.
Step 2: Configuring Permissions
For Android, open android/app/src/main/AndroidManifest.xml and add the microphone permission:

Next, find the following two lines:

Update these to the versions shown in the example below:

For iOS, you will need to grant permission to this component. Inside your Podfile, locate the line: flutter_additional_ios_build_settings(target) and below this add the following:
target.build_configurations.each do |config|
  config.build_settings['GCC_PREPROCESSOR_DEFINITIONS'] ||= [
    '$(inherited)',
    # dart: PermissionGroup.microphone
    'PERMISSION_MICROPHONE=1',
  ]
end
Open ios/Runner/Info.plist and add the microphone usage description:

Step 3: Implementing the Speech-to-Text Functionality
Let us dive into the implementation. Here is the complete code for the main.dart file:
import 'package:flutter/material.dart';
import 'package:speech_to_text/speech_to_text.dart';

void main() {
  runApp(const MyApp());
}

class MyApp extends StatelessWidget {
  const MyApp({super.key});

  @override
  Widget build(BuildContext context) {
    return MaterialApp(
      title: 'Flutter Speech to Text',
      debugShowCheckedModeBanner: false,
      theme: ThemeData(
        primarySwatch: Colors.deepPurple,
        visualDensity: VisualDensity.adaptivePlatformDensity,
      ),
      home: const SpeechScreen(),
    );
  }
}

class SpeechScreen extends StatefulWidget {
  const SpeechScreen({super.key});

  @override
  _SpeechScreenState createState() => _SpeechScreenState();
}

class _SpeechScreenState extends State<SpeechScreen> {
  final SpeechToText _speechToText = SpeechToText();

  bool _isSpeechEnabled = false;
  String _wordsSpoken = "";

  @override
  void initState() {
    super.initState();
    initSpeech();
  }

  void initSpeech() async {
    _isSpeechEnabled = _speechToText.isAvailable == true
        ? await _speechToText.initialize()
        : false;
    setState(() {});
  }

  void _startListening() async {
    await _speechToText.listen(onResult: _onSpeechResult);
    setState(() {});
  }

  void _stopListening() async {
    await _speechToText.stop();
    setState(() {});
  }

  void _onSpeechResult(result) {
    setState(() {
      _wordsSpoken = "${result.recognizedWords}";
    });
  }

  @override
  Widget build(BuildContext context) {
    return Scaffold(
      appBar: AppBar(
        backgroundColor: const Color.fromARGB(255, 110, 80, 163),
        title: const Center(
          child: Text(
            'Speech To Text',
            style: TextStyle(
              color: Colors.white,
            ),
          ),
        ),
      ),
      body: Center(
        child: Column(
          children: [
            Container(
              padding: const EdgeInsets.all(16),
              child: Text(
                _speechToText.isListening
                    ? "Listening... say"
                    : _isSpeechEnabled
                        ? "Tap the mic, and let's rock 'n' roll!"
                        : "Oops! Speech recognition isn't available.",
                style: const TextStyle(
                    fontSize: 20.0, fontWeight: FontWeight.bold),
              ),
            ),
            Expanded(
              child: Container(
                padding: const EdgeInsets.all(16),
                child: Text(
                  _wordsSpoken,
                  style: const TextStyle(
                    fontSize: 24,
                    fontWeight: FontWeight.w400,
                  ),
                ),
              ),
            ),
          ],
        ),
      ),
      floatingActionButton: FloatingActionButton(
        onPressed: _speechToText.isListening ? _stopListening : _startListening,
        tooltip: 'Listen',
        backgroundColor: const Color.fromARGB(255, 110, 80, 163),
        child: Padding(
          padding: const EdgeInsets.all(8.0),
          child: Icon(
            _speechToText.isNotListening ? Icons.mic_off : Icons.mic,
            color: Colors.white,
          ),
        ),
      ),
    );
  }
}
Step 4: Testing Your Implementation
Run your app using a real device or emulator:
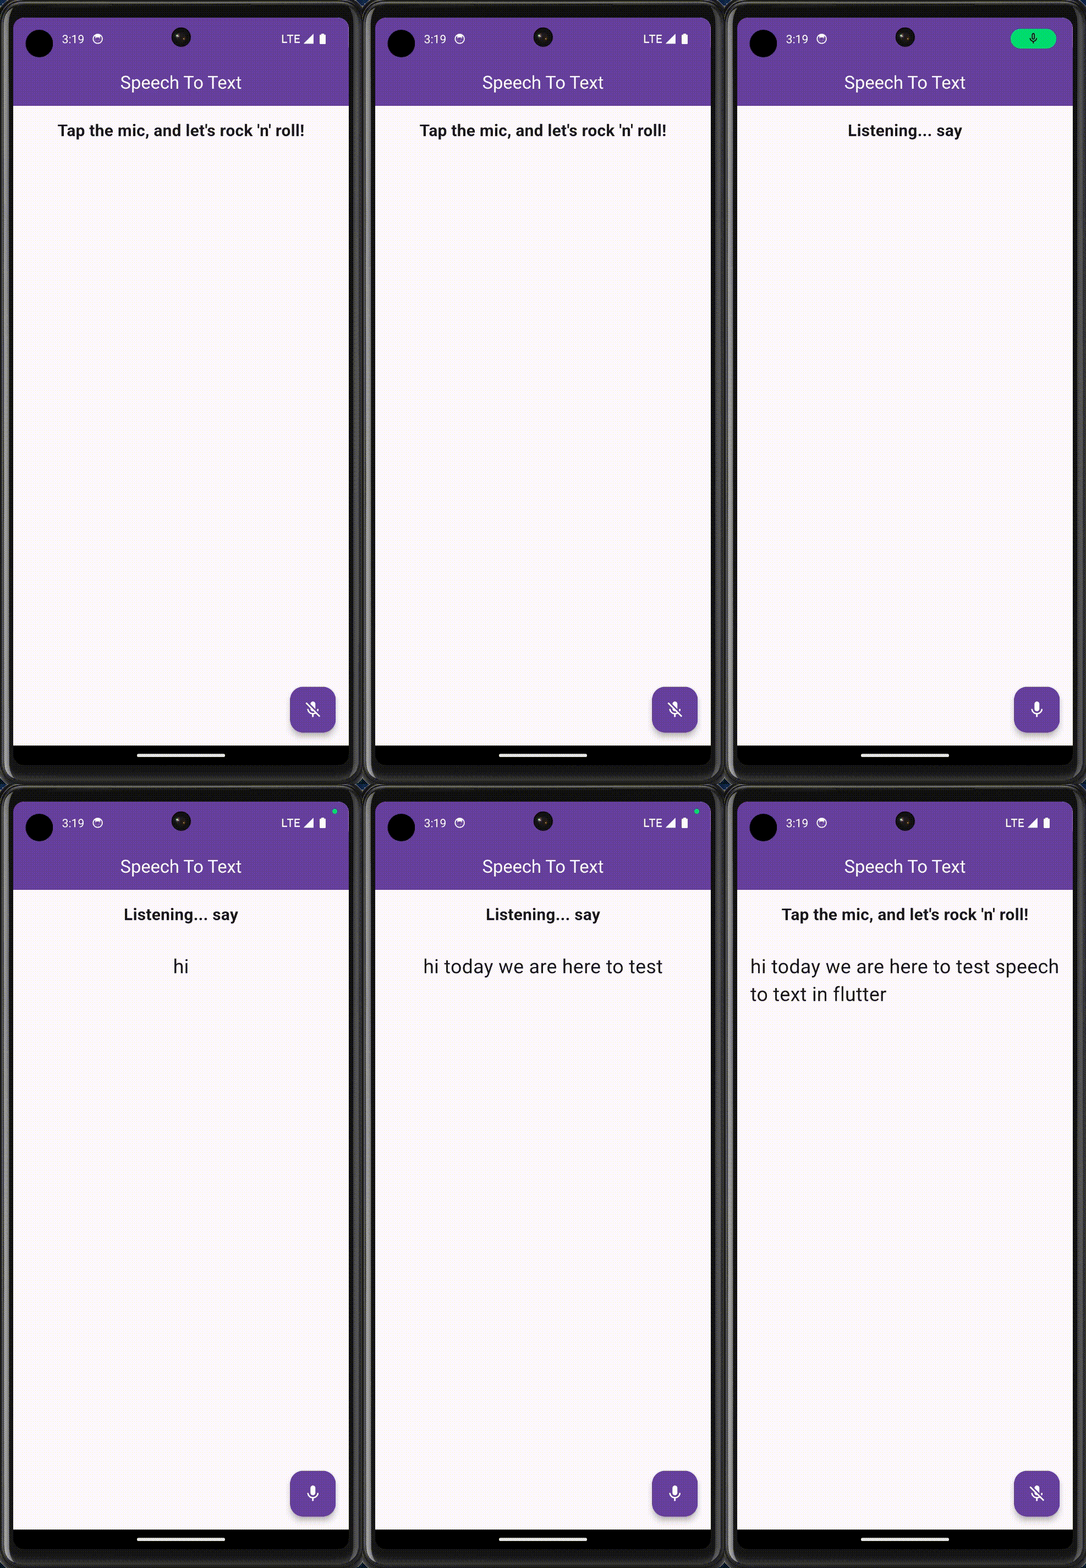
flutter runEnsure you grant microphone permissions when prompted. Press the button and start speaking. The recognized text should be displayed on the screen.
Enhancing Your App with Voice Commands
In the previous sections, we explored how to implement speech-to-text functionality in your Flutter app, which is pretty cool by itself. But why stop there? Let us take it up a notch and recognize specific voice commands to perform actions like opening Gmail, launching websites, or even searching on Google.
Here is how we can implement these voice commands in our Flutter app:
1. Add URL Launcher Dependency: To handle URL actions, we use the url_launcher package. Add it to your pubspec.yaml file:
dependencies:
  flutter:
    sdk: flutter
  speech_to_text: ^4.2.1
  url_launcher: ^6.0.20
2. Handle Commands in Code: Update your _performAction method to recognize and act on specific voice commands. Here is the updated method:
 void _performAction(String command) async {
    if (command.toLowerCase().contains('open gmail')) {
      final Uri email = Uri(
        scheme: 'mailto',
      );
      if (await launchUrl(email)) {
        await launchUrl(email);
      } else {
        throw 'Could not launch $email';
      }
    } else if (command.toLowerCase() == ('search')) {
      final startIndex = command.toLowerCase().indexOf('search') + 6;
      if (startIndex < command.length) {
        const query = "";
        final url = Uri.https('www.google.com', '/search', {'q': query});
        try {
          if (await launchUrl(url)) {
            await launchUrl(url);
          } else {
            throw 'Could not launch $url';
          }
        } catch (e) {
          throw 'Could not launch $url';
        }
      }
    } else if (command.toLowerCase().contains('search')) {
      final startIndex = command.toLowerCase().indexOf('search') + 6;
      if (startIndex < command.length) {
        final query =
            command.substring(command.toLowerCase().indexOf('search') + 7);
        final url = Uri.https('www.google.com', '/search', {'q': query});
        try {
          if (await launchUrl(url)) {
            await launchUrl(url);
          } else {
            throw 'Could not launch $url';
          }
        } catch (e) {
          throw 'Could not launch $url';
        }
      }
    } else if (command.toLowerCase().contains('open youtube')) {
      final url = Uri.https('www.youtube.com');
      try {
        if (await launchUrl(url)) {
          await launchUrl(url);
        } else {
          throw 'Could not launch $url';
        }
      } catch (e) {
        throw 'Could not launch $url';
      }
    }
  }
3. Integrate Command Recognition: Ensure your speech-to-text functionality integrates with command recognition seamlessly. Update your _onSpeechResult method:
void _onSpeechResult(result) {
  setState(() {
    _wordsSpoken = result.recognizedWords;
  });
  _performAction(_wordsSpoken);
}
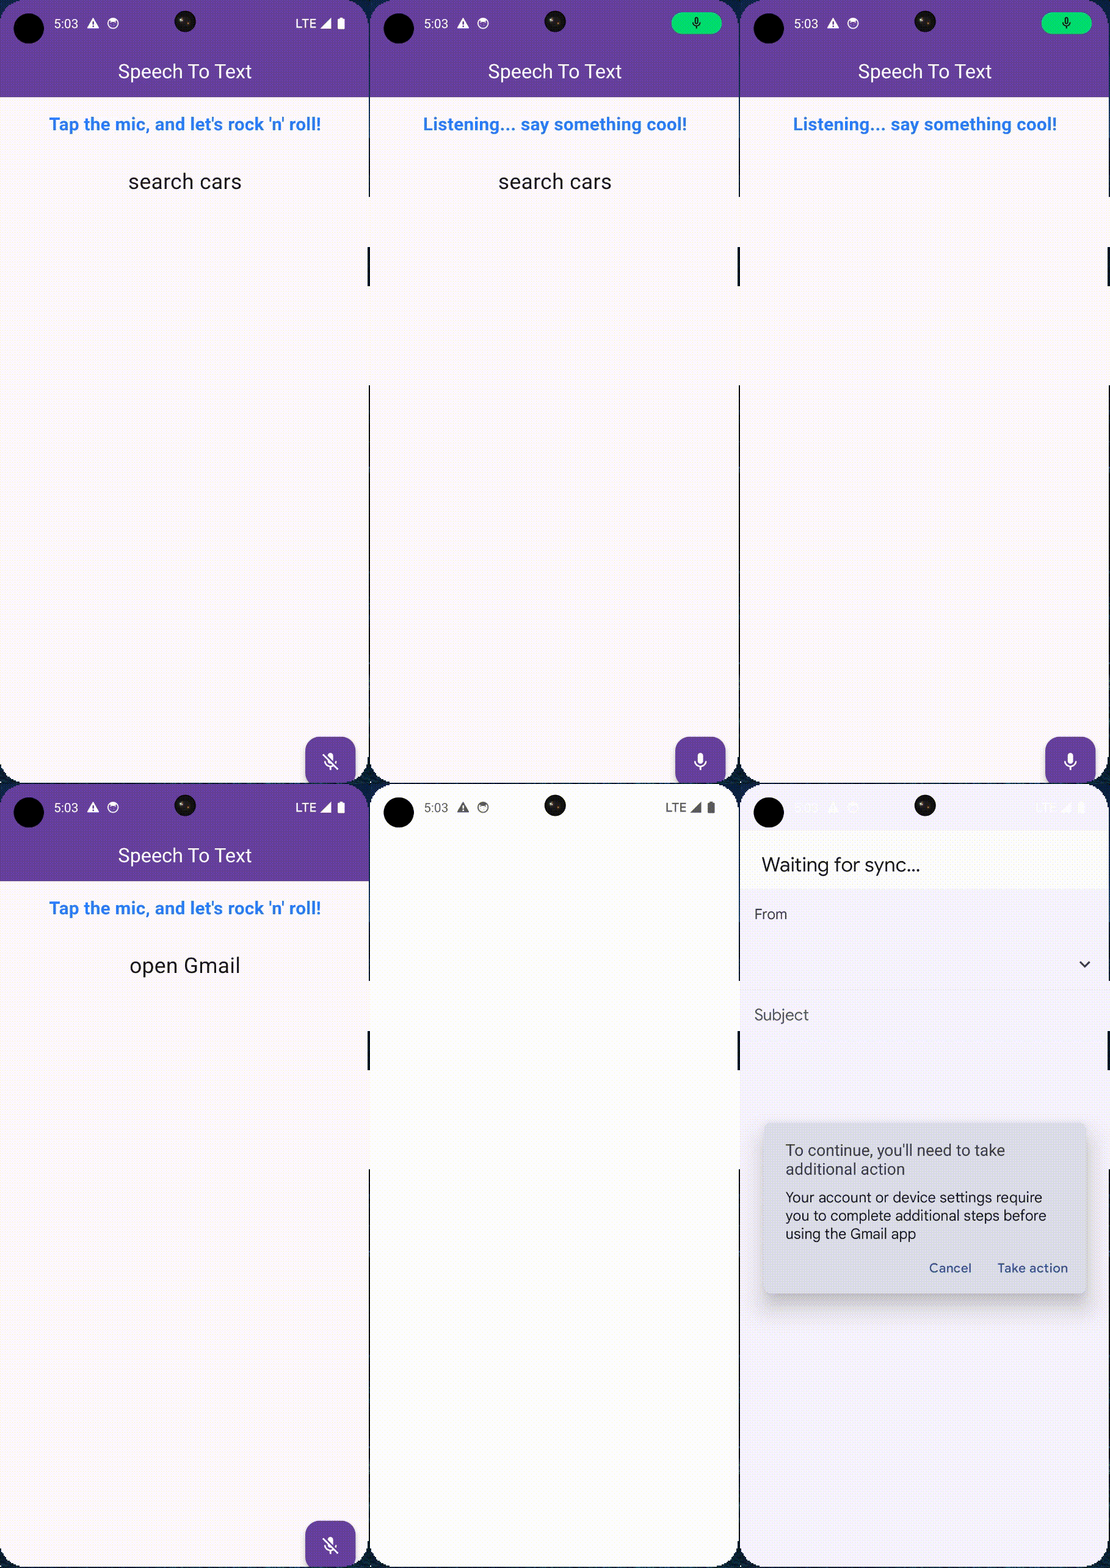
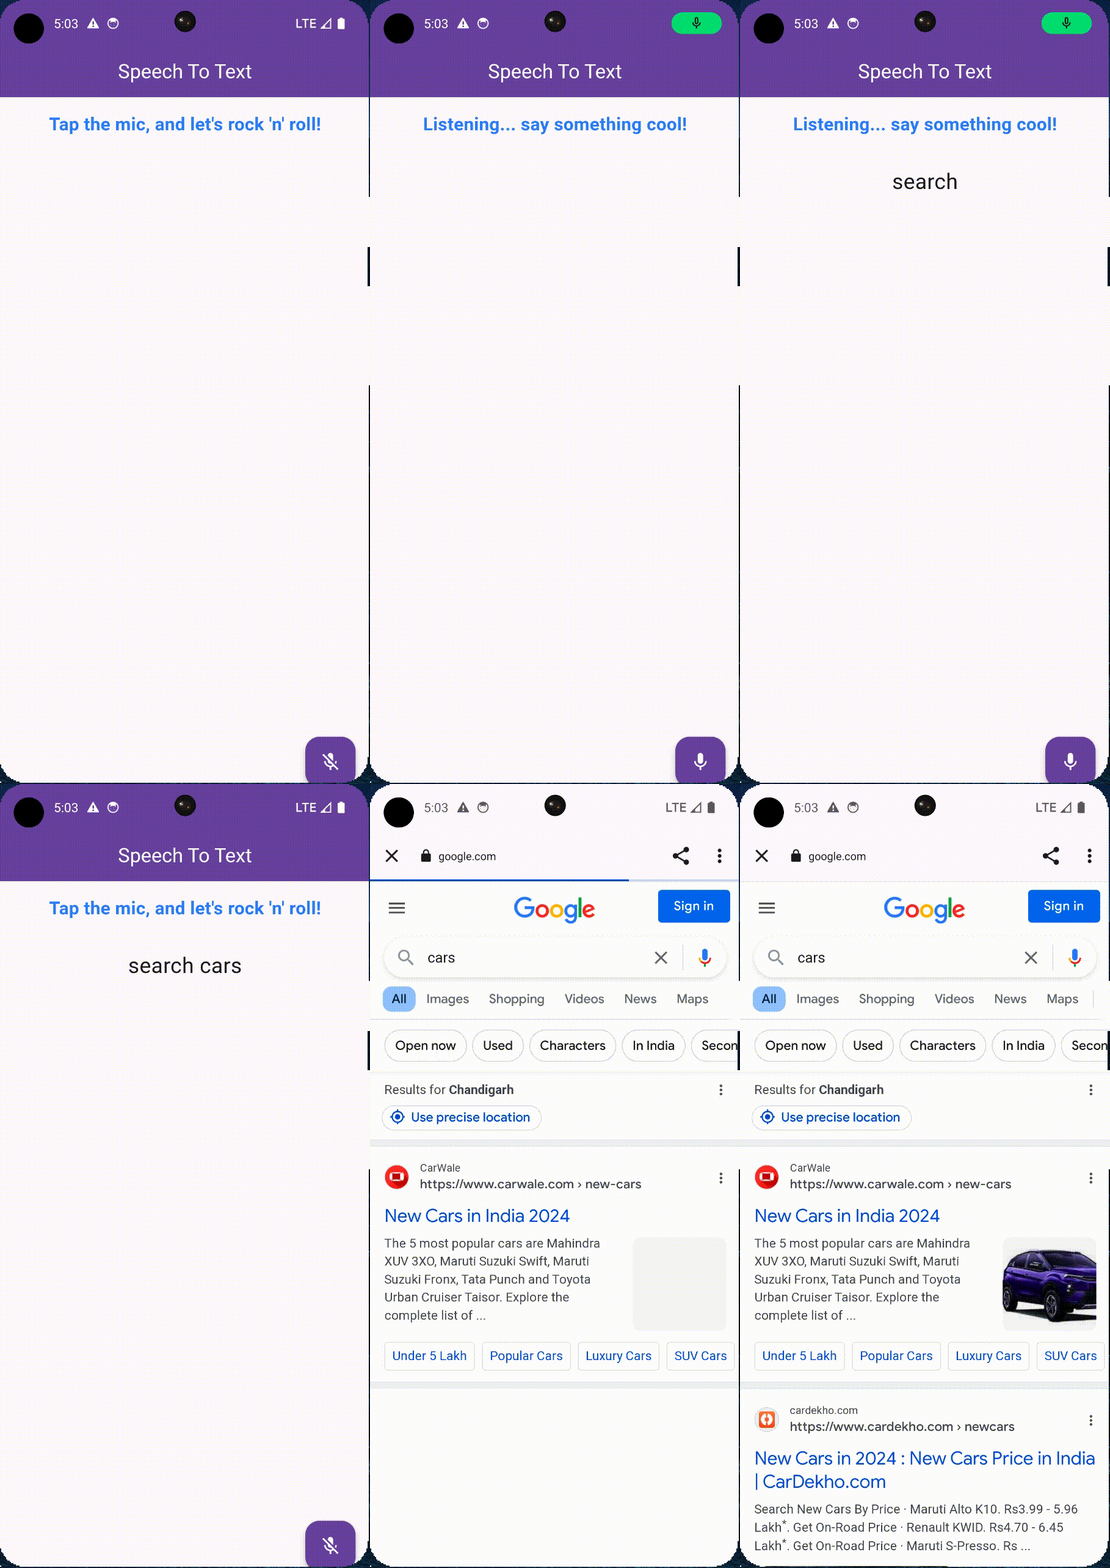
4. Testing Your Implementation: Run your app and try out the commands:
- "Open Gmail"
- "Search cars"
- "Open YouTube"
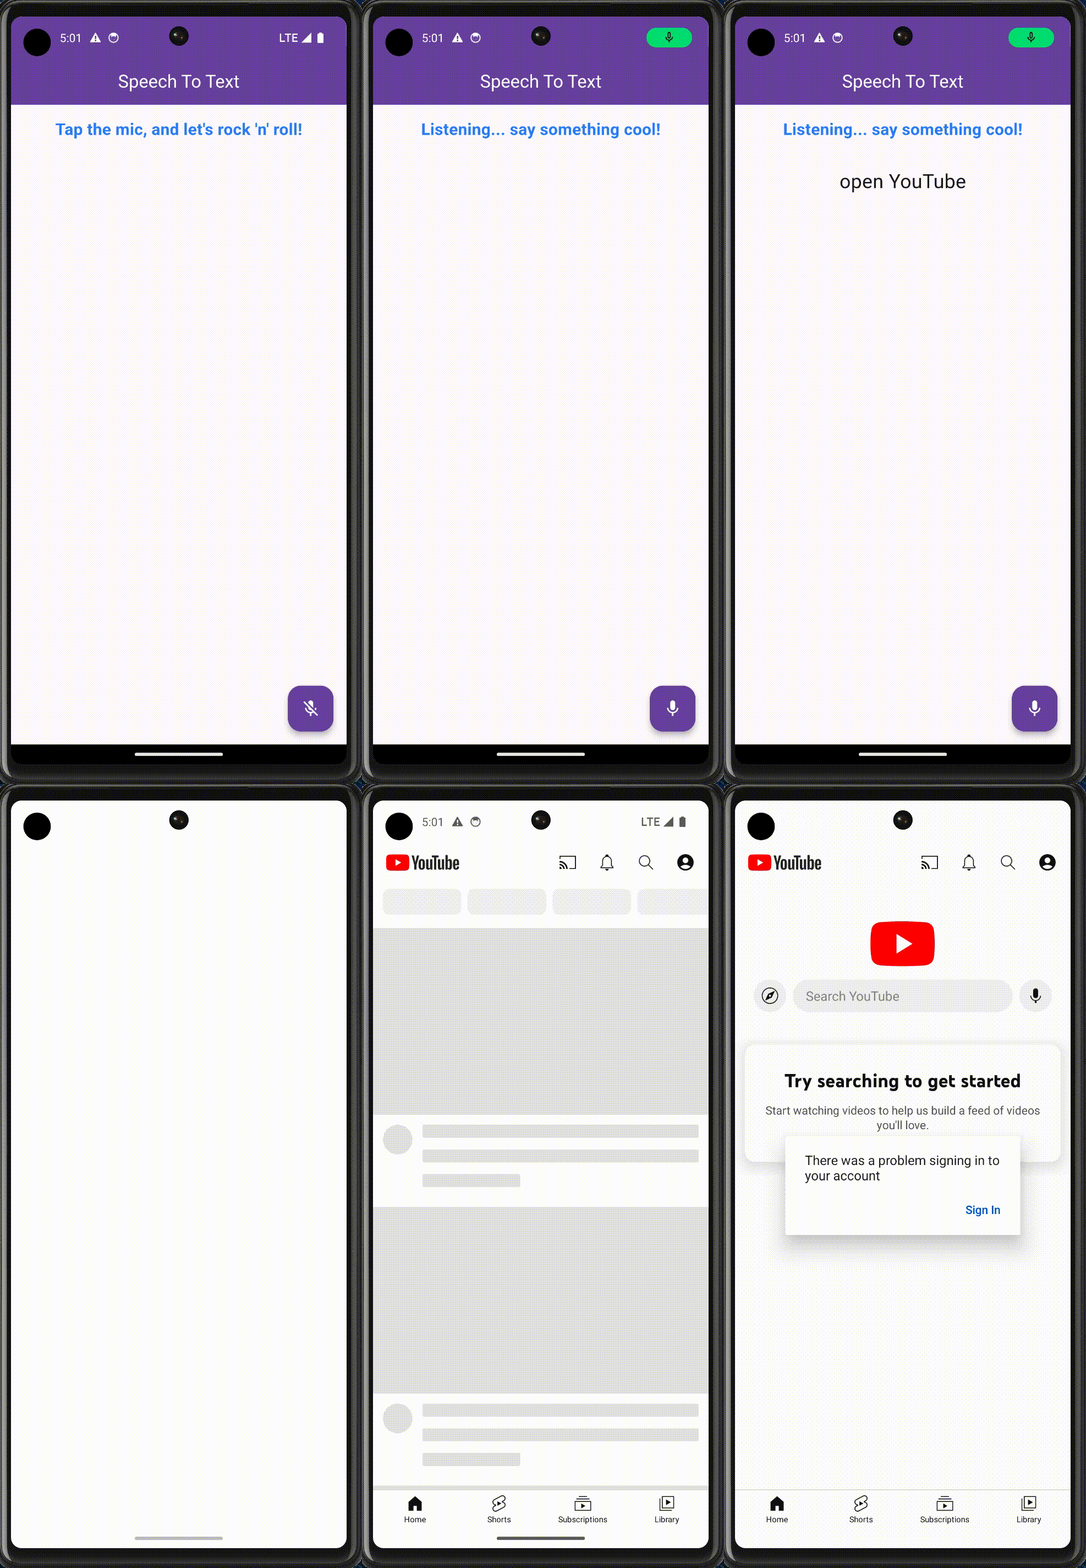
Implementing Voice Commands
By recognizing specific phrases, we can make our app respond to commands like "open Gmail," "go to google.com," or "search for cars." This turns our app into an interactive assistant that responds to the user’s voice, enhancing the user experience significantly.
Use Cases for Speech-to-Text
Now that we have the basic functionality implemented, let us explore some use cases for speech-to-text in apps:
- Voice Commands: Enable users to control app functionality using voice commands. For example, navigating to different screens or triggering actions.
- Voice Input for Forms: Allow users to fill out forms using their voice. This can be particularly useful for accessibility.
- Voice-Activated Search: Implement voice search functionality in your app to provide a hands-free search experience.
- Voice Notes: Enable users to take voice notes, which can be transcribed and saved for later reference.
For a hands-on experience and to better understand the workflow, dive into the code. Feel free to explore the implementation via this GitHub repository.
Conclusion
By adding voice command recognition to your app, you make it not only interactive but also highly intuitive and user-friendly. This enhancement empowers users to control the app with their voice, making it accessible and convenient. Implementing speech-to-text in your Flutter app can significantly enhance the user experience by providing hands-free interaction. This technology is particularly useful in various scenarios, including accessibility, efficiency, and convenience.
By following the steps outlined above, you can easily integrate speech-to-text functionality into your app and start leveraging its benefits. Experiment with different use cases to see how speech-to-text and voice command recognition can enhance your app's functionality and user experience. So go ahead, implement these features, and watch your app become a smart assistant in the palm of your users' hands!







